Best Recessed Lighting Kits: 5 That Install in Minutes
A Canless Kit Is the Only Ceiling Job You Can Actually Finish in an Afternoon
Modern recessed lighting kits ship as a driver box, a thin light disc and a set of spring clips. You cut a hole, connect two wires, squeeze the clips and let go. There is no metal housing to wrestle between joists, no ceiling to open up, and the whole fitting takes a few minutes once the first one has taught you the rhythm.
That is the change worth understanding before you buy. Old-style canned lighting was a construction job. Canless retrofit kits are a hole saw and a screwdriver. Below are the five kits I would put in my own ceiling, the checks that stop you buying the wrong diameter, and the two situations where a kit is genuinely the wrong tool.
Top Picks at a Glance
| Kit | Best for | Watch out for |
|---|---|---|
| Amico 6-Inch Ultra-Thin (6-pack) | Best value per fixture | Driver reliability across large packs |
| HALO HLB 6-Inch Canless | Longest service life | Two to three times the price |
| Lithonia WF6 Canless | Damp rooms and cold ceilings | Narrow dimming range |
| Ensenior 6-Inch Dimmable | Highest output per fixture | Trim sits proud on uneven ceilings |
| Halo RL56 Retrofit | Reusing existing cans | Only works if cans are already fitted |
The first time I fitted recessed lighting kits, I cut all fourteen holes before opening a single box. Two of them landed within an inch of a joist and one clipped a heating duct I had not thought to check for. I ended up patching three holes and repainting the whole ceiling. Now I do it the slow way: locate joists and services first, mark every position, then cut one hole, fit one light, and only then cut the rest. It adds twenty minutes and it has never cost me a ceiling since.
Canless vs Canned — Which Kit Should You Buy?
A canned kit uses a metal housing that mounts to the joists before the ceiling goes up, or gets fed through a hole in an existing ceiling and clipped to a joist. It is the older approach and it needs cavity depth — typically seven inches or more.
A canless kit puts the LED and heat sink into a disc under an inch thick, with the driver in a small junction box that sits on top of the plasterboard between joists. There is no housing at all. It fits shallow cavities, it does not need to touch a joist, and it is the reason a five-light room is now an afternoon rather than a weekend.
The short version: new construction with the ceiling open, canned is fine. Every retrofit, buy canless. Our deeper comparison of canless recessed ceiling lights covers the trim and beam-angle differences.
Three Checks to Make Before You Order
1. Measure your cavity depth
Drill a small test hole and push a bent wire in. If you have less than 4 inches of clear space, look specifically at shallow recessed ceiling lights rather than assuming any canless kit will fit — the driver box still needs somewhere to sit.
2. Pick the diameter before the brand
6-inch is the default for general room lighting. 4-inch suits hallways, closets, kitchen perimeters and anywhere you want more fixtures making a tighter pattern. Mixing sizes in one open-plan space looks unintentional, so decide once. Our 4-inch recessed light picks cover the smaller format.
3. Confirm IC rating and dimmer compatibility
IC-rated means the fixture is built to sit safely in contact with insulation. If your ceiling cavity has insulation and the fixture is not IC-rated, that is a fire risk, not a preference. And if you want dimming, check the manufacturer’s compatibility list — a standard incandescent dimmer driving an LED kit gives you flicker at the bottom of the range and a buzz you will hear from the sofa. See dimmable recessed ceiling lights for the pairings that behave.
Paint the ceiling first. Cutting into fresh paint is straightforward. Cutting first and then trying to roll a ceiling around eight installed fixtures means cutting in eight circles by hand and getting paint on every trim. Our walkthrough on the best way to paint a ceiling is the right order of operations.
The 5 Best Recessed Lighting Kits
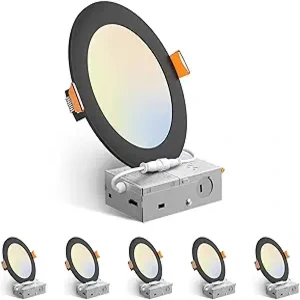 Best value per fixture
1. Amico 6-Inch Ultra-Thin Dimmable Kit (6-Pack)
The kit most people should start with. Ultra-thin profile that fits cavities where nothing else will, five selectable colour temperatures on a switch on the driver, IC and damp rated, and priced so that lighting a whole room does not require a second thought. Dimmable across most common LED dimmers.
One real limitation: across a large multi-pack, expect one driver to be weaker than the rest over a few years. That is the trade at this price. Buy one more pack than your count so you have spares on the shelf rather than a mismatched replacement in two years.
Best for: lighting a whole living room, bedroom or basement on a fixed budget.
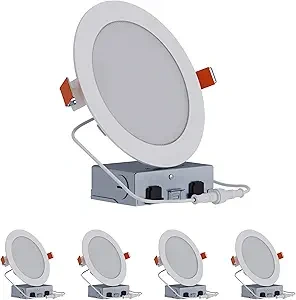 Longest service life
2. HALO HLB 6-Inch Canless Kit
The one electricians fit when the customer is not counting units. Better driver, better thermal management, CRI 90 so colours in the room read accurately, and a warranty the manufacturer honours. Over ten years in a kitchen or living room, the cost per year is lower than the budget packs.
One real limitation: two to three times the price per fixture. In a large open-plan space that adds up fast. A sensible compromise is Halo in the rooms you live in and a budget kit in the utility room and hallway.
Best for: kitchens and living rooms, where you will notice the light quality daily for a decade.
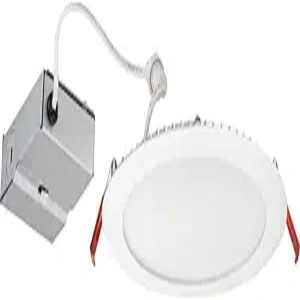 Best for damp or cold ceilings
3. Lithonia WF6 Canless Downlight Kit
Lithonia’s sealing on the WF6 is a step above most kits in this band, which matters in bathrooms, laundry rooms, basements and unheated garages where warm air meets a cold ceiling and condenses. Three selectable colour temperatures and a low-profile driver that fits tight cavities.
One real limitation: the dimming range is narrow and it flickers at the low end with older dimmers. If dimming matters to you, budget for a compatible LED dimmer at the same time rather than reusing what is on the wall.
Best for: bathrooms, basements and any ceiling that gets cold on one side. Also our pick for recessed ceiling lights in a garage.
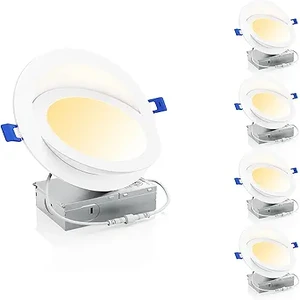 Highest output per fixture
4. Ensenior 6-Inch Dimmable Kit
Around 1200 lumens per light, which is roughly a quarter more than most budget kits. That translates directly into fewer holes in the ceiling for the same brightness — a real benefit if you are working around joists, ducts and pipes and every extra position is a negotiation.
One real limitation: the trim ring sits slightly proud on ceilings that are not perfectly flat. On an older plasterboard ceiling with visible bow you will see a hairline gap on one or two of them. A bead of decorator’s caulk hides it, but you should know before you fit.
Best for: large rooms, high ceilings, or any ceiling where you want to cut as few holes as possible.
 Best for existing cans
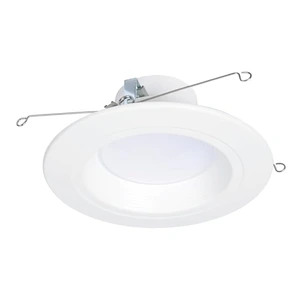
5. Halo RL56 Series Retrofit Kit
Different job from the other four. If your ceiling already has old recessed cans with halogen or CFL lamps, the RL56 screws into the existing lamp socket and the trim clips into the can. No hole cutting, no wiring, no patching. It is the fastest lighting upgrade in the house — perhaps fifteen minutes for a whole room.
One real limitation: it only makes sense if the cans are already there and in good condition. If you are starting from a blank ceiling, a canless kit is cheaper and thinner than buying cans and then retrofitting them.
Best for: replacing tired halogen downlights in a house that already has recessed cans fitted.
When a Recessed Lighting Kit Is the Wrong Choice
- Concrete or solid ceilings. There is no cavity to put the driver in. Surface-mounted panels or track lighting are the honest answer; chasing a concrete slab is a job and a half.
- Vaulted ceilings with no attic access above. Canless kits still need the driver box to sit somewhere. On a sealed vaulted ceiling with foam right up against the board, there is often nowhere for it to go.
- Rooms where you need directional light. Downlights wash a floor. If you are lighting artwork, a reading chair or a kitchen island specifically, track or pendants do it better and a ceiling of downlights will feel flat.
- Any wiring you are not confident about. Connecting a kit to an existing lighting circuit is straightforward; adding a new circuit or a new switch drop is not. An electrician for an afternoon costs less than getting it wrong.
How Many Kits for a Room?
The usable rule for a living space is one 6-inch fixture per 20 to 25 square feet of floor, keeping fixtures roughly 4 to 6 feet apart and about 2 feet in from the walls. A 12 x 15 living room lands at eight lights. Kitchens want more, at around one per 16 to 20 square feet, because worktops need light that is not blocked by your own shoulders.
A layout mistake that shows up constantly: pushing all the fixtures to the middle of the ceiling. Light that hits a wall bounces back into the room, and a ring of downlights set in from the perimeter makes a room feel considerably larger than the same number clustered in the centre. Pull them out toward the walls.
Frequently Asked Questions
How long does it take to install a recessed lighting kit?
For a canless kit on an existing circuit, roughly 10 to 15 minutes per light once the first one is done — cut the hole, connect two wires, squeeze the clips, push it up. Locating joists and services beforehand is what takes the real time.
Do I need an electrician to fit recessed lighting kits?
Connecting kits to an existing lighting circuit is within reach for most confident DIYers, and rules vary by region. Adding a new circuit, a new switch drop, or working in a room where you are unsure what is behind the ceiling is electrician territory.
Are canless recessed lights better than canned?
For retrofits, yes. They fit shallow cavities, need no housing, do not have to attach to a joist and install in a fraction of the time. For new construction with the ceiling open, canned housings are still perfectly reasonable.
What size recessed lighting kit should I buy?
6-inch for general room lighting, 4-inch for hallways, closets and kitchen perimeters where you want a tighter pattern. Pick one size per open space — mixed diameters in the same sightline look like a mistake.
Can I put recessed lights in a ceiling with insulation?
Only IC-rated fixtures. A non-IC fixture in contact with insulation traps heat and is a fire hazard. Nearly all reputable canless kits are IC-rated, but confirm it on the specific model rather than assuming.
Why do my recessed lights flicker when dimmed?
Almost always an incompatible dimmer. LED drivers need a dimmer designed for LED loads with a suitable minimum load. Check the manufacturer’s compatibility list and replace the dimmer rather than the lights.
How many recessed lights do I need in a 12×12 room?
Six 6-inch fixtures is a good baseline for a 144 square foot living space, spaced about 4 feet apart and 2 feet in from the walls. Add two more if it is a kitchen or a work area.
What I Would Buy
For most rooms: the Amico multi-pack, because the value is hard to argue with and the ultra-thin profile fits ceilings other kits will not. For a kitchen or a main living room you will look at every day: Halo, and accept the price. If your ceiling already has cans, the RL56 retrofit is fifteen minutes and a completely different room. And whichever you choose, mark your positions and paint the ceiling before the hole saw comes out.
About the author — Sophie Ulman has renovated and painted more rooms than she can count — and made every mistake in the book so you don’t have to. She focuses on real-world durability: not how products perform on day one, but whether the repair holds through a full seasonal cycle.
ThePaintly is reader-supported. We only recommend products we’ve personally evaluated. When you buy through links on this site, we may earn an affiliate commission at no extra cost to you.