Best Way to Paint a Ceiling: 10-Step Pro Guide + Paint Calculator
Updated: June 2026 · By Sophie Ulman
The best way to paint a ceiling is not complicated, but it is specific. Wrong roller nap on a popcorn ceiling and you are fighting splatter all day. Skip the masking tape and you are cutting back in for an hour after the fact. Rush the prep and you will see every lap mark the first time sunlight hits it at a low angle. I have painted ceilings in over 40 homes and the same four mistakes show up every time — I will walk you through all of them before you open a single can.
The best way to paint a ceiling starts long before you pick up a brush. Prep, primer, and a flat-finish ceiling paint matched to your specific surface type are the foundation. Get those right and the actual rolling goes fast. Skip them and you will be recoating before the weekend is out. Durability is 50% product quality and 50% surface preparation — ceiling work is no exception.
Roller Guide by Ceiling Type
The wrong roller nap is the mistake I see most often on ceiling jobs — it causes either too much splatter or incomplete coverage, and there is no fixing it mid-roll. Match the nap to the surface before you open the paint.
| Ceiling Type | Roller Nap | Why | Splatter Level | Coats Needed |
|---|---|---|---|---|
| Smooth drywall (new) | 3/8″ | Minimal surface area, low paint needed | Low | 2 (primer + topcoat) |
| Smooth drywall (repainted) | 3/8″ | Surface is sealed, good bite | Low | 1–2 |
| Skip-trowel / knockdown texture | 1/2″ | Moderate surface peaks need more paint | Medium | 2 |
| Light orange-peel texture | 1/2″ | Even texture, consistent nap works well | Medium | 2 |
| Heavy popcorn texture | 3/4″ | Deep valleys need high-nap to reach bottom | High | 2–3 |
| Vaulted / angled ceiling | 3/8″–1/2″ | Load lighter to prevent drips on angle | Medium | 2 |
Quick Picks: Best Ceiling Paints
| Category | Product | Best For | Check Price |
|---|---|---|---|
| Best Overall | KILZ Stainblocking Ceiling Paint | Stain-hiding, color-change technology | Check Price → |
| Best Flat Finish | Rust-Oleum 260967 Ceiling Paint | Ultra-flat, low-VOC, hides imperfections | Check Price → |
| Best Primer | KILZ 2 All-Purpose Primer | Pre-paint adhesion, stain blocking | Check Price → |
Top 3 Ceiling Paints Reviewed
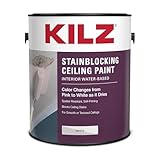
★ Best Overall
KILZ Stainblocking Ceiling Paint, Interior White
KILZ’s ceiling paint rolls on pink — a deliberate design choice that shows you exactly where you have painted and prevents you from missing spots overhead. Once dry (under an hour), it transitions to a clean, bright white. The stainblocking formula is aggressive enough to cover water stains, light smoke marks, and minor discolouration in a single coat. Coverage runs 250–400 sq ft per gallon depending on porosity.
The thickened formula drastically cuts splatter compared to standard wall paints, which matters more than most people realise when you are rolling overhead for two hours. The downside: at $35–40 per gallon, it costs more than basic white paint. But considering you are buying fewer coats and less cleanup time, the math works. The flat finish is genuinely flat — no sheen, no reflection — which is exactly what you want on a ceiling.
✔ Rolls on pink to show coverage gaps — dries to bright white in under 60 minutes.
- Color-change application — no missed spots
- Excellent stain blocking
- Low splatter formula
- Single coat on most ceilings
- Higher price point than basic ceiling paint
- Limited color options (effectively white only)
Best for: Bedrooms, living rooms, and any ceiling with light water stains or prior discolouration where one coat needs to do the job.
Via Amazon.com
Related Ceiling Guides on ThePaintly
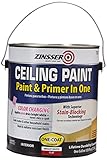
Best Flat Finish
Rust-Oleum 260967 Ceiling Paint
Rust-Oleum’s ceiling formula delivers an ultra-flat, zero-sheen finish that swallows light rather than reflecting it. That means textured ceilings, popcorn repairs, and any surface irregularity essentially disappears once painted. The low-VOC formula makes it suitable for bedrooms and nurseries — you can finish a ceiling and move back in same-day without worrying about off-gassing. Coverage is strong at 300–350 sq ft per gallon.
One thing to know: this paint is thinner than KILZ’s formula, so splatter management matters more. Use a low-nap roller (3/8 inch) and load lightly. It does not have stain-blocking properties, so if your ceiling has water rings, prime first with a dedicated stain blocker before applying this product. Two thin coats always beat one thick coat — always.
✔ Ultra-flat finish completely eliminates sheen — ideal for hiding textured ceiling imperfections.
- True flat finish
- Low-VOC formula
- Hides surface texture
- Budget-friendly per gallon
- No stain blocking — prime first if needed
- Slightly more splatter than KILZ
Best for: New drywall, textured ceilings, and any ceiling that needs a fresh white coat with no stain issues.
Via Amazon.com
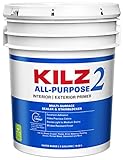
Best Primer
KILZ 2 All-Purpose Primer, Interior/Exterior
Before you think about topcoat, any ceiling with visible stains — water rings, smoke residue, rust bleed-through — needs a proper primer. KILZ 2 seals all of those into the surface and creates a uniform base for your ceiling paint to bite into. A primed ceiling uses less topcoat, produces better colour accuracy, and lasts significantly longer. Coverage is 300–400 sq ft per gallon and it dries to recoat in just 30 minutes.
KILZ 2 is water-based, so cleanup is easy and odor is minimal. It works equally well on drywall, plaster, and previously painted ceilings. The one scenario where you would want oil-based primer instead is severe water or smoke damage — KILZ Original handles those. But for 90% of ceiling situations, KILZ 2 is the right call. Don’t skip priming if you see any staining — ceiling paint alone will not hold back water damage bleed-through, no matter how many coats you apply.
✔ Dries to recoat in 30 minutes — seal stains before they bleed through your ceiling paint.
- Fast 30-minute dry time
- Water-based, low odor
- Seals most common stains
- Works on all ceiling surfaces
- Not for severe smoke damage (use KILZ Original oil-based)
- Requires topcoat — not a standalone paint
Best for: Any ceiling with water rings, nicotine stains, patched drywall, or new drywall that needs uniform adhesion.
Via Amazon.com
More From ThePaintly
The Best Way to Paint a Ceiling: 10-Step Process
🏗 Renovation Stage: PAINT
Ceiling painting falls in the PAINT stage of the Renovation Protocol. Complete flooring protection, wall patching, and any texture repairs before opening your first can. Paint ceilings before walls — drips onto fresh wall paint will ruin your work. See also: colour guide for rooms with high ceilings.
Clear and Protect the Room Completely
Move all furniture out or push it to the centre of the room and cover it with drop cloths. Lay 4-mil plastic sheeting over the entire floor — paint splatters significantly more from ceilings than from walls. Tape plastic sheeting to the baseboards to prevent it sliding. Turn off all ceiling fans, disable HVAC registers in the room, and remove ceiling light covers and bulbs if you can do so safely.
Mask the Perimeter
Apply 2-inch painter’s tape along the top edge of the walls where they meet the ceiling. If you have crown moulding, tape along the lower edge of the moulding. Press the tape edge firmly to prevent paint bleeding under. This step adds 20 minutes but saves 45 minutes of cut-in touch-up later. Prep matters more than the brand of paint you use.
Clean the Ceiling Surface
Wipe the ceiling with a dry microfibre mop or a damp cloth to remove dust, cobwebs, and grease. Any debris left on the surface will show through your paint as raised bumps. For kitchen ceilings, use a mild degreaser solution and let the surface dry completely — at least 30 minutes — before the next step.
Repair Any Cracks, Holes, or Damage
Fill cracks and nail holes with lightweight spackle and let it cure fully. Sand flush with 120-grit paper. For ceiling cracks wider than 1/8 inch, use a flexible patching compound and fiberglass mesh tape — spackle alone will crack again. Water-stained areas should be treated with a stain-blocking primer before any topcoat. Skip this and the stains will bleed through no matter how many coats you apply.
Prime if Needed (Non-Optional for New Drywall and Stains)
Prime any patched spots, stained areas, or bare drywall with KILZ 2 using a brush. Let it dry 30 minutes. If the entire ceiling has stains or is new drywall, prime the full surface before topcoat. A 30-minute primer coat saves you a full topcoat, produces a truer white, and prevents adhesion failure on patched areas. It is not optional on new drywall.
Load Your Roller Correctly
Use a roller tray with a ramp — not a flat pan. Load the roller in the paint, then roll it on the ramp 4–5 times to distribute paint evenly and remove excess. A properly loaded roller should not drip. A dripping roller is the single biggest cause of ceiling splatter — light loads applied in multiple passes always produce a better result than one heavy, dripping pass.
Cut In the Edges with a Brush First
Load an angled 2.5-inch brush with ceiling paint and cut in along all four edges of the ceiling — where it meets the walls (or tape line). Work 3–4 inches from the edge to give your roller room without touching the wall. This is the most important part of the best way to paint a ceiling when you want clean edges. Keep a wet edge — do not let your cut-in dry before you roll the adjacent section or a visible line will form.
Roll in Sections Using the W-Pattern
Load the roller and apply paint in a W or M pattern over a 4-square-foot section. Then fill in the W with parallel strokes without re-loading. Move immediately to the next adjacent section, overlapping the wet edge. The wet-edge technique from Family Handyman is what separates professional results from DIY — lap marks happen when paint starts to dry before the next pass connects. Work fast, work in sections, never stop mid-roll.
Work From Natural Light Source Toward It
Start rolling in the corner opposite the room’s main window and work toward the window. This way, the natural light hits the fresh paint at a low angle and reveals any misses or thin spots while the paint is still wet enough to correct. Rolling away from the light source means you are painting blind — you will only see the thin spots once it is dry and too late to blend.
Apply a Second Coat Perpendicular to the First
Most quality ceiling paints cover in one coat over a properly primed surface. If you see any thin spots or colour variation after the first coat dries, apply a second coat perpendicular to the first. If you rolled east-west, roll north-south on the second coat. This cross-rolling technique is the method professional painters use to eliminate any remaining roller texture. Two thin coats always beat one thick coat. Always.
Mistakes Sophie Made (So You Don’t Have To)
“The first ceiling I painted on my own, I didn’t turn off the HVAC register. Moving air dried the paint so fast between passes that I got lap marks across an entire 12×15 room. Had to sand and recoat. Cost me an extra day.
The second time, I skipped primer on a ceiling with a faint water stain from a roof repair three years earlier. Two coats of white ceiling paint later and the stain was still bleeding through as a yellow ring. Had to prime anyway — so I ended up with three coats instead of the one I could have done if I’d primed first.
The third mistake: I tried to paint a popcorn ceiling with a 3/8-inch nap roller. The roller couldn’t reach into the valleys of the texture and left a speckled, uneven finish. The right nap (3/4 inch for heavy popcorn) would have covered in one pass. These are not edge cases — these are the three mistakes I see on almost every ceiling repaint. Turn off the HVAC, prime the stains, match the roller nap.”
Ceiling Paint Coverage Calculator
🧮 How Much Ceiling Paint Do You Need?

Tools Required: What to Have Ready Before You Open the Paint
| Tool | Spec | Why It Matters | Amazon |
|---|---|---|---|
| Paint roller frame | 9-inch | Standard for ceilings; wider is harder to control | See options → |
| Roller nap (smooth ceiling) | 3/8″ | Minimal splatter, even application | See options → |
| Roller nap (textured ceiling) | 1/2″ or 3/4″ | Reaches texture valleys for full coverage | See options → |
| Extension pole | 4–8 ft | Work from the floor; far less fatigue than a ladder | See options → |
| Angled sash brush | 2.5″ | Cut-in edges before rolling | See options → |
| Painter’s tape | 2″ wide, 14-day | Masks wall edge for clean ceiling line | See options → |
| Drop cloths (floor) | 4-mil plastic, 9×12 | Paint splatters more from ceilings than walls | See options → |
| Roller tray with ramp | Standard 9″ | Ramp removes excess paint from roller — prevents drips | See options → |
Buying Guide: Choosing the Right Paint for Your Ceiling
Flat vs. Eggshell for Ceilings
The universal rule: ceilings take flat paint. A flat finish absorbs light rather than reflecting it, making imperfections, roller marks, and the natural curve of a ceiling essentially invisible. Eggshell or satin on a ceiling catches every roller stroke and amplifies any texture — you will see every flaw with the light at a low angle. In high-moisture rooms like bathrooms, a flat bathroom ceiling paint with mildew resistance is the right call rather than switching to eggshell.
⚠ When NOT to Use Standard Ceiling Paint
- Water-stained ceilings. Standard white ceiling paint will not hold back water stain bleed-through — ever. You must prime with a stain-blocking primer first, full stop. If you skip this, the stain will bleed through every topcoat you apply.
- Bathroom ceilings with direct shower steam. Standard flat ceiling paint will peel and mildew within 6 months in a steam-heavy bathroom. Use a mold-resistant ceiling paint formulated for high humidity.
- Garage ceilings near vehicles. Garage ceilings need oil/grease resistance that standard ceiling paint does not provide. Use a cleanable formula or an exterior-grade ceiling paint rated for garage environments.
- New raw drywall without primer. Applying ceiling paint directly to unprimed drywall will result in flash — uneven sheen where the paint soaks in unevenly at joints vs. field areas. Always prime new drywall first.
Stain-Blocking vs. Standard Ceiling Paint
Standard ceiling paint works on ceilings that have never been stained. The moment there is a water ring, nicotine residue, or any discolouration, you need stain-blocking capability. KILZ Stainblocking Ceiling Paint is formulated for exactly this — its stain-blocking resins trap the stain before the paint film forms. Standard white ceiling paint will not achieve this, no matter how many coats you apply.
Coverage Rate: What the Label Isn’t Telling You
Most ceiling paints advertise 300–400 sq ft per gallon. That assumes smooth, non-porous surfaces with one coat. Old popcorn ceilings, rough plaster, and previously unpainted drywall can cut that figure by 30–40%. Always buy 10–15% more than the calculator suggests. Running out mid-ceiling and opening a new can mid-roll is a leading cause of visible sheen differences — the best way to paint a ceiling without this problem is to have enough paint to finish each section from a single batch.
How Long Does Ceiling Paint Last?
⏱ Ceiling Paint Lifespan by Surface and Condition
Standard flat ceiling paint on smooth drywall, no moisture: 5–10 years before yellowing or chalking becomes visible. Under natural light you’ll notice first at the 7-year mark.
Standard flat paint in a kitchen: 3–5 years. Grease mist from cooking bonds to flat paint surfaces and discolours them. A stain-blocking repaint at 4 years is typical.
Bathroom ceiling paint (humidity, not steam): 3–4 years with standard flat paint before peeling edges start. Mold-resistant ceiling paint with proper ventilation extends this to 6–8 years.
Garage ceiling paint: 4–7 years depending on temperature swings and dust level. Sealed concrete garages are harder on ceiling paint than drywalled ones due to moisture wicking.
Sophie’s observation: The mistake I see most often is repainting too early. Most ceiling paint yellowing at 5 years is from grease or smoke accumulation, not paint failure. Wash the ceiling with TSP substitute first — it often looks like new. If the surface is still discoloured after washing, that’s when you paint.
🎯 Verdict
The best way to paint a ceiling comes down to four non-negotiables: proper prep (masking, cleaning, patching), the right roller nap for your specific ceiling type, a flat-finish ceiling paint with enough stain-blocking power for your surface, and maintaining a wet edge throughout the rolling process. Of the three products above, KILZ Stainblocking Ceiling Paint is the single best pick for most homeowners — the color-change technology alone prevents the missed spots that cause visible thin patches once the light hits the dried ceiling. If your ceiling is clean and new, Rust-Oleum 260967 delivers a flawless flat white at a lower price. Always prime before you paint on new drywall or any stained surface — it is the fastest route to a finish that doesn’t need redoing.
Frequently Asked Questions
What is the best way to paint a ceiling without getting paint on walls?
Apply 2-inch painter’s tape along the wall edge first. Cut in with an angled brush 3–4 inches from the wall edge before rolling. Keep your roller loaded lightly — heavy loads splatter. Work in 4-square-foot sections and maintain a wet edge throughout.
What roller nap is best for painting a ceiling?
Use 3/8-inch for smooth ceilings, 1/2-inch for light or skip-trowel texture, and 3/4-inch for heavy popcorn texture. Wrong nap thickness is the leading cause of uneven coverage and excess splatter on ceiling jobs. Match the nap to your specific ceiling surface.
Should I use a roller or brush to paint a ceiling?
Use both. A brush for cutting in the perimeter, a roller for the main field. A 9-inch roller with an extension pole lets you work from the floor — far less fatiguing than ladder work. Rollers cover faster and produce a more uniform finish on large surfaces.
How many coats of paint does a ceiling need?
One to two coats. One coat over a properly primed, previously painted ceiling. Two coats on new drywall, significant stains after priming, dramatic colour changes, or textured ceilings. Two thin coats always beat one thick coat.
Do I need to prime a ceiling before painting?
Yes, in most cases. New drywall always needs primer. Any ceiling with water stains, smoke damage, or patched areas must be primed or the stains will bleed through — the best way to paint a ceiling over stains without bleed-through is to seal them with KILZ 2 before any topcoat goes on.
Should I paint the ceiling or walls first?
Always paint the ceiling first. Drips and splatter from ceiling work land on the walls. It is much easier to cut back in with wall paint over a dry ceiling edge than the reverse. Ceiling first is the standard professional sequence.
How do I avoid roller marks when painting a ceiling?
The best way to paint a ceiling without roller marks is to always maintain a wet edge — roll back into the previous section before it tacks up. Use the W-pattern technique: apply in a W, fill in with parallel strokes, never stop mid-roll to reload. Work fast in small sections. Two thin coats, always.
How long does ceiling paint last?
5–10 years on smooth drywall with no moisture issues. 3–5 years in kitchens due to grease mist. 3–4 years in high-humidity bathrooms with standard flat paint — use mold-resistant ceiling paint to extend to 6–8 years. Before repainting, wash the ceiling with TSP substitute first — most apparent yellowing at 5 years is actually grease accumulation, not paint failure.
Ceiling Paint by Situation: Quick Reference
These steps apply to any ceiling, but the right paint choice determines whether one coat is enough. Use this table to find the right product for your specific ceiling:
| Ceiling Situation | What You Need | Why | Guide |
|---|---|---|---|
| Water stains from a past leak | Stain-blocking primer + ceiling paint | Standard paint won’t hold back water stain bleed-through — ever | Best paint to cover water stains → |
| Bathroom ceiling with humidity | Mold-resistant ceiling paint | Standard ceiling paint will peel within 6 months in a shower room | Best bathroom ceiling paint → |
| Eco-conscious / low VOC | Zero-VOC ceiling paint | Safe in occupied rooms; no off-gassing odor | Best zero-VOC ceiling paint → |
| Garage ceiling | Moisture-resistant, cleanable | Garage ceilings need oil/grease resistance standard ceiling paint won’t provide | Best garage ceiling paint → |
| Colored ceiling (not white) | Ceiling paint in any color | Colored ceilings can make low rooms feel taller in the right shade | Warm ceiling color ideas → |
Upgrade the Ceiling After Painting
- Replace old can lights: Best flush mount recessed ceiling lights — drop-in replacements that screw into your existing housings in under 10 minutes.
- LED panels: Best LED ceiling panels for home offices — for flat ceilings that need even illumination.
- Color choice for large rooms: Best paint colours for large rooms with high ceilings — ceiling colour is more impactful in large spaces.