How to Paint a House Exterior: Step-by-Step Guide
Updated April 25, 2026 · 11 min read · By ThePaintly Editorial Team
Learning how to paint a house exterior is one of the highest-ROI projects a homeowner can tackle. A professional exterior paint job runs $3,000–$8,000. Doing it yourself costs a fraction of that — and with the right prep and technique, the results last just as long. This guide walks you through every stage, from surface prep to final coat, so nothing gets missed and your finish holds up for a decade or more.
Exterior painting looks simple from the street. In reality, the prep work is where most DIY jobs fail. Rush the prep and your paint peels in two seasons. Take it seriously and you’ll be done once and done right. Everything here follows professional trade standards — not weekend-warrior shortcuts.
Tools & Products You’ll Need
Before you open a single can, gather your supplies. Missing something mid-job costs you a trip to the hardware store and breaks your momentum. The table below covers the essential items for a standard two-story house exterior project.
| Item | Best Pick | Why It Matters |
|---|---|---|
| Primer | KILZ Exterior Premium | Seals porous surfaces, blocks stains, improves adhesion |
| Brush | Purdy XL Glide Angle | Cut-in trim and edges with precision; holds paint well |
| Roller | Wooster 9″ Roller | Covers large flat surfaces fast without dripping |
| Pressure washer | Any 1,500–2,000 PSI unit | Removes dirt, mildew, chalk — essential for adhesion |
| Caulk gun + exterior caulk | Paintable latex/silicone hybrid | Seals gaps around windows, trim, doors before painting |
| Drop cloths + masking tape | Canvas + 3M ScotchBlue | Protect plants, windows, and concrete from drips |
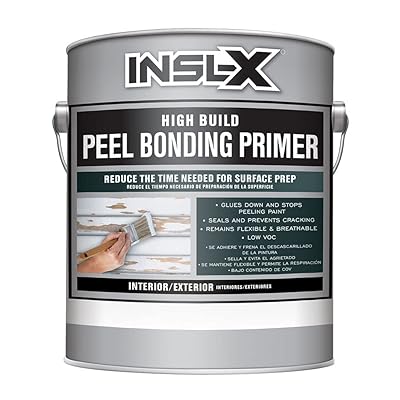
INSL-X High Build Peel Bonding Primer
If your exterior surface has chalking paint, bare wood patches, or previous peeling, INSL-X High Build is the primer you reach for first. It’s formulated with a high-solids content that fills micro-porosity in wood and masonry — creating a uniform base that dramatically extends how long your topcoats hold. Where standard primers sit on the surface, INSL-X penetrates and bonds at a molecular level, which is why professional painters use it on problem surfaces before applying any premium exterior finish.
The one-coat coverage on previously painted surfaces is strong enough that most homeowners skip a second primer coat entirely. Apply it at 68–86°F with at least 50% humidity for best adhesion — temperature and humidity matter more with bonding primers than standard ones. It dries to recoat in 1 hour and sands easily if you’re feathering in repaired spots.
- ✅ Exceptional adhesion on chalky and peeling surfaces
- ✅ High-build formula fills small surface irregularities
- ✅ Recoat in 1 hour
- ❌ Higher cost than basic primers
- ❌ Requires proper temperature/humidity conditions
Best for: Chalking, peeling, or bare-wood exterior surfaces before any finish coat.
Check Price on Amazon →Via Amazon.com
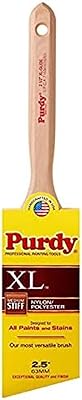
Purdy XL Glide Angle Sash Brush, 2 in.
The Purdy XL Glide is the go-to exterior trim brush for professionals, and the reason is simple: the nylon/polyester blend holds a sharp edge even after hours of cutting in around window frames, fascia boards, and corner boards. That edge control is what separates a clean paint job from one that needs tape-and-touch-up on every window. The angle-cut tip reaches into corners and along narrow trim profiles without splaying — something flat-cut brushes consistently fail at on exterior detail work.
The bristles release paint evenly at a controlled rate, which means fewer drips on vertical trim surfaces and less time correcting runs. Rinse thoroughly after each coat and the brush will hold its shape through a full multi-day exterior job. For oil-based paints, clean with mineral spirits; for latex, warm water works fine within the first 30 minutes.
- ✅ Holds a sharp, consistent edge for clean cut-ins
- ✅ Works with both latex and oil-based exterior paints
- ✅ Durable enough for multi-day professional use
- ❌ Premium price point
- ❌ Requires thorough cleaning to maintain edge
Best for: All exterior trim, window frames, corner boards, and anywhere you need a clean, controlled edge.
Check Price on Amazon →Via Amazon.com

For large flat surfaces like siding panels, stucco, and smooth masonry, a 9″ roller covers ground at a pace no brush can match. The Wooster 9″ roller is built for exterior work — the frame is heavier gauge than cheap rollers, so it doesn’t flex when you’re applying real pressure, and the covers shed almost no lint into your finish coat. Both of those traits matter on exterior surfaces, which tend to be rough and demanding on equipment.
Use a ½” nap cover for medium-texture siding, and a ¾” nap for rough stucco or concrete block. The right nap depth fills texture valleys and prevents skip marks — something painters commonly get wrong on their first exterior job. The Wooster frame also works with an extension pole, which is essential for reaching upper courses without constantly moving a ladder.
Key fact: A 9″ roller cuts your painting time by roughly 60% compared to brush-only on flat siding sections.
- Heavy-gauge frame stays rigid under pressure
- Low-lint covers for clean finish
- Compatible with extension poles
- Not suited for narrow trim or cut-in work
- Covers wear out — budget for 2–3 per project
- Too wide for tight lap siding profiles
Best for: Flat siding panels, stucco walls, smooth masonry surfaces
Check Price on Amazon →Via Amazon.com
Related: Want to skip rollers and brush entirely? See our guide to the best paint spray guns for beginners — airless sprayers can cut exterior painting time in half on large open surfaces.
⚡ Pro Tips
- Paint in the shade. Direct sun heats the surface and causes paint to dry before it levels — you get visible brush marks and lap lines. Follow the shade around the house.
- The 50°F rule. Never apply exterior paint below 50°F or above 90°F. Temperature extremes prevent proper film formation, which shortens the paint’s lifespan significantly.
- Always check the moisture content. Wood should be below 15% moisture before painting. A cheap pin-type moisture meter saves you from a failed paint job on damp lumber.
- Two thin coats, not one thick one. Thick coats trap solvent, take longer to cure, and are prone to dripping. Thin coats dry faster and bond better.
Renovation Stage: PAINT
Exterior house painting is a PAINT stage project. Before you reach for a brush, ensure surface prep and priming are fully complete. Skipping stages is the top cause of premature exterior paint failure. See the best paint removers if your current paint is peeling badly and needs stripping first.
🧮 Exterior Paint Coverage Calculator
Estimate how much paint you need for your house exterior.

Step-by-Step: How to Paint a House Exterior
Here is the full process professional painters use on house exteriors. Follow every stage in order. Cutting corners on early steps creates problems that show up after the paint is already dry.
Pressure Wash the Entire Surface
Start with a thorough wash at 1,500–2,000 PSI. This removes dirt, chalk, mildew, bird droppings, and any loose paint that would otherwise break the bond of your new coat. Wash from top to bottom, holding the nozzle at a 45-degree angle about 12 inches from the surface. Let everything dry for at least 24–48 hours before proceeding — painting over damp wood is a common and costly mistake.
Scrape and Sand Peeling Paint
Once the surface is dry, walk the entire exterior and scrape off any remaining loose or peeling paint with a stiff-blade scraper. Feather the edges with 80-grit sandpaper so there's no hard ridge between old paint and bare wood — that ridge will telegraph through your new coat and look uneven. On stubborn peeling sections, consider a chemical stripper. Our guide to the best paint removers for wood covers the right product for each situation.
Repair Damaged Areas
Inspect all siding, trim, and fascia for rot, cracks, and gaps. Replace any rotted boards entirely — paint will not stop rot from spreading, it will only hide it temporarily. Fill hairline cracks in wood and stucco with exterior spackling or paintable caulk. Allow all repairs to cure fully before priming. On wood siding, apply a wood hardener to any soft spots before filling.
Caulk All Gaps and Seams
Caulk every joint where water could infiltrate: around window frames, door casings, where trim meets siding, at corner boards, and around any penetrations (pipes, cables, vents). Use a paintable exterior caulk — not silicone, which rejects paint. A latex/silicone hybrid gives you paintability plus the flexibility to handle seasonal wood movement without cracking. This step is what separates a 5-year paint job from a 12-year one.
Mask and Protect
Lay canvas drop cloths around the foundation to protect plants and concrete. Tape off window glass with 3M ScotchBlue painter's tape and cover light fixtures. Protect the roof line with poly sheeting if you're using an airless sprayer. If you want to skip masking entirely, consider an airless sprayer built for speed — but budget extra time for the masking that sprayers require on trim and windows.
Prime Bare and Problem Areas
You don't need to prime the entire house if the existing paint is in good condition. Focus primer on any areas where you exposed bare wood or masonry during scraping. Apply KILZ Exterior Premium with a brush, working it into the grain. Allow it to dry fully per the label directions before applying finish coats — typically 1–2 hours for oil-based, faster for water-based primers. Priming correctly here determines how long your topcoats last.
Apply the First Finish Coat
Start at the top of the house and work down. Cut in all trim, window frames, and corners first with the Purdy XL brush. Then fill in the large flat sections with the Wooster roller and an extension pole. Work in manageable sections of 4–6 feet wide. Maintain a wet edge to avoid lap marks — this means moving quickly enough that each new stroke overlaps paint that hasn't yet dried. Apply paint in long, even strokes following the direction of the siding.
Apply the Second Coat
Allow the first coat to dry completely — usually 4–6 hours for latex, longer for oil-based. Check the can for manufacturer minimum recoat times, and respect them even if the paint feels dry to the touch. The second coat is what gives you full coverage, color depth, and durability. Apply exactly as the first coat: cut in trim first, then roll the field. Two coats are non-negotiable on exteriors exposed to sun and weather.
Related: Painting wood siding specifically? Check our full breakdown of the best paints for wood paneling — including the key differences between lap siding, shakes, and board-and-batten profiles that affect product selection.
Buying Guide: Choosing the Right Exterior Paint Materials
Your technique is only as good as what you're putting on the house. Here's how to make smart material decisions before you buy anything.
Latex vs. Oil-Based Exterior Paint
Latex (water-based) exterior paint is the standard choice for most house exteriors today. It dries faster, cleans up with water, stays flexible through temperature swings, and resists mildew better than oil. Oil-based paint still has a role in high-adhesion situations — bare wood, heavily chalked surfaces, or surfaces with tannin bleed from cedar and redwood — but it's used as a primer rather than a topcoat in most modern applications. According to EPA VOC guidelines, low-VOC and zero-VOC latex formulas are the environmentally responsible choice for exterior work, and many local codes now require them.
Paint Sheen for Exterior Surfaces
Sheen selection affects both appearance and durability. Flat finish hides surface imperfections but is harder to clean and less moisture-resistant — use it only on rough textured stucco or masonry where you want to minimize how much texture shows. Satin is the most versatile exterior sheen: it repels moisture, cleans easily, and doesn't reflect enough light to make every surface flaw visible. Semi-gloss is reserved for trim, doors, and shutters — the higher sheen makes architectural details pop and holds up to frequent cleaning. This Old House recommends satin for most residential siding, and it's the default choice professionals use on full-house repaint jobs.
How Much Paint Do You Need?
Calculate wall area by multiplying your house perimeter by the average wall height (not including roofline). On a 1,600 sq ft exterior with two coats of satin latex, plan on 8–12 gallons depending on how porous your surface is. Subtract 20 sq ft per standard window and 20 sq ft per door to avoid overbuying. Always buy 10% extra — matching a custom color on a second trip is nearly impossible, and the leftover paint is useful for future touch-ups. Use the calculator above to get your exact estimate before going to the store.
Brush, Roller, or Sprayer?
Each tool has a role. Brushes are essential for cut-in work on trim, corners, and detail areas — nothing replaces them here. Rollers cover flat siding panels quickly and push paint into the surface better than sprayers, giving excellent adhesion. Airless sprayers are the fastest option for covering open siding, but they require more masking time and a learning curve to avoid runs and uneven coverage. For most DIY homeowners doing their first exterior job, brush-and-roller is the most forgiving and produces the most consistent results. Once you're comfortable with the process, adding a sprayer for future projects speeds things up significantly.
Related: If your current exterior paint is in rough shape and needs stripping before you can repaint, see our roundup of the best paint removers for wood and metal to find the right product for your situation.
Final Verdict
Painting a house exterior is a project most homeowners can complete in a weekend on a single-story home, or across two weekends for a two-story. The prep — washing, scraping, caulking, and priming — takes longer than the actual painting, and that's exactly as it should be. Rush the prep and your new paint fails early. Get the prep right and your job holds up for a decade or more.
Start with KILZ Exterior Premium on any bare or chalky areas. Use the Purdy XL Glide for all trim, cut-in, and detail work. Cover the flat siding sections quickly with the Wooster 9" roller on an extension pole. Two coats, top to bottom, following the shade — that's the whole system.
Frequently Asked Questions
How many gallons of paint do I need for a house exterior?
For a typical 1,500–2,000 sq ft home with two coats of paint, plan on 8–14 gallons for the walls and 2–4 gallons for trim. Use the calculator above with your actual perimeter and height measurements for a precise estimate. Always add 10% extra for waste and future touch-ups.
Do I need to prime before painting a house exterior?
Not always — but often. You need primer on any bare wood or masonry exposed during scraping, on surfaces with heavy chalk or staining, and on cedar or redwood siding prone to tannin bleed. If the existing paint is in good condition and the color change is minor, you can often skip primer on the full surface and prime only the repaired areas.
What is the best time of year to paint a house exterior?
Late spring through early fall is the ideal window — temperatures between 50°F and 85°F with low humidity. Avoid painting in direct sun during the hottest part of the day, as heat causes paint to skin over before it levels properly. Spring and fall mornings are typically ideal conditions in most U.S. climates.
How long does it take to paint a house exterior?
A single-story 1,500 sq ft home typically takes 2–3 full days for a thorough DIY job: half a day for washing and prep, a full day for scraping/caulking/priming, and 1–2 days for two coats of finish paint. A two-story home doubles the time estimate. Professional crews work faster but you're paying for that speed.
Should I use a brush, roller, or sprayer for exterior house painting?
Use all three strategically. Brushes handle trim and cut-in work. Rollers cover flat siding panels efficiently with strong adhesion. Sprayers are fastest on open areas but require more masking preparation. For a first-time DIY exterior, brush-and-roller is the most forgiving combination. Experienced painters often add a sprayer for the main field once they're comfortable with the process.
Can I paint a house exterior myself or do I need a contractor?
Most single-story homes are very manageable as a DIY project. Two-story homes are doable but require comfortable work on extension ladders and more time. Hire a contractor if the home is three stories or more, if extensive rotted wood needs replacement, or if the current paint is lead-based and requires professional remediation. In those cases, the safety and liability considerations make professional help worthwhile.
How long does exterior house paint last?
A quality exterior paint job on properly prepared surfaces lasts 7–12 years. Wood siding tends to need repainting more often than fiber cement or masonry because wood moves with humidity cycles. Paint exposed to harsh sun on south-facing walls typically fades faster. Investing in thorough prep and two coats of premium paint extends the interval significantly.
How do I avoid lap marks when painting house exterior?
Lap marks form when you paint over paint that has already started to dry. Prevent them by maintaining a wet edge — always overlap your current stroke into the previous stroke while it's still wet. Work in smaller sections on hot or windy days when paint dries faster. Adding a paint conditioner (like Floetrol for latex paint) extends open time and gives you more working window in warm conditions.