The Best Textured Paints for Hiding Wall Cracks and Imperfections
Updated May 2026 · ThePaintly Editorial
You filled the crack, sanded it flat, and painted over it — but the wall still looks rough and uneven. The repair is visible every time the light hits from the side. This is the problem textured paint was designed to solve. A textured paint or additive creates a consistent surface pattern across the entire wall, making minor imperfections, patch seams, and old crack lines disappear into the overall texture rather than catching the eye.
The best textured paint to hide wall cracks works by breaking up the flat surface into a fine pattern — sand, suede, or knockdown — that scatters raking light instead of reflecting it directly. We tested three HOMAX texture products across different wall conditions and finish requirements. Here’s exactly what each one does and which one fits your wall.
Quick Picks at a Glance
| Product | Finish | Coverage | Check Price |
|---|---|---|---|
| HOMAX Sand Texture 6 oz | Fine sand — subtle, most versatile | 1 gallon paint | Amazon → |
| HOMAX Suede Texture Additive | Suede — soft, premium decorative look | 1 gallon paint | Amazon → |
| HOMAX 1 Gal Roll-On Paint Texture | Sand — large rooms, ready to use | 1 gallon mixed ready | Amazon → |
⚠️ When Textured Paint Is — and Isn’t — the Right Move
Use textured paint when: The crack has already been filled and sanded, but the repair is visible. The surrounding wall has slight texture and you want a consistent finish. You’re repainting the full wall anyway and want to upgrade the surface quality.
Don’t use textured paint when: The crack is structural or still active — texture hides the appearance but doesn’t stop movement. The crack hasn’t been filled yet — texture over an open crack bridges nothing and will crack again at the same spot. You’re applying in a confined area and need a seamless blend to existing smooth paint — texture creates a visible zone boundary.
Full Product Reviews
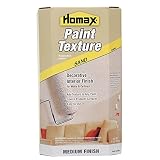
HOMAX Sand Texture is a 6 oz additive that mixes into one gallon of your existing wall paint. The fine aggregate creates a subtle sand finish that scatters light across the wall surface, making repaired cracks and drywall imperfections visually disappear into the overall texture. The sand finish is fine enough to be barely noticeable in normal lighting while still doing its optical job at raking angles.
The mixing process takes about two minutes of stirring. The texture applies with a standard 3/8 inch nap roller — no special tools needed. Coverage matches whatever gallon you mix it into: roughly 350–400 sq ft per gallon. Because you choose and supply the paint, the color match to existing walls is exact. This is the strongest advantage over pre-mixed texture products: zero color mismatch risk.
Key fact: Mixes into any gallon of your existing wall paint — exact color match guaranteed because you supply the paint. No guessing at custom colors.
✅ Pros
- Mixes into any existing paint color
- Subtle sand finish — works anywhere
- Standard roller application
- Economical — 6 oz per gallon
❌ Cons
- Requires separate paint purchase
- Sand can clump if improperly mixed
- Not for extremely fine texture look
Best for: Walls with repaired cracks where the existing color must be maintained and the texture level needs to stay subtle and natural-looking.
Check Price on AmazonVia Amazon.com
🔗 Related ThePaintly Guides
The HOMAX Suede additive creates a softer, more dimensional texture than the sand option. Where sand produces a gritty, rough finish, suede produces a fabric-like surface with subtle depth — similar to the fine-skip-trowel finishes seen in higher-end residential interiors. This finish is more decorative than functional, but it still provides excellent optical camouflage for repaired cracks and patch lines.
It comes in a 1-gallon concentrate that mixes into paint at a 1:4 ratio. The suede particles are finer than sand and produce a more uniform, less grainy finish when viewed up close. It’s harder to over-apply than the sand version — the suede finish blends more forgivingly when you need to overlap sections. On a wall with multiple repaired areas, this makes the suede finish more consistent across the full surface.
Key fact: Creates a premium suede-style finish — more fabric-like and dimensional than sand texture, making it the best choice for living rooms and bedrooms where finish quality is visible.
✅ Pros
- Premium decorative suede finish
- Forgiving overlap — consistent look
- Better for living areas than sand
- Finer particle size — less rough
❌ Cons
- Larger 1-gallon concentrate
- Higher cost than sand option
- Requires separate paint purchase
Best for: Living rooms, dining rooms, and bedrooms where the finish quality is noticed up close — and where a premium dimensional look is preferred over a basic sand texture.
Check Price on AmazonVia Amazon.com
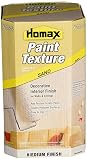
This is the bulk option in the HOMAX line — a full gallon of sand texture additive that’s sized for large rooms or multi-room jobs. Rather than mixing a 6 oz packet into a single paint gallon, you have enough concentrate to texture-treat multiple gallons across a project. The formula is the same sand texture as the 6 oz version, so the finish is identical — only the quantity and economics differ.
Buying at this scale makes sense when you’re texturing more than two full rooms or need a consistent texture treatment across several walls simultaneously. The larger package reduces per-ounce cost significantly, and having extra on hand means you can touch up any areas that need a second pass without opening a new package. For a single room or minor repair project, the 6 oz version is more practical.
Key fact: Same HOMAX sand texture formula as the 6 oz — but at 1-gallon scale for multi-room projects or anyone who needs consistent texture treatment across a large space.
✅ Pros
- Economical for large projects
- Enough for multiple rooms
- Same proven formula as 6 oz
- Touch-up stock included
❌ Cons
- Overkill for single room repairs
- Requires multiple paint gallons
- Sand finish only — no suede option
Best for: Large homes, multi-room repaints, or landlords refreshing multiple units — anywhere consistent texture treatment across a large area lowers cost per square foot.
Check Price on AmazonVia Amazon.com
Texture Finish Comparison
| Feature | HOMAX Sand 6 oz | HOMAX Suede 1 gal | HOMAX Roll-On 1 gal |
|---|---|---|---|
| Finish type | Fine sand — gritty | Suede — fabric-like | Fine sand — gritty |
| Best room | Any room | Living / bedroom | Any — large scale |
| Package size | 6 oz → 1 gal paint | 1 gal concentrate | 1 gal → multiple gal |
| Visibility up close | Slightly rough | Soft, dimensional | Slightly rough |
| Mix ratio | 6 oz : 1 gal paint | 1:4 with paint | Per label |
| Best for | Single-room repairs | Decorative upgrade | Multi-room projects |
Renovation Stage: PAINT
Textured paint is applied at the PAINT stage — after cracks are filled, sanded, and primed. Never apply texture over an unfilled crack. The crack will telegraph through the texture layer within weeks.
Texture Paint Coverage Calculator
📐 How Much Texture Additive Do You Need?
Enter your room dimensions to find out how many gallons of paint and additive packets you need.

How to Apply Textured Paint Over Repaired Cracks
The Correct Order of Operations
Texture is a finish step — it comes after everything else. Before any textured paint goes on, the crack must be filled and sanded flush, the repair must be fully cured, and the patched area must be primed to prevent paint absorption from creating a dull spot. Applying texture over an unfilled crack is the single most common mistake — the texture bridges the surface but the crack telegraphs through within weeks as the wall moves.
The correct sequence: fill the crack → sand flush → spot prime → let dry → mix texture additive into paint → roll the full wall surface in consistent sections.
Mixing the Additive Correctly
Poor mixing is the most common application failure. HOMAX additives must be mixed thoroughly before and during application — the aggregate particles settle quickly. Stir the paint-additive mixture for 2 full minutes before starting. Stir again every 20 minutes during application. Use a drill with a mixing paddle for large volumes. Inadequate stirring creates clumps of aggregate that create visible globs in the finish rather than an even texture.
The mix ratio is 6 oz per 1 gallon of paint for the standard sand packet. Don’t over-add — more aggregate doesn’t create more texture uniformity, it creates a coarser, grittier surface that can feel rough to touch.
Roller Nap and Application Technique
Use a 3/8 inch nap roller for sand texture. A thicker nap deposits too much aggregate in an uneven pattern. Apply in W-pattern sections of approximately 4 feet wide, then back-roll without loading more paint to even the texture. Work quickly — the aggregate-loaded paint skins faster than standard paint. Maintain a wet edge to prevent lap marks at section boundaries.
For suede texture, the same 3/8 inch nap roller works, but the W-pattern is even more important. Suede particles are finer and more sensitive to technique — inconsistent pressure creates visible bands across the wall. According to Family Handyman’s textured wall guide, the key to smooth texture application is maintaining consistent roller pressure rather than varying speed. EPA indoor air quality guidelines also recommend ventilating the room during texture application, as the aerosol particles from roller application can temporarily elevate fine particle levels.
Texture as a Long-Term Investment
A textured wall surface is harder to scuff and mark than flat paint. The texture breaks up the flat film and prevents the rubbing damage that flat and eggshell finishes show quickly. This makes texture an especially practical choice in hallways, family rooms, and any high-traffic wall area — not just for crack concealment but for ongoing durability.
⚡ Pro Tips for Flawless Textured Application
- Always do a sample test first. Mix a small amount and apply to a cardboard section. Let dry and view at a raking angle. The dry texture will look different from the wet application — test before committing to the full wall.
- Apply texture to the full wall, not just the repair area. Spot-texturing over a repair creates a visible boundary. Roll the entire wall surface for a consistent finish that eliminates any visible zone lines.
- Start from a corner. Begin at an inside corner and work across the wall. This ensures your first section’s wet edge is against a natural boundary rather than mid-wall, which prevents dry-edge lap marks.
- Keep a damp cloth nearby. Texture aggregate on trim, windows, or floors dries hard. Wipe any drips immediately while wet — cleanup is dramatically easier than dried removal.
🔗 More ThePaintly Guides
Our Verdict
For most single-room crack repair jobs, HOMAX Sand Texture 6 oz is the right call — it mixes into any gallon of your existing paint, costs almost nothing extra, and creates a consistent subtle texture that makes repaired cracks invisible. For a higher-end living space where the wall finish is noticed at close range, HOMAX Suede delivers a more premium dimensional look. And for anyone texturing more than two rooms or a large open-plan space, the HOMAX 1 Gallon Roll-On is the most economical choice.
Frequently Asked Questions
Can textured paint hide cracks in walls?
Yes — but only after the crack has been filled and the surface is close to flush. Textured paint works by breaking up the flat surface into a pattern that scatters raking light. This makes minor imperfections, patch seams, and repaired crack lines visually disappear. Textured paint cannot bridge or seal an open crack on its own — the crack must be filled first.
What is the best textured paint for hiding wall imperfections?
HOMAX roll-on texture additives are the most practical option for most homeowners because they mix into your existing wall paint — ensuring an exact color match. The sand texture is the most versatile finish for hiding imperfections. For areas where aesthetics matter more, the suede texture additive creates a softer, more premium finish while still concealing surface flaws.
Do I need to fill cracks before applying textured paint?
Yes — always. Textured paint conceals visual surface irregularities but cannot seal structural gaps. If you apply texture over an unfilled crack, the crack will expand slightly with seasonal wall movement and push through the texture layer. Fill, sand, and prime the crack fully before applying any textured finish coat.
How do I apply textured paint to hide wall cracks?
Fill and sand the crack, spot-prime the repair, then mix the texture additive into your paint gallon. Apply with a 3/8 inch nap roller using a W-pattern in sections of 3–4 feet. Apply to the full wall surface — not just the repair zone — so there’s no visible boundary between textured and non-textured areas. Two coats provide the most consistent texture coverage.
Will textured paint come off walls easily?
No more easily than standard latex paint. The aggregate particles in HOMAX texture additives are mixed into the paint film and don’t come off under normal cleaning. Textured walls can be wiped down with a damp cloth without losing the texture. To remove textured paint, you would need to sand the surface or apply a chemical paint stripper — the same process as removing regular latex paint.
Can I use textured paint additive with any color paint?
Yes — HOMAX texture additives mix into any latex interior wall paint regardless of color. Because you supply the paint, the color is exact. This is the main advantage over pre-mixed textured paints, which come in limited colors and require tinting. Mix the additive into a fully custom-color-matched gallon for a perfect match to your existing wall color.