The Best Brake Caliper Paint That Survives Real Brake Heat
Updated: July 2026 | By Sophie Ulman
Get the wrong brake caliper paint and you will see it fail before the season is out — bubbling at the edges, browning from the heat, then peeling off in flakes that make the whole wheel look worse than bare cast iron ever did. Calipers are one of the hottest parts on your car that you can actually see, and most paint simply is not built for it. The right brake caliper paint locks on, resists brake dust and chemicals, and still looks sharp after a full year of hard stops. This guide covers the five kits I trust, why they hold, and where each one lets you down.
I learned this the expensive way. The first time I painted a set of calipers, I grabbed a can of generic high-temp engine enamel because it was on the shelf and the label said 1200°F. Two months later the front calipers — the ones that do most of the braking — had gone from gloss red to a scorched orange-brown, and one was flaking at the leading edge. Here is what I learned: heat rating alone means nothing if the paint is not formulated for the constant thermal cycling and brake dust a caliper lives in. You need caliper-specific product, and prep matters more than the brand you pick.
Quick picks at a glance ·
The 5 best brake caliper paints ·
Pro tips from the garage ·
How much paint do you need? ·
How to choose brake caliper paint ·
When caliper paint is the wrong call ·
Prep steps that actually matter ·
FAQ
Quick Picks at a Glance
| Pick | Best for | Type | Heat resistance |
|---|---|---|---|
| G2 Caliper Paint System | The longest-lasting finish | Two-part epoxy, brush-on | Highest — dries rock-hard |
| VHT High-Temp Caliper (Gloss Black) | Fast jobs, calipers left on the car | Ceramic aerosol | Up to 900°F |
| Dupli-Color BCP400 Kit | First-timers who want everything in one box | Aerosol kit with prep + clear | Up to 500°F |
| Dupli-Color Black Caliper Paint | The factory sleeper look | Ceramic aerosol | Up to 500°F |
The 5 Best Brake Caliper Paints for 2026

G2 High Temperature Brake Caliper Paint System (Red)
This is a two-part epoxy, not a spray. You mix a catalyst into the paint, which triggers a chemical cure — the film cross-links into a hard shell instead of just drying by evaporation. That is the whole reason it outlasts aerosols: a cured epoxy does not soften and re-flow when the caliper heats up on a long downhill, so it resists the browning and edge-lift that kills cheaper coatings.
You brush it on, and one kit covers four calipers. The honest limitation is the work: you have to mix it in the right ratio, use it within the pot life, and the brush marks show if you rush the second coat. On a raw, heavily rusted caliper I painted last spring, I skipped proper degreasing on one side to save ten minutes — that side started lifting at the edge within a month while the properly prepped side is still flawless. The epoxy is only as good as the surface under it.
- Hardest, most durable finish here
- Resists chemicals and brake dust
- Deep, even gloss when brushed carefully
- Mixing and pot life to manage
- Brush marks if you rush
Best for: anyone repainting calipers they have removed and want to do once and never revisit.
VHT High Temperature Caliper Paint — Gloss Black
VHT builds this on ceramic resins, which is why it holds a rating up to 900°F. Ceramic particles in the binder do not break down under heat the way a straight enamel does, so the color stays put through repeated thermal cycles. It sprays from an aerosol with a wide fan nozzle, so you can coat a caliper without pulling the wheel off — a real advantage if you are not doing a full brake job.
The trade-off with any aerosol is film hardness. It cures by evaporation, not chemical reaction, so it will never get quite as bulletproof as the G2 epoxy. It also demands patience between coats — two thin coats always beat one thick coat, and a thick coat here will run and stay soft underneath for days. Masking the rotor and pads is non-negotiable, because overspray on a braking surface is dangerous.
- Highest heat rating in aerosol form
- Spray on with the wheel off — no removal
- Fast handling time
- Softer film than epoxy
- Runs easily if applied thick
Best for: a quick refresh on calipers that stay bolted to the car.
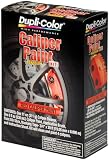
Dupli-Color BCP400 Single Brake Caliper Kit (Red)
If you have never done this before, this kit removes the guesswork. It bundles a prep spray, the ceramic-resin brake caliper paint, and everything you need for one axle in a single box. The prep step is what makes it worth it — that spray etches and cleans the surface so the paint has something to bite into, which is exactly the step first-timers skip and then wonder why the color peels.
It is rated to 500°F, which is plenty for normal street driving but lower than the VHT or G2. That is the honest ceiling here: if you track the car or ride the brakes down mountain passes, you can exceed it and see discoloration. For a daily driver getting a color pop, though, it holds up fine. The included brush coverage is enough for one axle, so budget two kits for all four corners.
- Everything for one axle included
- Built-in prep step
- Easiest entry point
- Lower 500°F ceiling
- Covers one axle per kit
Best for: first-time DIYers painting a daily driver who want no missing pieces.
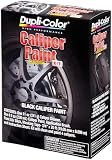
Dupli-Color Black Caliper Paint
Not everyone wants candy red poking through the spokes. This ceramic-resin black gives you the clean, understated look of a factory performance caliper — the sleeper finish that looks like it came that way from the dealer. Black also hides brake dust far better than any bright color, so it stays looking clean between washes with almost no effort.
Same 500°F ceramic formula as the kit above, so the same limitation applies: great for street use, not for repeated hard track sessions. Black is also less forgiving of a sloppy job than a bright color — every drip and thin spot shows against the dark, even sheen. Mask well, keep your coats thin, and let each one flash off before the next.
- Understated factory look
- Hides brake dust between washes
- Simple aerosol application
- 500°F ceiling
- Shows drips against the dark finish
Best for: owners who want a subtle, clean upgrade instead of a color statement.
Pro Tips From the Garage
Degrease twice, then don’t touch it. Calipers are coated in decades of oily brake dust. Hit them with brake cleaner, wire-brush the loose rust, then hit them with brake cleaner again — and once they are clean, handle them with gloves. The oil from your fingertips is enough to cause a fisheye in the paint.
Two thin coats always beat one thick coat. On a caliper this is not a style rule, it is a durability rule. A thick coat stays soft underneath and cooks off when the caliper heats up. Thin coats cure through.
Mask the rotor and pads like your life depends on it — because braking does. Any overspray or drip on the friction surface is a safety problem, not a cosmetic one. Bag the rotor or pull it entirely.
Do the fronts first and best. Front calipers do roughly 70% of the braking and run the hottest. If you are going to skimp anywhere, skimp on the rears, never the fronts.
Painting calipers is really a metal-finishing job, and the same rules carry over from other automotive surfaces. If you are freshening up the whole corner, the same care applies to your wheel paint and any bare aluminum parts under the arch.
How Much Brake Caliper Paint Do You Need?
How to Choose Brake Caliper Paint
The market looks crowded, but the decision comes down to three things: how the paint cures, its heat ceiling, and how you plan to apply it. Get those right and the color is just personal taste.
Cure type: epoxy vs. aerosol
Two-part epoxy caliper paint cures by chemical reaction, so it dries genuinely hard and stands up to chemicals and heat cycling better than anything in a rattle can. Aerosols cure by evaporation — faster and easier, but the film stays comparatively soft. If maximum longevity is the goal, epoxy wins. If convenience matters more, aerosol is the trade.
Heat rating: match it to how you drive
Street calipers rarely exceed 400°F, so a 500°F ceramic caliper paint is fine for a daily driver. Track days, towing, and steep mountain descents push temperatures far higher — that is when you want the 900°F ceramic or a two-part epoxy. Buying more heat resistance than you need costs nothing but effort; buying too little costs you a repaint.
Application: on the car or off?
Aerosols let you paint calipers without removing them — mask, mist, done. Brush-on epoxy generally means pulling the caliper for a clean job, which pairs naturally with a brake service. Decide which project you are actually doing before you buy, because it changes which brake caliper paint makes sense.
According to Family Handyman, surface prep is the single biggest predictor of how long any automotive coating lasts — and Consumer Reports notes that brake components see some of the harshest heat and chemical exposure of any part on the vehicle.
When Caliper Paint Is the Wrong Call
Do not paint calipers that are cracked, seized, or leaking. Paint hides problems. If a caliper is failing, it needs replacing, not decorating — and fresh paint over a leak just buys you a false sense of security.
Do not use regular spray paint or generic high-temp engine enamel. It is not formulated for the specific combination of heat cycling, brake dust, and brake-fluid exposure a caliper sees. It will discolor and peel, which is exactly the mistake I made my first time out.
Never let any product touch the rotor face or pads. This is a braking surface. Overspray there is a safety issue, full stop — mask it completely or remove it.
Prep Steps That Actually Matter
Durability on a caliper is maybe half the product and half the surface under it. Rush the prep and the best brake caliper paint on the market will still lift. Here is the sequence that holds:
Start by cleaning the caliper with brake cleaner to strip oil and grime. Wire-brush or use a sanding pad to knock off loose rust and scuff the surface so paint can key into it. Clean a second time with brake cleaner and let it fully flash off. Mask the rotor, pads, bleeder screw, and any rubber boots. Then apply your first thin coat, let it flash, and follow with the second. If you are working with an epoxy, respect the pot life and mix only what you will use. For related metal prep, the same logic in our metal paint remover guide and engine paint guide carries straight over.
The Verdict
For a finish that lasts years, the G2 Caliper Paint System is the one I reach for — the epoxy cure is in a different league on durability. If you want speed and do not want to pull the wheels, the VHT gloss black gives you the highest aerosol heat rating and a clean spray. And if this is your first set, the Dupli-Color BCP400 kit hands you the prep and paint together so nothing gets skipped. Whichever you pick, the prep decides how long it lasts — not the label.
Frequently Asked Questions
Do you have to remove the calipers to paint them?
No — you can paint them on the car with an aerosol if you mask the rotor and pads carefully. Brush-on epoxy usually goes on cleaner with the caliper removed, so it pairs well with a brake job.
How long does brake caliper paint last?
A well-prepped epoxy finish can last several years. An aerosol coat with good prep typically holds a year or more of daily driving. Poor prep is what shortens either one to a few months.
Can I use regular high-heat spray paint on calipers?
I would not. Generic high-temp enamel is not built for brake dust and brake-fluid exposure, and it tends to discolor and peel. Use a caliper-specific product instead.
Do I need a clear coat over caliper paint?
Two-part epoxy kits do not need one — they cure hard on their own. Some aerosol systems include or recommend a high-temp clear for extra gloss and chip resistance; follow the specific product instructions.
How much heat resistance do I really need?
For street driving, 500°F is enough. If you track the car, tow, or descend long grades, step up to a 900°F ceramic or a two-part epoxy to avoid discoloration.
Will painting my calipers affect braking?
Not if you mask correctly. Paint only goes on the caliper body — never the rotor face or pads. Overspray on a braking surface is the one mistake you cannot afford here.