You’ve undoubtedly grabbed your paint, brushes, and painting tape if you’re about to give your house a fresh coat of paint. But don’t overlook the first and most crucial step in the painting process i-e how to prep walls for painting. Cleaning walls before painting is a headache, but having cleaned drywall before putting down that paint may help you avoid a bundle of flaws down the line.
While it may be appealing to let go and directly begin with the paint rollers, forgetting to clean walls before painting might result in significant issues in the future. If dirt, filth, or debris has remained on the wall and then painted over, mold, fungus, or perhaps even peeling paint may develop, requiring you to restart the process or hire a professional to cure and restore the wall. Avoid the headaches and thoroughly clean your walls before painting.

Related Post: “10 Best Ceiling Paint Sprayer For Home Painting Project”
If you’re ready to start painting, here’s how to clean walls before painting.
Step 1: Wash Walls before Painting
The importance of clean walls in prepping a room for painting cannot be overstated. But what to clean walls with before painting? Well, there is no one-size-fits-all solution for cleaning walls before painting, most may be cleaned with a sponge and hot water.
Wash surfaces that have been exposed to oil or filth, such as kitchen walls, using a solution of water and grease-cutting solution, then rinse with clean water to eliminate any cleansing agent residue. Wipe down the walls with something like a moist towel to dry.
Step 2: Mold and Mildew Removal
If you’re going to paint a room, be sure you get rid of any mold beforehand. Avoid painting over mildew since it will begin to expand under new paint, making regular maintenance much tougher. Mildew may be removed with a towel and three-to-four-parts water to one part diluted bleach.
Apply the mixture, wait a few moments for it to dry, and then clean the afflicted area with a gentle brush before rinsing with clean water when preparing the surface for painting. Be sure you’re wearing gloves and eye protection, and give yourself plenty of time to rest.
Step 3: Removing Flakes
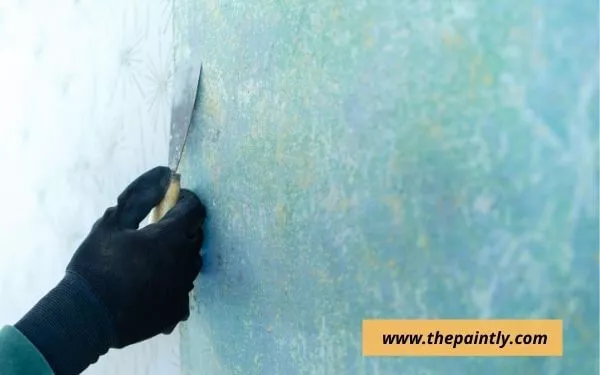
On earlier painted walls, flaking or peeling paint could also be a problem. Paint peeling on walls can be caused by some factors, the most frequent of which is improper surface preparation before painting. Painting over broken paint is a terrible idea; before painting, it will make vast bunches of color that will look so annoying and messy. Always go for sanding walls before painting, scrubbing or scraping away any flakes from the walls. This will let you paint evenly with consistency.
Step 4: Before Painting, Sand the Walls
Although sanding walls before painting aren’t essential for every painting, uneven patches on walls, whether they’ve been painted before or not, should be sanded before they’re repainted to guarantee the paint adheres evenly. To soften any rough edges, use sandpaper, wipe away the residue with a moist towel, and then let dry completely.
On walls earlier coated with glossy or high-gloss paint, smoothing the walls before painting is required. Scrape with fine-grit sandpaper any previously coated water-based paint. Intermediate sandpaper should be used for oil-based paint. Wipe any remaining debris aside and leave it dry fully.
Step 6: Let the Walls Dry Completely
Allow your freshly cleaned walls to dry completely before priming and painting them. Mold can form between paint coats, and blistering can develop if they are still moist when the paint is applied. To generate some excellent circulation through the moist walls, use swinging fans along the walls or open the windows.
Step 7: Finally, Prime Your Walls
If paint color builds a house, priming is the basis of that house. If your walls are porous or have stains that need to be covered up, use a primer and get the most out of your paint. Primers hide flaws, produce an accurate base for your paint to adhere to, and provide a consistent finish regardless of whatever you’re going to paint.
Some Pros Tips
Now, we will tell you some tips to clean walls in different situations. Let’s have a look!
How to prepare bathroom walls for painting?
You do not have to use much more than a light soap and water solution to clean those walls because they’re probably the cleanest in your home. Before painting, make sure the walls are free of dust, webs, and grime and that the corners are free of mold.
Cleaning Smoke Stains
Smoking not only stains house walls, but that also emits a nasty stench that may penetrate even a new coat of paint. Using a solution of water and baking soda while preparing for painting, erase smoke traces and residuals. Baking soda not only dissolves the smoke staining but also neutralizes the smoky odor, leaving your wall clean and tidy.
Tackling grease
As kitchen walls might have grease stains through cooking, cleaning and preparing them can be time-consuming. So the best way to wash walls before painting in the kitchen is by Dishwashing soap with just a grease-cutting composition that works nicely in this case. If the grease marks persist after using the soap, try a frothing wall cleanser or a product containing trisodium phosphate, such as TSP.
Final Verdict
Painting is indeed a challenging undertaking; you wouldn’t want to make it extremely difficult. While it may be enticing to forego the tedious work to clean walls for painting, doing so can help you avoid future difficulties with broken paint flakes and even mold, all of which may be harmful to you and your physical wellbeing. Take care to adopt the best way to wash walls before painting so that you can savor your fresh paint for many years.
Leave a Reply