The Master Guide to Holiday Ceiling Transformations
Painting your ceiling for the holiday season is perhaps the single most transformative DIY project a homeowner can undertake. While walls act as the boundaries of a room, the ceiling is its atmosphere. It is the surface that captures and redistributes the warm glow of Christmas tree lights, the flicker of a fireplace, and the ambient shimmer of festive candles. By choosing the right hue and finish, you don’t just “paint a surface”—you redefine the entire volume of your living space, turning a standard room into a high-end holiday sanctuary.
📋 The Paintly Executive Summary
- The Power of Reflection: The ceiling’s Light Reflectance Value (LRV) determines how “magical” your holiday lighting will look.
- Industrial Advantage: For exposed basement ceilings, dark matte tones hide structural eyesores, while bright whites maximize limited light.
- Expert Finish: Always prioritize a “Flat” sheen for the main area to mask imperfections, reserving “Metallic” or “Satin” for high-impact architectural accents.
Section I: Conceptualizing the Festive Ceiling
When we talk about “Christmas ceilings,” we aren’t just talking about temporary decor. We are talking about a permanent architectural upgrade that serves as the perfect backdrop for seasonal aesthetics while maintaining professional elegance throughout the year.
1. The “Snow & Glow” Palette (White and Gold)
This remains the gold standard for traditional holiday homes. A high-reflectance white ceiling creates an airy, open feel. By integrating a thin, hand-painted gold border along the crown molding, you create a reflective “halo” that catches the warm yellow frequencies of Christmas LEDs. This setup is particularly effective in rooms with low natural light, as it artificially boosts the room’s brightness.
2. The Jewel-Tone Sanctuary (Emerald and Navy)
For those aiming for a high-end, “boutique hotel” vibe, deep greens and navies are unmatched. These colors absorb light in a way that creates a “cocoon” effect. When the sun goes down and the holiday lights come on, a dark green ceiling reflects the needles of the tree, making the entire room feel like it’s part of a winter forest. This is a bold choice that demands high-quality, high-viscosity paint to ensure a streak-free finish.
3. The Modern Winter Frost (Icy Blue and Slate)
Modern, minimalist homes benefit from cool-toned ceilings. An icy blue or soft slate grey pairs exquisitely with silver tinsel and “Cool White” LED displays. This palette feels crisp and clean, evoking the silence of a snowy landscape. It’s an ideal choice for bedrooms or modern open-plan lofts.

Section II: The Technical Blueprint – How to Achieve a Flawless Finish
A great design is nothing without professional execution. Most DIY ceiling projects fail because of poor preparation or incorrect tool selection. To ensure your article provides real value to your readers, we must dive into the “Nitty-Gritty” of the painting process.
1. Surface Preparation and Chemistry
Ceilings are notorious for “ghosting” (the accumulation of dust and soot in specific patterns due to thermal bridging). Before a single drop of paint touches the surface, it must be cleaned with a TSP (Trisodium Phosphate) solution. This de-glosses the surface and removes oils that would otherwise prevent the paint from bonding.
2. Managing the “Wet Edge”
The biggest challenge in ceiling painting is “lapping.” This happens when you roll over a section of paint that has already begun to dry, creating a visible line. To prevent this, you must work in 3×3 foot sections and maintain a “wet edge,” overlapping each stroke by about 50%. This is where the quality of the paint’s “open time” (how long it stays wet) becomes critical.
3. The Strategic Choice of Sheen
- Flat/Matte: 95% of ceilings should be Flat. It absorbs light from all angles, meaning it doesn’t highlight the small bumps or tape lines in your drywall.
- Satin/Eggshell: Only use these in high-moisture areas like kitchens or bathrooms where you need “scrubbability.”
- Metallic: Use strictly for accents. A full metallic ceiling is distracting and nearly impossible to apply without visible roller marks.
Section III: The “Industrial Christmas” – Revamping Exposed Basement Ceilings
Basements are the new “Holiday Hubs.” If your basement features exposed joists, ductwork, and electrical conduits, you have a unique industrial canvas.
The Charcoal “Disappearing” Trick
By painting the entire exposed ceiling—pipes and all—in a deep charcoal or matte black, you effectively make the ceiling “disappear.” This creates an illusion of much higher ceilings. When you wrap these black-painted pipes in warm string lights, the effect is sophisticated and magical, perfect for a cozy Christmas movie night.
The “Stain-Bleed” Warning
Industrial elements like old copper pipes or steel ducts are prone to “bleeding” through paint. If you use a standard water-based latex paint without a proper primer, you will see yellow or orange rust spots appearing through your beautiful holiday white within days.
Section IV: Top-Tier Toolset – Amazon Product Reviews for the Perfect Ceiling
To get the results described above, you need products that perform under pressure. Here are the top three recommendations for a professional-grade holiday project.
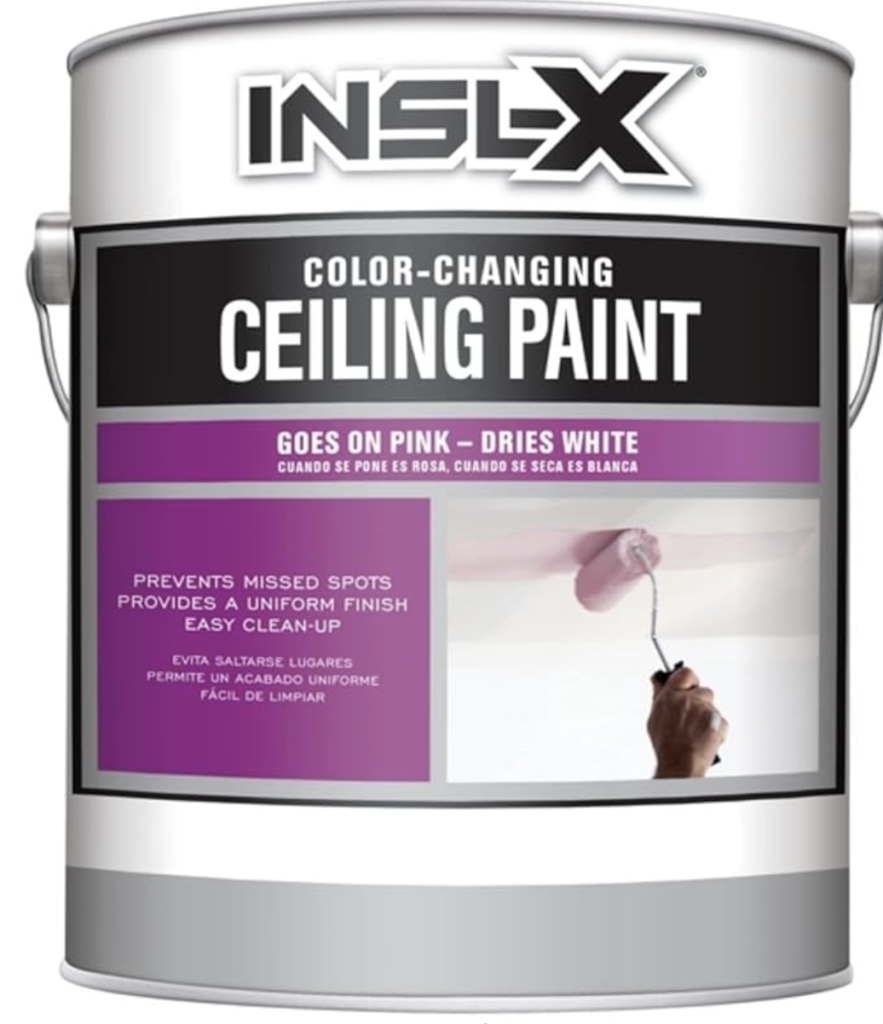
1. The “Beginner’s Best Friend”: INSL-X Color Changing Paint
The Innovation: This paint is a miracle for DIYers. It applies as a soft pink, allowing you to see exactly where your roller has been, and dries to a brilliant, flat white.
- Why we love it: It eliminates the “missed spot” syndrome common with white-on-white painting. It has incredible “hide” capabilities, covering old yellowed ceilings in a single pass.
- Pros: Easy to track, low odor, high coverage.
- Cons: Limited to flat white. Check Price for INSL-X Color Changing Paint
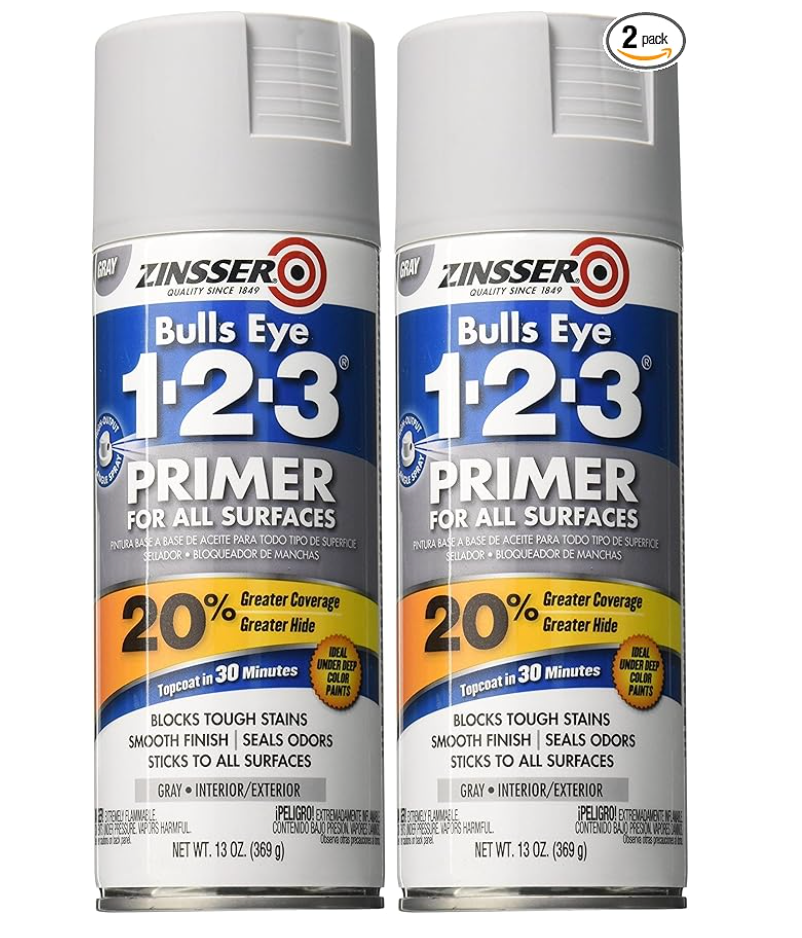
2. The “Problem Solver”: Zinsser Bulls Eye 1-2-3 Primer
The Innovation: A high-performance, water-based primer that sticks to literally anything—including those tricky PVC pipes and metal ducts in your basement.
- Why we love it: It features a “breathable” film that prevents moisture buildup and, more importantly, it blocks “tannin bleed” and rust. It also seals in odors from old basements.
- Pros: Incredible adhesion, mold and mildew resistant, seals odors.
- Cons: Very thick; requires a heavy-duty roller. Get Zinsser Bulls Eye 1-2-3 on Amazon
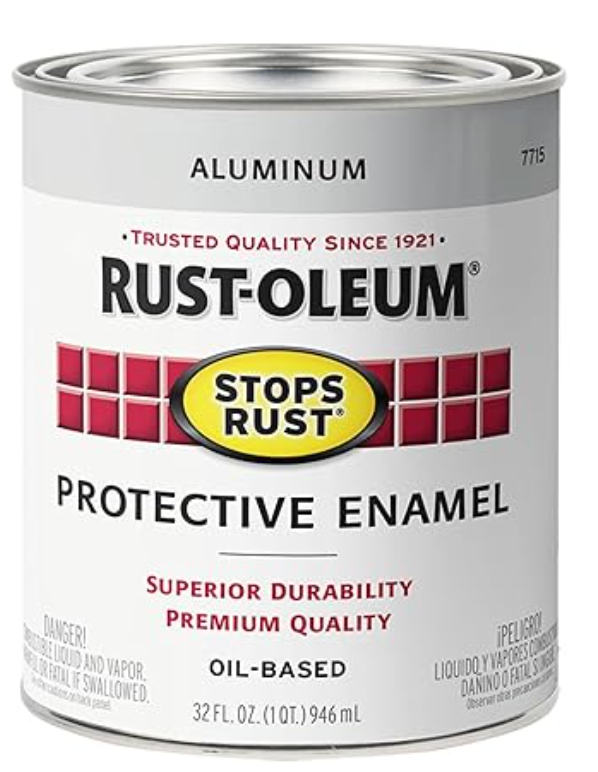
3. The “Designer’s Secret”: Rust-Oleum Metallic Accents
The Innovation: A water-based, low-odor metallic paint that uses mica flakes to create a sophisticated shimmer rather than a “craft store” glitter look.
- Why we love it: It’s the perfect tool for that gold border or for highlighting the edges of exposed basement beams. It adds a layer of luxury that makes your DIY project look like a $5,000 professional designer job.
- Pros: Rich pigment, easy cleanup, dries quickly.
- Cons: Small containers; expensive for large areas. Buy Rust-Oleum Metallic Accents on Amazon
Section V: Step-by-Step Technical Execution
- Clearing the Zone: Remove all furniture. Dust the ceiling with a microfiber mop.
- The “Cut-In” Phase: Use a 2.5-inch angled brush to paint a border around the perimeter. This creates a “buffer zone” for your roller.
- The Rolling Strategy: Use an extension pole and a high-quality roller cover. Apply the paint in a “W” pattern to distribute the material, then “back-roll” in straight, parallel lines to smooth it out.
- The Detail Work: Once the main coat is dry, use a small detail brush and your Rust-Oleum Metallic paint to accent the moldings or beams.

FAQ: Solving Your Holiday Painting Dilemmas
Q: How long should I wait after painting before hanging decorations? A: Even if the paint feels “dry to the touch” in 2 hours, it hasn’t “cured.” Wait at least 24–48 hours before using adhesive hooks or tacks to avoid peeling the fresh paint right off the drywall.
Q: Can I use a regular wall roller for my ceiling? A: You can, but a dedicated ceiling roller often has a thicker “nap” designed to hold more paint, which reduces the number of times you have to climb down the ladder to refill your tray.
Final Verdict: Why It’s Worth the Effort
Painting your ceiling is the ultimate holiday investment. It creates a cohesive, high-end environment that elevates every other piece of decor in your home. By choosing the right products—like the pink-to-white INSL-X or the metallic Rust-Oleum—and following professional “wet edge” techniques, you can achieve a transformation that lasts long after the Christmas tree is taken down.
Want to make sure your outdoor entrance is as impressive as your new ceiling? Read our guide on Restoring Trex Decking to prep your home for winter guests.