How to Paint Kitchen Cabinets Without Sanding (2026 Guide)
Updated April 2026 · By ThePaintly Editorial Team
Learning how to paint kitchen cabinets without sanding opens the door to a complete kitchen transformation without the most dreaded part of the job. Modern bonding primers and liquid deglossers now do the adhesion work that sandpaper once handled — meaning you can get a durable, professional-looking finish without generating dust, without renting a sander, and without a weekend of exhausting prep work.
This guide walks you through the complete no-sand process step by step, recommends the three essential products that make it work, and gives you a cost estimator so you can budget the project before you buy a single can. Tens of thousands of DIYers have used this method successfully. When done correctly, the results are indistinguishable from a sanded cabinet job.
Essential Products at a Glance
| Role | Product | Use |
|---|---|---|
| 🧹 Step 1: Degloss | Krud Kutter Gloss-Off (32 oz) | Dulls existing finish without sanding |
| 🎨 Step 2: Prime | INSL-X Stix Bonding Primer (1 Gal) | Bonds to glossy, varnished, or painted surfaces |
| 🪣 Step 3: Paint | INSL-X Cabinet Coat Enamel Satin (1 Gal) | Self-leveling, ultra-hard cabinet finish |
⚠️ When NOT to skip sanding: If your cabinets have peeling paint, deep gouges, or a very heavy varnish buildup, light sanding is still the right call. This no-sand method works best on cabinets that are structurally sound with a smooth, intact existing finish.
Top 3 Products for Painting Kitchen Cabinets Without Sanding
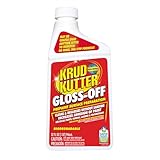
Krud Kutter Gloss-Off is the product that makes the no-sand method possible. It works by chemically breaking down the glossy surface layer on existing cabinet finishes — varnish, polyurethane, old paint — leaving the surface dull and micro-etched so that bonding primer can grip properly. The application process is simple: wipe on with a clean cloth, wait 10 minutes, and you are ready to prime. No rinsing required.
The formula also removes grease, wax, and residue in the same step — combining degreasing and deglossing into one pass. This is genuinely useful for kitchen cabinets, where cooking grease accumulates in layers that are invisible to the eye but will absolutely cause adhesion failure if left uncleaned. One real-world detail from cabinet refinishers: applying Gloss-Off in two passes on high-gloss factory finishes significantly improves primer adhesion on stubborn surfaces.
- Combines degreaser + deglosser in one step
- No sanding dust or cleanup
- Works on varnish, paint, polyurethane
- Ready to prime in 10 minutes
- May require 2 passes on very high-gloss factory finishes
- Not a substitute for sanding on peeling or damaged surfaces
Best for: Any homeowner ready to skip sanding entirely on structurally sound, painted or varnished cabinets.
Check Price on Amazon →Via Amazon.com
🔧 Dealing with old paint that needs to come off completely? Read our guide: Best Paint Remover for Metal and Wood (2026).
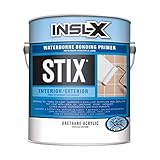
When you skip sanding, the bonding primer becomes the single most critical product in your entire cabinet project. INSL-X Stix is the bonding primer that professionals reach for precisely because it adheres to surfaces that stop regular primers cold — glossy paint, varnish, polyurethane, laminate, tile, and even glass. Its acrylic urethane formula creates a molecular bond with the existing surface that sanding merely approximates mechanically.
Stix dries to the touch in 30–45 minutes and is ready for topcoat in 1 hour. It blocks stains, seals tannins in wood (which cause yellowing through light-colored cabinet paint), and sands smoothly if you choose to do a light scuff after priming. Coverage runs 300–400 square feet per gallon — typically enough for an average kitchen of 20 doors with a quart to spare. The waterborne formula cleans up with soap and water. In independent tests by This Old House, bonding primer used over a deglosser consistently produced adhesion results comparable to full mechanical sanding.
- Bonds to glossy, laminate, and varnished surfaces
- Ready for topcoat in 1 hour
- Blocks tannin stains and bleed-through
- Water-based, low VOC, easy cleanup
- Slightly higher cost than standard primer
- Best results require at least 2 coats on laminate
Best for: All no-sand cabinet projects, especially over laminate, factory-finished wood, or cabinets with heavy varnish.
Check Price on Amazon →Via Amazon.com
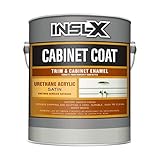
Once your cabinets are deglossed and primed, INSL-X Cabinet Coat is the finish coat that delivers the hard, smooth, factory-comparable result this whole method promises. Cabinet Coat is a urethane-reinforced acrylic enamel that self-levels aggressively — brush marks from a quality brush almost entirely disappear as the paint flows out before drying. The satin sheen hits the sweet spot between practical (hides fingerprints better than semi-gloss) and attractive (still reflective enough to look crisp and clean).
The formula cures hard enough to resist chips, food stains, grease splatter, and daily wiping within about 7 days of the final coat. It performs noticeably better than standard latex paint on kitchen cabinets, which tend to stay soft and pick up scuffs for weeks. Coverage is 400–450 square feet per gallon, making one gallon sufficient for most 20-door kitchens with two topcoats. Many cabinet painters call it the best white cabinet paint available at the consumer level — and we agree.
- Self-leveling formula minimizes brush marks
- Cures extremely hard for daily-use durability
- Excellent stain and grease resistance
- Pairs perfectly with Stix primer as a system
- Requires 7 days to fully cure before heavy use
- Brush application needs a quality brush for best results
Best for: The final topcoat on any no-sand cabinet project where a durable, smooth, factory-quality white finish is the goal.
Check Price on Amazon →Via Amazon.com
💧 Want to soften old paint before refinishing? See: How to Remove Paint with Steam for a no-chemical alternative.
✅ Pro Tips for the No-Sand Method
- Wipe the Gloss-Off in circular motions, then finish with straight grain-direction passes to maximize surface contact.
- Prime within 30–60 minutes of deglossing while the surface is still at its most receptive.
- Apply Cabinet Coat with a high-quality Purdy or Wooster brush — cheap brushes leave too many bristle tracks even in self-leveling paint.
- Work in temperatures between 60–85°F and low humidity. High humidity extends dry time and can cause milky patches.
- Wait the full 7 days before reinstalling hardware and subjecting surfaces to heavy use.
🔧 Renovation Stage: PREP
This guide lives in the PREP stage of your kitchen renovation — the foundation that determines whether your final paint job lasts 2 years or 10. Proper deglossing and priming here is what separates peeling cabinets from durable ones. For ideas on updating other cabinet-adjacent surfaces, see our guide on painting wood paneling.
Project Cost Estimator
💰 How Much Will Your No-Sand Cabinet Project Cost?

What to Know About Deglosser, Primer, and Cabinet Paint
How Liquid Deglosser Works
Liquid deglosser — sometimes called liquid sandpaper — uses solvents or chemical compounds to break down the molecular structure of a gloss finish, leaving the surface mechanically dull without removing material. The result is a surface that primer can penetrate and grip rather than sitting on top of a slick film. Krud Kutter Gloss-Off takes a gentler, water-based approach compared to solvent-heavy alternatives, making it safer for indoor kitchen use without sacrificing effectiveness on standard finishes.
Why Bonding Primer Is Non-Negotiable
Standard latex primer relies partly on mechanical adhesion — it grips into the tiny scratches that sanding creates. Without those scratches, it can peel. Bonding primer uses chemical adhesion to bond directly to smooth surfaces at a molecular level, making sanding unnecessary. INSL-X Stix is formulated specifically for this purpose and has a proven track record on the most challenging kitchen cabinet surfaces. Skipping bonding primer in a no-sand project is the single most common cause of peeling failures, according to professional cabinet refinishers.
Choosing the Right Sheen for Kitchen Cabinets
Kitchen cabinets generally perform best in satin or semi-gloss sheen levels. Satin (like Cabinet Coat’s standard offering) is slightly more forgiving of imperfections while still being easy to wipe clean. Semi-gloss is more reflective and extremely durable but can highlight any texture imperfections in the surface prep. Both outperform flat or eggshell on kitchen cabinets, which are too porous and difficult to clean for high-use surfaces. According to Family Handyman, satin is the most recommended sheen for kitchen cabinets in residential settings.
🎨 Want to upgrade your cabinet painting technique? See: The Ultimate 2026 Beginner’s Guide to Paint Spray Guns.
Complete No-Sand Cabinet Painting Process
- Remove doors, drawers, and all hardware. Label each door on the back edge with painter’s tape so you know exactly where it goes back. Remove hinges and pulls completely — painting around hardware always looks amateur.
- Degrease and degloss in one step. Apply Krud Kutter Gloss-Off to a clean lint-free cloth and wipe down all surfaces thoroughly — doors, face frames, drawer fronts. Pay extra attention to areas near the stove and sink. Allow 10 minutes of contact time. No rinsing needed.
- Apply bonding primer within 60 minutes of deglossing. Use a quality 2.5-inch angled brush on face frames and a 4-inch foam roller on flat door panels. Apply one even coat and allow to dry 1–2 hours. A second primer coat significantly improves durability on laminate surfaces.
- Lightly inspect between primer and topcoat. Run your hand over the primed surface. If you feel any raised grain or bumps, a very light pass with 320-grit paper (not required but optional) will give you an ultra-smooth base. Wipe away any dust with a tack cloth.
- Apply Cabinet Coat topcoat — two thin coats. Use a quality brush or fine-nap roller. Apply in thin, even passes and allow the paint’s self-leveling properties to do the work. Allow 4 hours between coats. Two coats is the minimum; three coats is recommended for the best durability.
- Cure before rehinging. Reattach doors after 24 hours but avoid any heavy wiping, scrubbing, or contact with grease for 7 full days. Cabinet Coat reaches its maximum hardness during this curing window.
Our Verdict
Painting kitchen cabinets without sanding is completely achievable when you follow the right product sequence. Krud Kutter Gloss-Off handles the deglossing and degreasing in a single pass. INSL-X Stix Bonding Primer provides the chemical adhesion that sanding would otherwise create. INSL-X Cabinet Coat delivers the hard, self-leveling finish your kitchen deserves. These three products together cost less than a professional cabinet painter’s day rate and produce results that are genuinely impressive — even without a sheet of sandpaper in sight.