How to Remove Paint With Steam: The Complete 2026 Guide
Updated April 2026 · By the ThePaintly Team
Learning how to remove paint with steam is one of the smartest decisions you can make before a repaint job. Steam strips old paint faster than sanding, produces far less dust, and requires zero toxic chemicals. If your walls, woodwork, or exterior trim are buried under layers of old paint, a steamer cuts through them without the mess that traditional scraping or chemical strippers leave behind.
This guide covers everything: the best steamers available in 2026, a proven step-by-step technique, lead paint safety, and which surfaces respond best to steam stripping. Whether you’re refreshing a single door or tackling a whole room, steam paint removal is the fastest, cleanest way to start with a fresh surface.
Quick Picks — Best Tools to Remove Paint With Steam
| Award | Product | Runtime | Best For | Link |
|---|---|---|---|---|
| BEST OVERALL | Wagner 715 Power Steamer | ~45 min | Trim, doors, windows | View on Amazon → |
| BEST FOR LARGE JOBS | Wagner 725 Wallpaper Steamer | ~2 hours | Full rooms, large walls | View on Amazon → |
| BEST MULTI-PURPOSE | McCulloch MC1375 Canister | 90 min | Paint + grout + tile | View on Amazon → |
Full Product Reviews
 PREP
PREPWagner Spraytech 715 Power Steamer
The Wagner 715 is the go-to recommendation when someone asks how to remove paint with steam on trim, doors, and window frames. It heats up in under 8 minutes and delivers a continuous, pressurized stream that softens even thick layers of oil-based paint in 20–30 seconds per section. The two included steam plates — a large rectangular pad and a narrow detail plate — cover most interior stripping jobs without buying extras.
Where the 715 earns its reputation is in the balance between power and control. The steam output is forceful enough to lift multiple paint layers cleanly, but not so aggressive that it damages the wood underneath. The main downside is the ~45-minute runtime before you need to refill the reservoir — acceptable for smaller jobs, but expect to stop and refill on larger projects. On Reddit DIY threads, painters frequently call it “the one tool I wish I’d bought sooner.”
Key fact: Two steam plates included — rectangular pad for broad surfaces, pointed tip for detail work and tight corners.
- Heats up in under 8 minutes
- Chemical-free — no fumes
- Two steam plates included
- Works on multiple paint layers
- ~45 min runtime before refill
- Hose can condense and drip
- Not for concrete or masonry
🔗 Also considering chemical removal? Read our complete guide to the best paint removers for metal and wood to compare methods before you commit.
 PREP
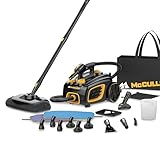
PREPWagner Spraytech 725 Wallpaper Steamer
The Wagner 725 steps up where the 715 leaves off. With nearly two hours of continuous steam on a full tank, it’s built for room-scale jobs where stopping to refill every 45 minutes kills momentum. Professional painters use this model to strip entire walls and multi-layer exterior paint without breaking the workflow. The larger steam plate covers more surface area per pass, which meaningfully cuts the time to remove paint with steam from large sections.
The 725 includes two steam plates and handles both oil-based and latex paint with equal ease. The longer hose gives you more reach, which matters when you’re working on high sections without constantly repositioning a ladder. The trade-off is the slightly heavier body and longer warm-up time compared to the 715. That said, one forum user summarized it well: “I did 3–4 times more work in the same time once I switched to the 725.”
Key fact: Up to 2 hours of continuous runtime — the longest in its class for steam paint removal at this price point.
- ~2 hours uninterrupted runtime
- Large steam plate covers more area
- Longer hose for extended reach
- Handles oil-based and latex paint
- Heavier than the 715 model
- Slightly longer warm-up time
- Higher price point
🔗 After stripping, you’ll want to repaint precisely. See our guide on how to match paint already on a wall to get a seamless finish every time.
 PREP
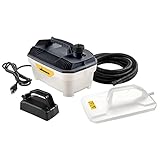
PREPMcCulloch MC1375 Canister Steam Cleaner
The McCulloch MC1375 is the pick for anyone who wants a steam unit that does more than just strip paint. At 58 PSI of pressure and 90 minutes of runtime, it handles paint removal, grout cleaning, tile degreasing, and furniture prep — all with the same machine. The 20-piece accessory kit includes the attachments needed to remove paint with steam on flat walls, detailed trim, and curved surfaces like banisters and chair rails.
Where the MC1375 stands out is versatility. It’s not as laser-focused on paint stripping as the Wagner units, but if you’re renovating a kitchen or bathroom and want one tool for the whole job — floors, tiles, paint, and fixtures — this earns its keep. The large 64-oz water tank heats in under 12 minutes and delivers consistent pressure throughout the session. The slight downside is weight: the canister design is heavier than handheld units, which makes overhead work more tiring.
Key fact: 58 PSI continuous steam pressure with 20 accessories — the most versatile steam kit for whole-home renovation projects.
- 90-minute runtime
- 58 PSI — high pressure output
- 20 accessories included
- Multi-surface capable
- Heavier canister design
- Tiring for overhead use
- 12-min heat-up time
🔗 Planning to spray after stripping? Our beginner’s guide to paint spray guns shows you exactly what to use for a flawless re-coat.
⚡ Pro Tips for Steam Paint Removal
- Work in sections no larger than 30×30 cm — steam cools fast and paint re-hardens in under a minute.
- Keep the steam plate 1–2 cm from the surface for maximum heat transfer without scorching.
- Always test an inconspicuous spot first, especially on older wood, to check for warping.
- Let the wood dry for at least 12 hours before priming or repainting — steam drives moisture into the grain.
- For lead paint (pre-1978 homes), wear an N100 respirator, not a standard dust mask — steam disturbs lead particles.
🔧 Renovation Stage: PREP
Steam paint removal is a surface preparation task. It comes before priming or repainting in the renovation sequence: Strip → Dry → Sand lightly → Prime → Paint. Skipping proper prep is the most common reason new paint peels within a year. Use steam to do it right the first time. See our guide to paint for hard-to-stick surfaces for what to apply after stripping.
How Steam Paint Removal Works
Steam softens paint through two simultaneous mechanisms. First, the intense heat — typically 200–230°F — breaks down the polymer bond between the paint film and the surface. Second, moisture from the steam seeps beneath the paint layer and physically lifts it from the substrate. Together, these two forces make old paint peel away cleanly rather than crumbling into dust.
This dual action gives steam a major advantage over dry heat tools like heat guns. Heat guns can reach 1,200°F, which is enough to vaporize lead in older paint and create a serious health hazard. Steam stays far below that threshold. According to the EPA’s lead paint guidelines, steam is one of the lower-risk methods of mechanical paint removal because it does not generate dry lead dust or toxic vapors when used correctly.
Steam also beats chemical strippers in one critical area: it leaves no residue. Chemical strippers need to be neutralized and fully removed before you can repaint. Steam leaves behind only moisture, which evaporates on its own. The result is a clean surface ready for priming without additional cleanup steps.
Step-by-Step: How to Remove Paint With Steam
Prepare the workspace
Cover the floor directly under the work area with a drop cloth to catch paint chips. Open windows for ventilation. If the home was built before 1978, test for lead paint before you begin — kits are available at any hardware store. Wear safety glasses, gloves, and an N95 respirator as a minimum.
Fill and heat the steamer
Fill the steamer reservoir with clean water — distilled water extends the unit’s lifespan. Power on and allow it to reach full temperature (typically 5–12 minutes depending on the model). Steam should flow continuously and steadily before you begin working.
Apply steam to the paint surface
Hold the steam plate flat against the surface, 1–2 cm away. Keep it in place for 20–40 seconds. You’ll see the paint begin to bubble or blister slightly — that’s your signal it’s ready to scrape. Don’t exceed 60 seconds on a single spot or you risk driving too much moisture into the substrate.
Scrape immediately
Move the steamer aside and use a broad putty knife or scraper at a 30–45° angle. Slide it under the loosened paint and push forward in a single steady motion. Work quickly — softened paint re-hardens within 30–60 seconds. If it doesn’t come off cleanly, re-steam for another 15–20 seconds.
Work in a systematic pattern
Move across the surface in overlapping rows, like mowing a lawn. Don’t jump around — you’ll reheat areas that have already cooled and waste time. On vertical surfaces, work from bottom to top so loosened paint falls away from your working area.
Let the surface dry completely
Steam drives moisture into wood and porous surfaces. Allow at least 12–24 hours of drying time before sanding, priming, or repainting. Sand lightly with 120-grit to smooth any raised grain, then wipe clean with a tack cloth before applying primer.
🕐 Steam Stripping Time Estimator
Buying Guide — How to Choose a Steam Paint Remover
Not every steamer is suited to every paint removal job. Before you buy, match the tool to your project size, surface type, and budget. Here’s what actually matters.
Tank Size and Runtime
Runtime is the single most important spec to look at. A 45-minute unit like the Wagner 715 is fine for door frames and trim. However, if you’re stripping a full room, you’ll spend more time refilling and waiting than actually working. For anything over 80 sq ft, choose a unit with 90+ minutes of runtime. A larger tank also maintains more consistent steam pressure throughout the session — smaller tanks can dip in output as they run low.
Steam Pressure (PSI)
Higher PSI means more forceful steam delivery. For general interior paint removal, 40–60 PSI is sufficient. The McCulloch MC1375 operates at 58 PSI, which is aggressive enough to penetrate multiple paint layers quickly. Dedicated wallpaper and paint steamers like the Wagner line use atmospheric steam (lower PSI) but compensate with surface contact and heat duration. Neither approach is wrong — it depends on whether you want aggressive pressure or controlled contact dwell time.
Steam Plate Size and Attachments
Flat steam plates are best for large open surfaces. Narrow plates or detail nozzles matter for intricate woodwork, moldings, and sash windows. According to This Old House, one of the most overlooked causes of uneven stripping is using a plate that’s too large for the surface profile — the steam can’t make proper contact with recessed areas. Always check that the steamer includes at minimum a large flat plate and a smaller detail attachment.
Intended Surfaces
Steam works best on wood, plaster, and painted metal. It is not suitable for concrete, brick, or masonry — these materials absorb steam without the paint lifting in the way you’d expect. Steam can also damage certain types of older plaster if held in place too long. Test a small hidden area first on any surface you’re unsure about.
🔗 Stripping painted wood paneling? Our dedicated guide on how to paint wood paneling covers prep, priming, and finish in full detail.
Our Verdict
Bottom Line
Steam is the safest, cleanest, and most efficient method to remove paint with steam from wood, trim, and plaster surfaces. It beats chemical strippers on cleanup time and beats heat guns on safety — particularly in pre-1978 homes where lead paint may be present.
For most homeowners, the Wagner 715 is the right call: it heats fast, includes the right attachments, and costs less than hiring someone to do a single door. Step up to the Wagner 725 if your project covers more than one room. Choose the McCulloch MC1375 if you want one unit that handles paint plus the rest of your renovation cleaning.
Steam + a quality putty knife + patience = a surface that’s ready to prime the right way.