4-Inch or 6-Inch Recessed Lights? Here’s How I Decide
Updated: June 2026 | By Sophie Ulman
Get the size wrong and you live with it every single evening. The 4 inch vs 6 inch recessed lighting decision sounds cosmetic, but it controls beam spread, fixture count, hole size, and whether your ceiling looks deliberate or like Swiss cheese. I learned that in my own first kitchen remodel. I put six 6-inch cans in an 8-foot kitchen ceiling because bigger felt brighter. The room ended up lit like a convenience store — flat, glaring, and impossible to dim into anything cozy. Two years later I patched two holes and added 4-inch wafers over the counters instead. Here’s what I learned: size to the job each light does, not to the room.
This guide gives you the decision rules, the spacing math, and one tested pick for each situation — so you drill the right holes the first time.
4 Inch vs 6 Inch Recessed Lighting at a Glance
The 4 inch vs 6 inch recessed lighting question comes down to beam control versus coverage. Here’s the short version:
| 4-Inch | 6-Inch | |
|---|---|---|
| Best role | Task and accent light — counters, islands, hallways, showers | Ambient light — main grid in living rooms, kitchens, bedrooms |
| Typical output | 700–800 lumens | 965–1,100 lumens |
| Beam character | Tighter pool, more contrast | Wider wash, fewer shadows |
| Ceiling look | Discreet — nearly disappears | Visible — reads as a fixture |
| Ceiling height | Shines at 7–8 ft; stays subtle | Better at 9 ft and up |
| Fixtures needed | More, spaced closer | Fewer, spaced wider |
Mixing both sizes in one room is not a compromise — it’s the layered design most lighting plans should land on. Run 6-inch for the general grid, then 4-inch where work happens.
The 3 Picks, Reviewed

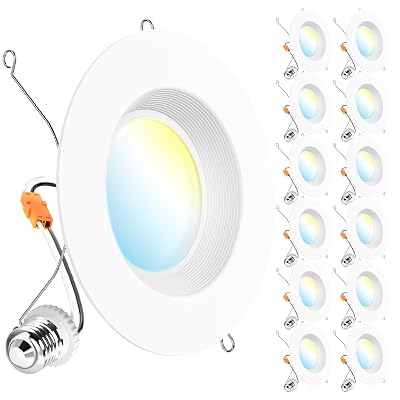
Amico 4 Inch 5CCT Ultra-Thin LED Recessed Lights (6-Pack)
These are canless wafers — the whole fixture is about half an inch thick, with the driver in a separate junction box that slips through the same 4.35-inch hole. That construction is why they fit where cans physically can’t: ceilings with shallow joist bays, blocked-in soffits, or insulation you don’t want to disturb. They’re IC-rated, meaning the housing can safely touch insulation without overheating.
The 5CCT switch on the junction box lets you pick the color temperature at install time, from 2700K warm to 5000K daylight. Set it before you close the ceiling — and write your choice down. The honest limitation from my own installs: at 800 lumens each, one wafer is a task light, not a room light. Over a kitchen counter spaced every 30 inches they’re excellent. As the only light source in a 12×14 room, they’ll disappoint you unless you hang six or more.
Pros
- Fits shallow ceilings where cans can’t go
- Selectable color temperature (2700K–5000K)
- IC-rated for direct insulation contact
- Smooth dimming to low levels
Cons
- 800 lm each — needs tight spacing as a main light
- Junction box adds a step per fixture
- Wafer diffuser is brighter to glance at than a baffled can
Best for: task lighting over counters and islands, low 7–8 ft ceilings, and retrofits where the joist bay is blocked.
Via Amazon.com

Sunco 6 Inch Retrofit LED Downlight, Baffle Trim, 3000K (4-Pack)
If your ceiling already has 6-inch cans, this is the cheapest meaningful lighting upgrade in the house. The retrofit screws into the existing bulb socket, then spring clips pull the trim tight to the ceiling — the old can stays put, no wiring, no new holes. The baffle trim is the detail that matters: those ridged dark grooves swallow side-glare, so the light reads as a soft pool instead of a bare hotspot.
I converted eight builder-grade cans with this style of retrofit in my last house, and the difference in glare from the old BR30 bulbs was obvious from the first evening — they survived two years of daily use without a flicker. One real limitation: this 3000K unit is single color temperature. Buy it when you know you want warm white. If you want to experiment room by room, the selectable-CCT version below is the safer order.
Pros
- Installs in existing cans in minutes
- Baffle trim genuinely cuts glare
- Damp-rated — fine for covered baths
- Dimmable with standard LED dimmers
Cons
- Fixed 3000K — no temperature adjustment
- Needs an existing can; not for new openings
- Spring clips need a firm pull on old cans
Best for: upgrading existing 6-inch cans in living rooms and bedrooms where you want warm, glare-free ambient light.
Via Amazon.com
Sunco 6 Inch Retrofit LED, Selectable CCT (12-Pack)
Same retrofit format as the pick above, with two differences that matter at scale: a five-way color temperature switch (2700K–5000K) on each unit, and a 12-pack price that drops the per-light cost when you’re doing a whole floor. The selectable switch solves the problem that kills multi-room projects — warm light belongs in the bedroom, neutral in the kitchen, and committing a whole case to one temperature forces a compromise somewhere.
The limitation to know before ordering: all twelve should be set deliberately, one room at a time, because a grid with one stray 5000K unit in a 3000K ceiling is visible from across the room. It happened in my hallway — one light looked “broken” for a week until I pulled it and found the switch nudged during install. Check every switch before the trim goes up.
Pros
- Per-fixture CCT choice across one big pack
- Slightly brighter than the fixed-CCT model
- Cost-efficient for whole-floor projects
- UL-listed, damp-rated
Cons
- 12 lights is too many for a single small room
- CCT switches are easy to bump during install
- Still requires existing 6-inch cans
Best for: whole-home or whole-floor retrofits where different rooms need different color temperatures from one order.
Via Amazon.com
Pro Tips From the Ladder
Paint the ceiling before you cut a single hole. Rolling around installed trims is slow, and overspray on new lights is permanent. My full sequence is in the ceiling painting guide — lights go in last.
Spacing rule of thumb: ceiling height ÷ 2. An 8-foot ceiling wants lights about 4 feet apart, half that distance from the walls. It’s a starting grid, not gospel — pull lights toward counters and seating, away from ceiling fans.
Keep perimeter lights 18–24 inches from the wall. Further out than that and the light grazes down the wall instead of landing on the counter or shelf below it.
Buy one extra. Whatever quantity your layout needs, order one more. A cracked diffuser or a dud unit two years from now will not match anything sold then.
Renovation Stage: PREP
Recessed lighting layout is prep-stage work: holes get planned and cut, and color temperatures get chosen, before ceiling paint and trim go on. Durability is 50% product quality and 50% surface preparation — and a lighting grid is only as clean as the layout marks it started from.
Recessed Lighting Layout Calculator
Enter your room and ceiling height. The calculator uses the height ÷ 2 spacing rule to estimate fixture count and grid spacing.

How to Choose in the 4 Inch vs 6 Inch Recessed Lighting Debate
Working through the 4 inch vs 6 inch recessed lighting choice takes three questions: what job is each light doing, how tall is the ceiling, and what’s already in it? Answer those in order and the size picks itself.
Question 1: Task light or ambient light?
Ambient light fills the room; task light lands on a surface where you work. 6-inch fixtures throw a wider, softer wash, which is exactly what a general grid should do. 4-inch fixtures hold a tighter pool with more contrast — that’s what makes a countertop or a reading chair feel intentionally lit. The mistake I see most often is buying one size for both jobs and getting a room that’s technically bright but feels flat. This Old House’s recessed lighting primer makes the same point: layout follows function, not symmetry.
Question 2: How tall is the ceiling?
Ceiling height settles more 4 inch vs 6 inch recessed lighting decisions than any other factor. At 7–8 feet, a 6-inch trim is close enough to eye level that it reads as a visible disc, and its wide beam overlaps aggressively — that’s the convenience-store effect from my kitchen story. Smaller apertures stay discreet at low heights. From 9 feet up, the relationship flips: a 4-inch beam narrows too much by the time it reaches the floor, and you’d need a fleet of them, so the 6-inch earns its keep. Vaulted or sloped ceilings are their own problem and need gimbal trims regardless of size.
Question 3: What’s already in the ceiling?
Existing 6-inch cans decide the argument for you — retrofit them and spend the savings elsewhere. Cutting new openings flips the default to 4-inch canless wafers, because they clear obstructions cans can’t and the smaller hole is kinder to a finished ceiling. Family Handyman’s installation walkthrough shows what’s involved when joists and insulation start dictating positions — shallow wafers dodge most of it. And if your ceiling can’t take new holes at all, surface-mount options like the ones in my flush mount recessed lights guide get you a similar look with zero cutting.
Lumens, not inches, set the brightness
A common myth in the 4 inch vs 6 inch recessed lighting comparison is that the bigger light is automatically the brighter one. Output is set by the LED module, not the hole. Plenty of 4-inch wafers out-lumen older 6-inch units. What the aperture actually controls is spread: the same 800 lumens through a 4-inch opening lands as a brighter, tighter pool than through a 6-inch baffle. Plan lumens per square foot first — about 20 for living spaces, 35+ over work surfaces — then pick the aperture that shapes the beam the way the room needs. For a full-room plan beyond downlights, my modern home lighting buyer’s guide covers the layers recessed cans can’t provide.
When NOT to Use Each Size
Don’t use 6-inch fixtures in a low hallway or small bath. Below 8 feet in a narrow space, big trims dominate the ceiling visually and the overlapping beams glare. This is the one I got wrong in my own kitchen — twice the aperture is not twice the comfort.
Don’t use 4-inch fixtures as the only light in large rooms. Past roughly 150 square feet, you’ll need so many wafers that the ceiling turns into a starfield and the dimmer load gets silly. Run a 6-inch grid and use 4-inch for the work zones.
Don’t put either size in a shower or sauna zone without a wet rating. The picks here are damp-rated — fine for a bathroom ceiling generally, not for directly inside a shower stall. Check the listing’s wet-location rating before that specific hole gets cut.
Before You Cut: 4 Prep Steps
Prep matters more than the brand — a clean layout with mid-range lights beats premium fixtures scattered by guesswork.
1. Mark the grid with painter’s tape first. Tape squares on the ceiling, live with them for an evening, and move tape instead of patching drywall.
2. Probe every hole location. A stud finder pass, then a bent coat hanger through a pilot hole, tells you about joists, pipes, and wires before the 4.35-inch hole saw commits you.
3. Finish the ceiling surface first. Paint, patch, and texture before trims go up.
4. Set and verify CCT switches before closing anything. One mismatched color temperature in a finished grid is maddening to find — check each unit on the ground.
The Verdict
There is no single winner in 4 inch vs 6 inch recessed lighting — there’s a winner per job. Existing cans: the Sunco 6-inch retrofit is the fastest, cheapest upgrade you can make. New holes in a normal-height ceiling, or any task zone: the Amico 4-inch wafers are the modern default. Doing the whole floor at once: the selectable-CCT Sunco 12-pack lets every room get its own warmth from one order. Size to the job, space at half the ceiling height, and set the color switches before the ladder goes back in the garage.
Frequently Asked Questions
Are 4 inch or 6 inch recessed lights better?
Neither wins the 4 inch vs 6 inch recessed lighting question universally. 6-inch lights are better for general room lighting from 9-foot ceilings and up; 4-inch lights are better for task lighting, low ceilings, and small rooms. Most well-lit rooms use 6-inch for the main grid and 4-inch over work areas.
Can you mix 4 inch and 6 inch recessed lights in the same room?
Yes — and you usually should. Keep each size in its own row or zone (6-inch in the center grid, 4-inch along the counter or in alcoves) and match the color temperature across all of them so the mix looks deliberate.
How far apart should 4 inch recessed lights be?
Divide the ceiling height by two for general spacing — about 4 feet apart under an 8-foot ceiling. For task lighting over counters and islands, tighten that to 24–30 inches so the pools of light overlap and kill shadows.
Are 4 inch recessed lights bright enough for a kitchen?
For counters and islands, yes — modern 4-inch wafers put out 700–800 lumens each, which is strong task light at tight spacing. As the only light in a mid-size kitchen, they’re marginal; pair them with a 6-inch ambient grid or another main source.
What size recessed light is best for an 8 foot ceiling?
4-inch is the safer default at 8 feet. The smaller aperture stays visually subtle at that height and avoids the overlapping-glare effect 6-inch trims can produce. Reserve 6-inch for larger rooms at 8 feet, or any ceiling at 9 feet and above.
Do 4 inch recessed lights cost more than 6 inch?
Per fixture they’re similar, but a 4-inch plan usually needs more fixtures to cover the same room, so the room total often runs higher. Retrofitting existing 6-inch cans is the cheapest path of all — no cutting, no junction boxes, no patching.