How to Remove Limewash Paint: Step-by-Step Guide (2026)
Updated April 2026 • By The Paintly Editorial Team
Limewash paint is designed to last. That’s its biggest selling point — and occasionally, its biggest headache. If you’re looking at limewashed brick that no longer fits your style, a wall you want to re-paint, or a project that simply didn’t go as planned, knowing how to remove limewash paint correctly makes the difference between clean bare brick and a permanently damaged surface.
The short answer: limewash is removable, but it takes the right method for the specific situation. Fresh limewash (within 48–72 hours) comes off relatively easily with water. Cured limewash that’s been on brick for years requires more effort — acid washing, mechanical scrubbing, or pressure washing, sometimes in combination. This guide walks you through every method ranked by difficulty, so you can choose the one that fits your surface and situation.
All 4 Removal Methods — Ranked by Situation
Method 1: Water + Vigorous Scrubbing
Works on limewash applied within 48–72 hours before full curing. Warm water and a stiff nylon brush will dissolve most of the coating. Best first attempt before escalating.
Method 2: Vinegar Solution Scrub
White vinegar (diluted 50/50 with water) breaks down the alkaline lime. Effective on single thin coats that haven’t fully carbonated. Apply, wait 10 min, scrub, rinse. Repeat as needed.
Method 3: Pressure Washing
1,200–1,500 PSI with a 25-degree tip removes limewash from exterior brick effectively. Keep the nozzle moving and at 8–12 inches distance. Too close or too high PSI risks brick damage.
Method 4: Diluted Muriatic Acid Wash
10:1 water-to-acid dilution applied with a nylon brush, left 5–10 minutes, then pressure washed off. The nuclear option for fully cured multi-coat limewash. Full PPE required.
Tools & Products You’ll Need
| Pick | Product | Best For | Link |
|---|---|---|---|
| Acid Removal | Klean-Strip Green Muriatic Acid | Stubborn multi-coat cured limewash | See Price |
| Scrubbing | DUOSHIDA Stiff Bristle Brush Kit | Mechanical scrubbing & water/vinegar removal | See Price |
| Light Removal | 7″ Masonry Brush | Fresh limewash removal & distressing | See Price |
Product Reviews
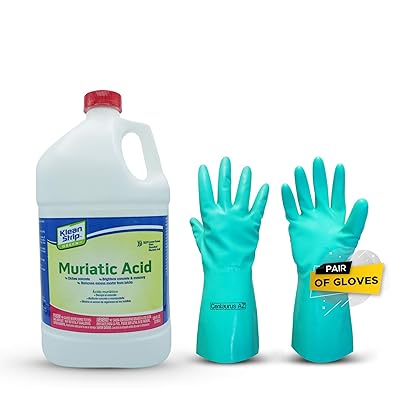
Klean-Strip Green Safer Muriatic Acid — 1 Gallon
For fully cured limewash that has been on exterior brick for years, diluted muriatic acid is the most effective chemical removal option available without professional equipment. Klean-Strip’s Green formula contains 90% fewer fumes than standard muriatic acid — a significant safety advantage when you’re working close to the surface. At a 10:1 dilution (10 parts water to 1 part acid), it penetrates and dissolves the calcium carbonate that limewash becomes as it cures, breaking the bond between the lime and the brick surface. Apply with a nylon brush (never metal — acid corrodes it), wait 5–10 minutes until you see fizzing stop, then pressure wash off thoroughly.
The critical rule with muriatic acid: always pre-wet the brick with plain water first. A dry brick will absorb acid too deeply and can discolor or etch the masonry. Also never mix with any other cleaners, particularly bleach-based products — the reaction produces toxic chlorine gas. One gallon is enough for 150–200 sq ft of brick at the 10:1 dilution. Full chemical-resistant gloves, eye protection, and an N95 respirator are non-negotiable for this product.
✅ Key fact: 90% lower fumes than standard muriatic acid — the safer option for enclosed or semi-enclosed spaces.
- Most effective for cured limewash
- 90% lower fumes vs standard acid
- One gallon covers large areas
- Works on multiple masonry surfaces
- Requires full PPE — no shortcuts
- Not for painted or sealed surfaces
- Can discolor some brick if misused
Best for: Fully cured, multi-coat exterior limewash on unpainted brick
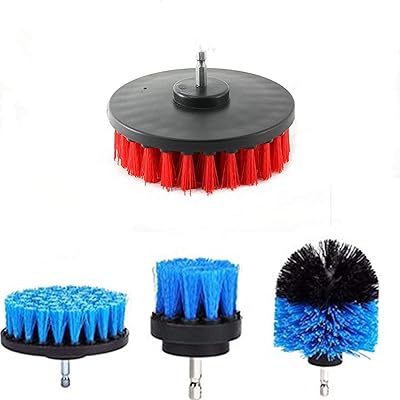
DUOSHIDA 4-Piece Stiff Bristle Power Brush Kit
For homeowners who want to avoid acid altogether, mechanical scrubbing is the gentlest effective approach for removing fresh or moderately cured limewash. The DUOSHIDA kit includes four stiff nylon-bristle attachments — cup brush, flat disc, conical, and small detail — that fit standard power drills. Applied with a water-and-vinegar solution (50/50), the flat disc brush can cover 2–3 sq ft per minute on brick, stripping light-to-medium coats of limewash without the risks of chemical approaches. The combination of mechanical abrasion and acidic solution attacks the lime from two directions simultaneously.
Nylon bristles won’t scratch or score the brick surface the way wire brushes can — a critical distinction on softer or aged brick. The power drill amplifies what manual scrubbing can’t achieve alone. This kit works best on limewash that’s less than two years old or on single thin coats. For heavy, multi-year buildup, pair it with a pre-soak in vinegar solution or transition to the acid wash method for full removal. The four-brush variety means you always have the right shape for mortar lines, flat faces, and corners without buying separate tools.
✅ Key fact: Nylon bristles — aggressive enough to scrub limewash but safe for brick and mortar.
- No chemicals required
- Four brush shapes for all areas
- Nylon won’t scratch brick
- Works with standard power drill
- Labor-intensive on large areas
- Less effective on deeply cured multi-coats
- Requires drill (not included)
Best for: Light-to-medium cured limewash removal, vinegar scrubbing method, interior brick

7-Inch Wide Limewash Masonry Brush
When limewash is still soft — typically within the first 24–72 hours of application — a wide masonry brush and water is all you need for partial or complete removal. The 7-inch wide format covers brick faces quickly, letting you work with warm water in broad strokes to dissolve and lift the uncured lime. This is also the correct tool for “distressing” — intentionally pulling back the limewash in strategic areas immediately after application to expose the underlying brick and create a more aged, variegated look. It’s a technique that transforms a flat, uniform application into something that looks genuinely architectural.
Even if you’re not doing a full removal, this brush belongs in any limewash project kit. The wide wooden block handle distributes pressure evenly across the bristles, preventing the uneven scrubbing marks that narrower brushes create. The stiff natural and synthetic blend bristles hold water well and release it evenly as you work. For full removal of cured limewash, pair this brush with the vinegar soak method — use the brush for scrubbing after the acid or vinegar has had time to work.
✅ Key fact: Wide 7-inch format — covers brick faces 3x faster than a standard paint brush for removal work.
- Wide format — fast coverage
- Ideal for fresh removal and distressing
- Works with water alone on uncured lime
- Doubles as application brush
- Not enough for fully cured limewash alone
- Wide format less precise in tight spaces
Best for: Fresh limewash removal (within 72 hours), distressing, light scrubbing
⚡ Pro Tips: Removing Limewash Without Damaging Brick
- Always test a patch first. Every batch of brick is different in porosity, hardness, and age. A 6-inch test section tells you how your brick will respond before you commit to the full surface.
- Pre-wet the brick before any chemical method. Dry brick absorbs chemicals too deeply. A pre-wet surface creates a barrier that keeps the removal agent working on the lime rather than penetrating the masonry.
- Work in sections from top to bottom. Chemical run-off from upper sections onto already-cleaned lower sections can cause over-etching. Top-to-bottom progression prevents double exposure.
- Rinse thoroughly — twice. Acid residue left in brick pores continues to react with moisture over time, causing efflorescence and surface damage. Rinse once immediately, then rinse again 10 minutes later.
- Consider distressing rather than removing. If the goal is less coverage, a vinegar-and-brush distress technique can selectively expose more brick without a full strip. You preserve the work while adjusting the look.
🔨 Stage: PREP — Removal Is a Reset to Raw Surface
Removing limewash is a PREP-stage task. The goal is to restore raw, porous masonry so a new finish can bond correctly. If you remove limewash and plan to re-apply a new color or product, the surface must be completely dry (48+ hours) and free of chemical residue before any new coating goes on. Check our guide on removing paint with steam if there are additional coatings on adjacent surfaces that also need stripping before your next project begins.
🔍 Which Removal Method Should You Use?
Answer three questions to get the right method for your situation.

Step-by-Step: Full Limewash Removal Process
Cover plants, windows, metal fixtures, and all non-masonry surfaces with plastic sheeting and painter’s tape. Muriatic acid and vinegar solution will damage wood, metal, and glass on contact.
Chemical-resistant gloves, safety goggles or face shield, N95 or better respirator, and old clothes you don’t mind ruining. Acid-splashed skin requires immediate flushing with water — have a bucket of clean water nearby at all times.
Pick a 6″×6″ section in an inconspicuous spot. Apply your method, wait, rinse, and evaluate after it dries. This is the only way to know how your specific brick will respond without risking the whole surface.
Soak the brick with a hose or pump sprayer until the surface is evenly damp. This prevents chemical solutions from penetrating too deeply into the masonry and reduces the risk of discoloration.
For vinegar method: apply 50/50 vinegar-water solution and wait 10 minutes before scrubbing. For acid method: apply diluted muriatic acid (10:1 water-to-acid) with a nylon brush in top-to-bottom sections. Wait until fizzing stops (typically 5–10 minutes).
Use the DUOSHIDA power brush kit on a drill for mechanical scrubbing, or a stiff nylon brush for manual work. Work in circular motions on brick faces, then straight strokes along mortar lines.
Rinse with clean water immediately after scrubbing. Wait 10 minutes, then rinse again. For acid washing, a third rinse is recommended. The goal is zero chemical residue in the brick pores.
Brick must be completely dry before applying any new paint, limewash, or sealer. Moisture trapped under a new coating causes adhesion failure. Allow 48–72 hours minimum in dry weather.
⭐ Our Verdict
If you’re working within 72 hours of application, start with the wide masonry brush and warm water — no chemicals needed. For limewash that’s been on for months, step up to the DUOSHIDA power brush kit with a vinegar soak. For fully cured multi-coat exterior limewash, Klean-Strip Green Muriatic Acid at a 10:1 dilution is the most effective option — follow all PPE requirements and never skip the pre-wet step. And if full removal feels like too much effort, consider distressing the surface back to a lighter coverage instead — it’s faster, safer, and often delivers exactly the result you were chasing.
Frequently Asked Questions
Yes, but complete removal is more difficult than with standard paint. Because limewash penetrates porous brick and chemically bonds as it cures, some trace pigment may remain in deeper pores even after thorough acid washing and pressure washing. In practice, most homeowners achieve 95%+ removal — enough that a new finish will cover the remainder completely. True bare-brick restoration from heavy multi-coat applications sometimes requires professional soda blasting.
Yes, for light coats and relatively recent applications. White vinegar is a mild acetic acid that dissolves the alkaline calcium carbonate in limewash. A 50/50 solution applied and left for 10 minutes, then scrubbed with a stiff brush and rinsed, can remove single thin coats effectively. For heavy or multi-year applications, vinegar alone is unlikely to achieve full removal and you’ll need to step up to muriatic acid.
A pressure washer at 1,200–1,500 PSI with a 25-degree tip can remove exterior limewash effectively, especially on brick that hasn’t been deeply carbonated. Keep the nozzle moving and maintain 8–12 inches from the surface. Do not exceed 2,000 PSI on brick — high pressure can erode mortar joints and damage the brick face. Pressure washing alone may not fully remove deeply embedded limewash without a pre-soak in vinegar or acid solution first.
On drywall or plaster, limewash removal is more delicate. Pressure washing and acid are out of the question. Warm water with a sponge and gentle scrubbing is the only safe method. Because drywall is not a porous masonry surface, limewash sits closer to the surface and often comes off more easily than on brick. In many cases, painting over it with a primer-sealer followed by the new finish is simpler and safer than attempting removal.
Often yes. Applying a fresh coat of limewash in a new color, or painting over it with a mineral silicate paint, is usually less work than full removal. Limewash is compatible with subsequent coats of limewash or mineral paint applied directly on top. If you want to apply latex or acrylic paint over limewash, you’ll need to prime with a masonry primer first, as lime’s high alkalinity can affect standard latex adhesion over time.
A standard fireplace surround (25–35 sq ft) takes 2–4 hours using the vinegar-scrub method. Acid washing the same area takes 1–2 hours including setup and safety precautions. An exterior facade of 500+ sq ft with a pressure washer and acid pre-soak is typically a full day project. Budget extra time for the 48-hour drying period before any new finish can go on — this waiting period is mandatory, not optional.
Yes, but acid washing indoors requires serious ventilation. Open all windows and use a high-CFM exhaust fan directed outside. For a fireplace specifically, the vinegar-and-power-brush method is safer and preferable indoors — it’s effective enough for the relatively small surface area and doesn’t risk acid fumes building up in a partially enclosed space. If the fireplace limewash is very heavily cured, a professional may be the smarter call than attempting acid washing in a living room.