
Can You Reglaze a Bathtub Yourself and Have It Hold Up Like a Pro Job?
Updated: October 2026 | By Sophie Ulman
Reglaze a bathtub without doing the prep right, and you will be looking at a peeling finish before the year is out — or paying a professional to strip off your mistake before they can even start their own job. Bathtub reglazing is one of the cheapest ways to make an old tub look new again, but it is also one of the easiest home projects to get wrong, because almost everything that decides whether it lasts happens before you ever open the can.
The first time I reglazed a tub for a client, I rushed the etching step because the schedule was tight that week. Three months later she called — the finish was lifting right along the bottom where water pools every time someone bathes. I went back, stripped the whole thing down, and did the etch properly the second time, letting it sit the full recommended time before coating. It has held for years since. Prep is not a step you shortcut to save an afternoon, and bathtub reglazing punishes that shortcut faster than almost any other paint job in the house.
This guide walks through what actually determines whether a DIY bathtub reglazing job holds up for years or falls apart in months, what a professional job buys you that a kit cannot, and when reglazing is not the right fix at all.
In This Guide
Quick Picks: Bathtub Reglazing Kits
| Kit | Best for | Coverage |
|---|---|---|
| Rust-Oleum Tub & Tile Refinishing Kit | A single cast iron, steel, or fiberglass tub | One standard tub |
| DWIL Tub & Tile Refinishing Kit (33 oz) | A tub-and-surround combo in one pass | Tub plus surrounding tile |
The Two Kits, Reviewed
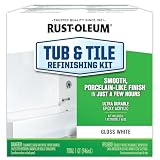
Rust-Oleum Tub & Tile Refinishing Kit
This is a two-part epoxy-acrylic system built around an etching step that degloss the old enamel before the new coating goes on — that etch is what gives the finish something to actually grip, instead of just sitting on top of the old surface the way a regular paint would. It is applied with the included brush or a foam roller, and it is the kit most DIY bathtub reglazing attempts on this type of tub start with, which is also why it shows up in nearly every forum thread about what went wrong.
It is built for porcelain, cast iron, steel, and fiberglass tubs that are structurally sound and just cosmetically worn. The honest limitation painters and refinishers report consistently: the cured epoxy is rigid, so it can chip at impact points — a dropped razor, a shampoo bottle corner — and white finishes tend to show yellowing sooner than other colors once soap film builds up.
Pros
- Widely available, works across several tub materials
- Includes its own prep materials
- Brush or roller application, no sprayer required
Cons
- Rigid finish can chip on impact
- Strong fumes during application and cure
Best for: a single enamel, cast iron, or fiberglass tub that just needs its surface redone.
Via Amazon.com
DWIL Tub & Tile Refinishing Kit (33 oz)
This is the same basic two-part epoxy process as a standard tub kit, just scaled up — at 33 oz it is sized to cover the tub basin and the surrounding tile or surround in the same project instead of buying two separate kits. The etch-then-coat sequence is the same, which matters for bathtub reglazing because tile and tub enamel do not etch at identical rates, so the prep time still has to match the slower surface, not the faster one.
Because it covers more total area, ventilation matters even more over the course of the project — more surface means more time with fumes in the room, not less. It suits a tub-and-surround refresh being done as one job rather than a quick spot fix.
Pros
- One kit covers tub and surrounding tile
- Saves buying two separate kits for one bathroom
Cons
- Larger project means a longer total working and fume window
- Prep has to account for two different surface types in one pass
Best for: a tub-and-tile surround being reglazed together in one project.
Via Amazon.com
Pro Tips Before You Start
- Do not skip or shorten the etching step to save ten minutes. It is the entire reason the coating bonds instead of peeling within a season — bathtub reglazing fails at the etch far more often than it fails at the coat.
- Tape off the drain and overflow plate before you start. A drop of water finding its way under the coating while it is still curing is the reason I get called back most often to fix a DIY bathtub reglazing job early.
- Run a fan and crack a window for the entire cure window, not just while you are applying the coating. The fumes get worse over the first several hours, not better, which is also why ventilation guidance from OSHA on respiratory protection and the EPA on indoor VOCs both apply directly to a project like this one.
- If a chip shows up later, feather in a small patch from the same kit rather than reaching for a generic touch-up pen. A mismatched patch on a reglazed tub shows forever, because the sheen never quite matches.
Where Bathtub Reglazing Sits in a Bathroom Refresh
Bathtub reglazing is a Paint-stage job: the surface underneath has to be sound before you start, and nothing about reglazing fixes a structural problem — it only changes what the surface looks and feels like. If you are refreshing the whole bathroom at once, reglaze the tub before you touch the walls; drips and dust from wall prep are the last thing you want landing on a curing epoxy finish. If the walls need attention too, our guide to the best paint for bathroom walls covers finish and humidity considerations that matter in the same room.
Cure-Time Calculator
Most bathtub reglazing kits need roughly 24 hours before light, dry contact and roughly 72 hours before any water touches the surface. Enter when you finished coating to see your two dates.

Bathtub Reglazing: What Decides Months vs. Years
Ask five different people how long bathtub reglazing lasts and you will get five different answers, because the honest answer is: it depends almost entirely on three things, in this order — surface prep, cure discipline, and daily care afterward. A professional reglazing job, done right, commonly holds up for a decade or more. A rushed DIY bathtub reglazing job can start lifting in a few months. Same basic chemistry, very different outcome, and the difference is not the brand of epoxy.
Surface prep is most of the result
Every bathtub reglazing kit starts the same way: strip the old caulk, deep-clean to remove soap film and mineral scale, patch any chips, then etch the surface so the new coating has something to grip. Skip the etch, or rush it, and the new coating is effectively just resting on top of the old glaze rather than bonding to it — which is exactly how a finish that looked great on day one ends up peeling off in sheets a few months later, usually starting at the bottom of the tub where water pools longest.
Cure time you cannot rush
Most kits want roughly 24 hours before any dry contact and roughly 72 hours before the tub sees water again. That window is non-negotiable, and it is also the step most people blow through because a bathroom with one tub is hard to live without for three days. A single drip finding its way onto a curing bathtub reglazing job — a leaky faucet, condensation, someone forgetting and running the shower — can leave a permanent mark in the finish.
What tub material you are starting with
Cast iron, steel enamel, and fiberglass all etch and bond slightly differently, which is why a kit built around one etching chemistry does not automatically behave the same way across every surface. If the tub itself is fiberglass rather than enameled metal, it is worth reading through our guide to the best paint for fiberglass as well, since fiberglass has its own prep quirks that a bathtub-specific kit does not always spell out.
Daily care after the job is done
A reglazed surface is more fragile than the enamel or gelcoat it replaced, at least for the first several weeks. Skip abrasive cleaners and scouring pads, towel-dry the tub after use instead of letting water sit, and keep bath mats with suction feet off a freshly reglazed surface until it has fully cured. Painters who reglaze tubs for a living report that this single habit — drying the tub rather than letting it air-dry with standing droplets — does more for long-term bathtub reglazing durability than any extra coat.
When NOT to Reglaze a Bathtub
Bathtub reglazing is cosmetic. It changes the surface, not the structure underneath, so it is the wrong fix when:
- There are deep structural cracks, not just surface hairlines
- Rust has worked all the way through the metal, not just stained the surface
- There is a soft, spongy spot anywhere near the drain — that is usually subfloor damage, not a coating problem
- The tub has already been reglazed more than once and is failing again quickly, which usually means the base layer underneath is too compromised to keep bonding to
In any of those cases, a new tub or a liner is the honest answer, and reglazing over the problem just buys a few more months before it comes back.
Prep and Coat, in Order
- Clear and strip old caulk around the tub edges and any fixtures that are in the way of the surface.
- Deep clean to remove soap film, body oil residue, and mineral scale — any film left behind stops the etch from working evenly.
- Patch chips and cracks with the filler included in the kit, and let it cure fully before moving on.
- Etch the surface exactly as long as the kit instructs — this is the step that gets rushed most often, and it is the one that matters most for how long the bathtub reglazing job actually holds.
- Rinse and dry completely. Any moisture left behind gets sealed under the new coating.
- Apply the coating in thin, even passes rather than one thick one — a thick coat skins over on the surface while staying soft underneath, which shows up later as soft spots or a tacky feel.
- Protect the drain and overflow and leave the room ventilated for the full cure window, not just while you are painting.
The same logic — thorough prep before a single drop of coating goes on — is why we tell people the same thing about walls in our guide to prepping bathroom walls before painting: the finish is only ever as good as what is underneath it. And if the plan is to reglaze the tub and the surrounding tile together, the DWIL kit above is built for that, which is also the case where our guide to the best paint for ceramic tile floors is worth a look, since tile and tub enamel do not always want the same cure time.
Our Verdict
Bathtub reglazing is one of the best-value fixes in the whole house when the tub itself is structurally fine and just looks worn out. DIY can genuinely hold up for a couple of years or more, but only when the etch step is done fully and the cure window is respected to the hour, not just to the day. A professional job costs more upfront but commonly buys a decade or longer because a pro is not tempted to rush the one step that matters most. If you are confident in your prep and you can keep the tub untouched for three full days, a DIY bathtub reglazing kit is worth trying. If either of those is in doubt, that is worth paying someone else to guarantee.
Questions People Actually Ask
How long does bathtub reglazing really last?
A professional bathtub reglazing job, done with proper prep, commonly holds up for a decade or longer. A DIY job’s lifespan swings much wider — anywhere from a few months to a couple of years — depending almost entirely on how carefully the etching step and cure time were handled.
Can you reglaze a bathtub yourself, or should you hire a pro?
You can do bathtub reglazing yourself if you are willing to follow the prep steps exactly and keep the tub completely untouched for the full cure window. If you are not confident doing careful surface prep or you cannot go three days without the tub, hiring a pro is the safer bet.
How long do you have to wait before using the tub after reglazing?
Most kits call for roughly 24 hours before any dry contact and roughly 72 hours before water touches the surface again. Check your specific kit’s instructions, since humidity and room temperature both slow the cure down.
Why does bathtub reglazing peel or bubble?
Peeling after bathtub reglazing almost always traces back to one of two things: the etching step was rushed or skipped, so the coating never actually bonded to the old surface, or water reached the finish before it had fully cured.
Can you reglaze a tub that already has cracks or rust?
Only surface-level hairlines and light rust staining are candidates for bathtub reglazing. Deep structural cracks, rust that has worked through the metal, or soft spots near the drain mean the tub needs replacing, not another coat.
Does bathtub reglazing work the same way on fiberglass tubs?
The same basic etch-then-coat process applies, but fiberglass etches and bonds a little differently than cast iron or steel enamel, so it is worth checking that your kit is rated for fiberglass before starting.
How do you make a bathtub reglazing job last longer?
Skip abrasive cleaners and scouring pads, towel-dry the tub after each use instead of letting water sit on the surface, and keep suction-foot bath mats off the tub until the coating has fully cured.
Can you reglaze over a tub that has already been reglazed before?
Sometimes, but each additional layer has less original surface left to bond to. If a tub has already failed one reglazing job and is peeling again quickly, that usually means the base layer is too compromised to keep recoating.