Best Paint for Bathroom Ceiling: 3 That Resist Steam
Updated June 2026 · By Sophie Ulman
The bathroom ceiling is the hardest surface in your house to paint correctly — and the first one to fail. Steam rises, condenses on the coldest surface in the room (the ceiling), and sits there. Standard ceiling paint absorbs that condensation cycle and peels within a year. The best paint for bathroom ceiling work combines anti-peel adhesion, mold-inhibiting chemistry, and a finish that sheds water rather than absorbing it.
Three products handle this environment properly: one ceiling-specific formula whose dried film is mildew resistant, and two Perma-White finishes carrying a written five-year mold-proof guarantee. I have put all three overhead in real bathrooms. Below is what each one is actually rated for — including the manufacturer instruction almost every bathroom-ceiling article leaves out, which is the reason a lot of these jobs fail in week one rather than year one.
The first time I painted a bathroom ceiling, I grabbed the leftover flat wall paint from the bedroom and figured a ceiling was a ceiling. Eight months later it was flaking off in sheets right above the shower head — and behind the flakes, the first grey freckles of mold. Here’s what I learned: a bathroom ceiling is not a dry-room ceiling, and the paint you put on it is the only thing standing between steam and a mold colony. I’ve repainted that ceiling with a mold-proof film, and three winters later it’s still clean. That mistake is why this guide exists.
Quick Picks
| Pick | Product | Finish | Best For |
|---|---|---|---|
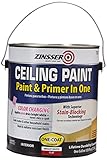
| 🥇 Best Ceiling-Specific | Zinsser Ceiling Paint & Primer in One (260967) | Flat/White | Mildew-resistant film, blocks stains, dries pink to white |
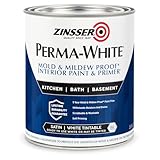
| 💧 Best for Humid Ceilings | Zinsser Perma-White Satin | Satin | Mold-proof film for steam-heavy bathrooms |
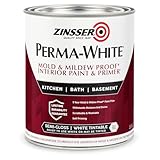
| 🚿 Best for Shower Ceilings | Zinsser Perma-White Semi-Gloss | Semi-Gloss | Maximum water-shedding over steam showers |
⚠️ Why Bathroom Ceilings Fail Faster Than Walls
Ceilings collect steam condensation directly — water vapor rises, hits the ceiling (the coolest surface), and condenses into liquid droplets. This creates a wet-dry cycle happening every single morning. Standard ceiling paint is a flat, porous formula that absorbs this moisture rather than shedding it. Within 12–18 months, the absorbed moisture breaks down the paint film from below, and peeling begins at the edges of the ceiling — near the shower.
The fix is using a ceiling paint that either (a) contains a mold-proof film binder like Perma-White, or (b) uses a specific anti-drip formula designed for overhead application with stain-blocking technology. The wrong paint choice on a bathroom ceiling isn’t a cosmetic problem — it creates a mold factory overhead.
Product Reviews
🔗 Ceiling Paint Cluster
Best Way to Paint a Ceiling How to Make Paint Dry Fast Paint Colours for High Ceilings Best Sprayers for Interior Jobs🚫 When NOT to Use Ceiling Paint Alone
Mold-proof ceiling paint is a top coat, not a cure. If your ceiling already has active mold, water staining that keeps returning, or a soft spongy patch, do not just paint over it — the paint will trap moisture and peel within months, and the mold keeps spreading underneath. Stop and fix the source first: kill existing mold, run down where the moisture is coming from (a failing fan, a roof leak, no ventilation), and prime with a dedicated mold-killing primer before any topcoat. Paint is the last 10% of the job. Skip the prep and even the best paint on this list will fail you — full stop.
Renovation Stage: PAINT (Ceiling)
Paint the ceiling before the walls to avoid drips on fresh wall paint. Once the ceiling is dry, work through the rest of the room. For technique, see our guide to the best way to paint a ceiling, and if you’re fighting the clock between coats, how to make paint dry fast.
🧮 Bathroom Ceiling Paint Calculator

Buying Guide: Choosing the Right Bathroom Ceiling Paint
Flat vs. Satin vs. Semi-Gloss on Ceilings
Conventional interior design calls for flat ceiling paint — it hides seams, joint compound patches, and texture irregularities by eliminating light reflection. In a dry room, that’s correct. In a bathroom, flat ceiling paint is a liability. The higher the sheen, the better the moisture resistance and the easier the surface wipes clean. Match your ceiling finish to your humidity level: flat for powder rooms, satin for standard baths, semi-gloss for steam shower bathrooms.
Ceiling-Specific vs. Wall Paint Applied to Ceiling
Ceiling paint has two properties wall paint lacks: (1) anti-drip viscosity that makes overhead application manageable, and (2) typically higher hiding power in a single coat — because you’re covering more area and making fewer passes. The Zinsser 260967 is the only purpose-built ceiling paint on this list. The Perma-White products are wall paints that work well overhead because of their mold-inhibiting chemistry — not because of any ceiling-specific formulation, which is also why they drip more readily than the Zinsser does. One warning worth carrying from the wider ceiling-paint aisle: not every ceiling paint is bathroom-rated. Glidden’s Grab-N-Go Pink to White, a common shelf neighbour of the Zinsser and near-identical in concept, is stated by its maker as not for use on bathroom ceilings. Read the can rather than the category.
Ventilation: The Variable No Paint Can Replace
An exhaust fan sized appropriately for your bathroom square footage is more important than paint selection. The Family Handyman recommends running the bathroom fan for 30 minutes after every shower — not just during. A fan rated at 1 CFM per square foot of bathroom floor area is the standard. For a 50 sq ft bathroom, that means a 50 CFM fan minimum. Pair proper ventilation with mold-proof paint for maximum ceiling longevity. If your bathroom has a tall or vaulted ceiling, our notes on paint colours for large rooms with high ceilings cover reaching and finishing those harder spans.
The Ceiling-First Rule
Always paint the ceiling before the walls. Ceiling drips on fresh wall paint can’t be cleaned without leaving marks — you’ll repaint the top section of every wall. Painting ceiling first means any drips land on untreated walls or the floor (covered by drop cloth). Let the ceiling dry completely — at least 2 hours — before cutting in the walls. The EPA’s mold prevention guidelines also recommend addressing any ceiling moisture intrusion before repainting.
The Instruction on the Tin Nobody Follows: Don’t Shower for 24 Hours
Here is the line buried in Rust-Oleum’s own Perma-White data sheet, and I have never seen it quoted in a bathroom ceiling article: if the paint is applied near a shower, wait 24 hours before using that shower, and do not scrub the surface for seven days.
That instruction explains a failure I used to blame on the paint. Latex is touch-dry in an hour or two, and the natural assumption is that touch-dry means finished. It does not. Touch-dry means the water has left the surface; what has not happened yet is coalescence — the acrylic particles fusing into one continuous film. Steam a ceiling that is touch-dry but uncoalesced and the moisture goes into a film that has not closed up yet. The paint looks fine for a fortnight and then blisters in a patch directly over the shower head, which everyone reads as “this paint is not good enough for a bathroom.” It was. It was used four hours too early.
So the real sequence for a bathroom ceiling is not a weekend job squeezed around normal use. Paint it, then keep every hot shower out of that room for a full day — use another bathroom, or paint on a morning when the house can go a day without it. Then treat the ceiling gently for a week: no scrubbing, no wiping condensation off it, fan running after every shower. Seven days of restraint is the cheapest durability you will ever buy, and it costs nothing but planning.
💡 Sophie’s timing rule
I paint bathroom ceilings on a Saturday morning now, never a Sunday evening. Saturday morning gives the film all of Saturday and Saturday night before anyone needs the shower on Sunday, and it puts the seven-day gentle window inside a normal week rather than across a busy weekend. The one time I did it on a Sunday night, someone showered before work at six the next morning and I was back on the ladder a month later.
The Paint Is Only Half the Fix: Size the Extractor Fan
Here is the part most bathroom ceiling articles leave out. Mildew-resistant paint slows a mould colony down; it does not stop steam from sitting against the ceiling for an hour after a shower. If the paint keeps failing in the same spot, the extractor fan is undersized or vented into the loft rather than outside — and no coating survives that.
The rule I use: for a bathroom under 100 square feet, take one cubic foot per minute of fan capacity for every square foot of floor. A 7 by 9 foot bathroom is 63 square feet, so a 70 CFM fan is the minimum and 80 CFM is the sensible buy. Add 50 CFM for a jetted tub and another 50 for an enclosed shower cubicle. Then run the fan for a full 30 minutes after the shower stops — the same figure Family Handyman gives above, and the point at which the ceiling actually dries. It is the single cheapest thing you can do to make the paint last. Technique matters too — our guide to painting a ceiling properly covers the roller work.
Two checks worth doing before you open a tin: put a sheet of tissue against the running fan grille and see whether it holds — if it drops, the fan is not moving air. And look in the loft to confirm the duct exits through a roof or wall vent rather than dumping warm wet air into the roof space, which is how ceiling mould comes back through fresh paint within one winter.
How to Paint a Bathroom Ceiling Without Drips
Step 1 — Choose the Right Roller Nap
Use a 3/8″ nap roller for smooth ceilings and 1/2″ for textured surfaces. Avoid cheap foam rollers — they create bubbles on ceilings and drip constantly. A quality microfiber roller holds more paint with less drip.
Step 2 — Load the Roller Correctly
Don’t overload. Half-load the roller in the tray, roll it on the ribbed section until it stops dripping, then apply overhead. An overloaded roller drips regardless of the paint formula. This single technique eliminates 80% of ceiling drip complaints.
Step 3 — Work in 3-foot sections
Apply paint in a W-pattern across a 3×3 foot section, then fill in without lifting the roller. Work across the room in strips rather than randomly. Overlap each strip slightly while the previous section is still wet — this prevents lap marks.
Step 4 — Two Coats, Ceiling Fan Off
Turn the bathroom fan and any ceiling fan off during application — airflow creates uneven drying and lap marks. Let the first coat dry the full 2 hours before the second. The fan goes back on 30 minutes after the final coat is applied.
🏆 Our Verdict
For most bathroom ceilings, Zinsser Ceiling Paint & Primer in One (B0050DW73U) is the practical choice — purpose-built for overhead work, mildew resistant in the dried film, and it blocks the water ring that probably sent you looking in the first place. If your bathroom has a steam shower or a history of mold on the ceiling, step up to Perma-White Satin (B000BZX7HM), or Semi-Gloss (B000C02C5O) directly above the shower zone, for the written five-year mold-proof film. But whichever you buy, the thing that decides whether it lasts is not on this list: an extractor fan sized to the room, run for thirty minutes after every shower, and a full 24 hours before the first shower after painting.