Can You Paint a Motorcycle Engine Without Pulling It Out of the Frame?
Updated: August 2026 | By Sophie Ulman
Pull the engine and a weekend job turns into a three-week teardown with a bag of bolts you can no longer identify. That is why almost everyone asking about motorcycle engine paint is really asking one narrower question: can the cases and cylinder be sprayed while the motor is still bolted into the frame? Yes — but the job stops being about the paint and starts being about masking, degreasing and access. Get those wrong and you will be scraping overspray off a fork leg with a rag and lacquer thinner, which is exactly how I spent an afternoon I am not getting back.
Everything below assumes the engine stays in the frame. Different paint, same cans — different sequence.
What’s on this page
- The five things you actually need
- The kit, one item at a time
- Pro tips for spraying in the frame
- How many cans will this take?
- Choosing motorcycle engine paint that survives heat, fuel and chain fling
- When you should pull the engine anyway
- The prep sequence that decides everything
- The verdict
- Questions people ask
The five things you actually need
| What it does | Product | Why it earns its place |
|---|---|---|
| Lift and hold the bike | VEVOR Hydraulic Motorcycle Lift Jack, 1,500 lb | You cannot spray the underside of the cases from your knees |
| Strip the oil film | Gunk EB1 Engine Brite Original | Solvent degreaser that gets into fin roots |
| Mask hard edges | 3M Automotive Refinish Masking Tape 388N | Crepe tape that follows curves and peels clean |
| Primer coat | VHT SP148 550° Engine Enamel Primer, Light Gray | Heat-rated primer, so it will not lift under the topcoat |
| Colour coat | Dupli-Color DE1615 Engine Enamel with Ceramic, Aluminum | Ceramic-resin enamel that shrugs off gas and brake fluid |
The kit, one item at a time
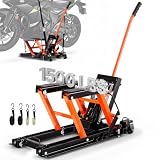
VEVOR Hydraulic Motorcycle Lift Jack, 1,500 lb Capacity
This is a foot-operated scissor jack that sits under the frame rails and lifts the whole bike on a wide steel deck. The foot pedal matters more than the capacity number. Both your hands stay free, so you can steady the bike with one and pump with the other, and you can raise it in small increments instead of committing to one height.
For in-frame work the point is not lifting — it is holding the bike at chest height so you can see the bottom of the cases without lying on the floor. The honest limitation: on a bike with low-slung exhaust headers or a belly pan, you will need to find a flat contact patch on the frame rails first, and on some cruisers that means fitting a length of 2×4 across the deck. Check your clearance before you buy, not after.
- Foot pedal keeps both hands on the bike
- Wheels let you roll the bike into better light
- Wide deck spreads load across both frame rails
- Heavy to move around a small garage
- Needs a flat frame contact patch
Best for: anyone painting cases, sump or the underside of a cylinder without splitting the bike.
Via Amazon.com
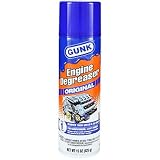
Gunk EB1 Engine Brite Original Heavy Duty Engine Degreaser, 15 oz
Engine Brite Original is a solvent-based degreaser, not a detergent. That distinction is the whole reason it belongs here. Detergents lift surface grime; a solvent dissolves the baked oil film that has soaked into cast aluminium over years of heat cycles. That film is invisible, and it is the single reason motorcycle engine paint lifts in sheets three months later.
You spray it on a cool engine, leave it ten to fifteen minutes, then rinse. On a bike, the rinse is the awkward part — you are standing next to a carburettor, an air filter and an electrical loom, so bag them first. Fair warning: the Original solvent formula can dull or soften some aged plastics and painted trim, which is exactly why the gel version exists. If your bike has a lot of exposed plastic near the motor, mask it before you spray, not after.
- Dissolves baked-in oil, not just surface dirt
- Cheap enough to use twice on a filthy motor
- Rinses with plain water
- Can dull aged plastics and rubber
- Needs a proper rinse, which means bagging the electrics
Best for: a motor with more than a few seasons of oil weep around the cases.
Via Amazon.com
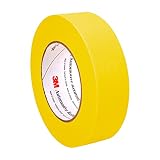
3M Automotive Refinish Masking Tape 388N, 36 mm x 55 m
Crepe paper tape stretches. That sounds like a small thing until you try to mask the curve where a cylinder head meets a rocker cover with household tape and it tents at every bend, letting a fine mist of paint underneath. The 388N crepe backing conforms to the curve and holds a hard edge, and the adhesive is built to release cleanly rather than bond permanently.
The first time I masked an engine in the frame, I used general-purpose beige tape from the hardware aisle. It looked fine going on. When I pulled it the next morning, half of it tore into fibres across the fin edges and I spent longer picking tape off aluminium than I had spent painting. Here is what I learned: buy the automotive crepe, and pull it within 24 hours while the adhesive is still soft. The limitation is width — 36 mm is right for edges but slow for large panels, so pair it with paper or plastic sheet for the tank and forks.
- Stretches around curves without tenting
- Peels clean from bare aluminium
- Holds a genuinely sharp paint edge
- Too narrow to mask large areas alone
- Costs several times what hardware-aisle tape costs
Best for: masking the joint lines between painted and unpainted engine surfaces on an assembled bike.
Via Amazon.com
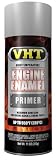
VHT SP148 550° Engine Enamel High Heat Primer, Light Gray, 11 oz
Ordinary automotive primer is rated for body panels that live at ambient temperature. Put it under motorcycle engine paint and the primer softens before the topcoat does, so the whole stack lifts together. SP148 uses a urethane and ceramic resin blend rated to the same 550°F as the enamels that go over it, which means the layer underneath fails at the same temperature as the layer on top instead of first.
It also does the cosmetic job people forget about. A used engine is never one colour — it is grey casting, white oxide bloom and dark heat staining. Light grey primer levels all of that so the colour coat reads evenly. The limitation is honest and specific: this is not an etch primer. On bright, freshly blasted aluminium with no oxide at all, adhesion is mechanical only, so scuff the surface before you spray. Our guide to spray primers for wood and metal covers the etch-versus-mechanical question in more depth.
- Heat rating matches the topcoat, not the bodywork
- Evens out mottled used castings
- Resists oil and automotive fluids once cured
- Not an etch primer — bare bright alloy needs scuffing
- Light grey shows every missed spot, for better or worse
Best for: a used engine with mixed bare metal, old paint and oxide patches.
Via Amazon.com
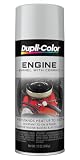
Dupli-Color DE1615 Engine Enamel with Ceramic, Aluminum, 12 oz
Ceramic resin is the reason this can costs more than a general-purpose enamel. The ceramic particles in the film conduct heat outward instead of holding it, so the coating sheds engine heat rather than cooking in it. Dupli-Color rates the finish to 500°F intermittent, and the film is formulated not to chip, flake, crack or peel when hit by the fluids that actually land on a motor — fuel, brake fluid, chain lube fling.
The aluminium shade is the practical choice for in-frame work, and not for looks. Overspray on a bare alloy case is nearly invisible in aluminium; the same overspray in gloss black is a bright line you will see from across the garage. If you want black, that is a different decision and I have compared the two main options head to head in our VHT versus Rust-Oleum engine enamel piece. One limitation worth stating plainly: on an assembled bike you cannot heat cure this properly, so the film reaches full hardness slowly through normal riding heat cycles rather than in one oven session.
- Ceramic resin dissipates heat instead of trapping it
- Resists fuel, brake fluid and chain lube
- Aluminium shade hides overspray on bare cases
- Cannot be oven cured while the engine is in the frame
- Aluminium shade rarely matches an original casting exactly
Best for: cases, covers and barrels you want to look factory rather than restored.
Via Amazon.com
Pro tips for spraying an engine you cannot remove
Bag the carburettor, the air intake and every electrical connector before the degreaser comes out — not before the paint. The rinse is what kills electrics, not the spray can.
Mask the exhaust studs and the spark plug holes with tape, then thread the plugs back in finger tight. Paint in a plug thread is a real problem months later.
Spray with the can 7 to 10 inches out and keep moving. Two thin coats always beat one thick coat. Always. Close in, a wet coat runs straight down a vertical case wall and pools on the ledge above the sump.
Do the underside first, while your patience and your back are both fresh. Everyone does the pretty side first and then rushes the part nobody sees, which is also the part that gets hit by road grit.
Warm the can in a bucket of hand-hot water for a few minutes before spraying in a cool garage. A cold can atomises poorly and lays down a gritty, dry-looking film.
Give it a full 24 hours before you start the bike, then bring it up to temperature gently rather than idling it hard on the stand. The high heat paint for exhaust guide explains why that first heat cycle sets the film.
Renovation Stage: PAINT
This job sits in the PAINT stage, but two thirds of the work is PREP. If you have not degreased and masked, you are not ready to open the colour can.
How many cans will this take?

Choosing motorcycle engine paint that survives heat, fuel and chain fling
A car engine bay is a sheltered box. A motorcycle motor is out in the weather, inches from the road, and it takes abuse a car block never sees. That changes what you should look for in motorcycle engine paint, and it is why a can that works beautifully on a small block will disappoint you on a bike.
Temperature rating: match the hottest point, not the average
Cases and covers on most road bikes run somewhere around 200 to 300°F. The cylinder head and barrel on an air-cooled engine go considerably higher, and the exhaust flange higher still. Rate your paint for the hottest surface you intend to spray, then add margin — a 500 or 550°F engine enamel covers everything except the header pipe itself, which needs a genuine exhaust coating rather than engine enamel.
Fluid resistance is the spec people skip
Heat resistance gets all the attention. Fluid resistance is what actually saves the finish. A bike engine gets petrol dribbled on it at every fill, chain lube flung onto the swingarm side of the cases, and brake fluid dripped near the rear master cylinder. Brake fluid strips ordinary enamel on contact. Ceramic-resin engine enamels hold up to all three, which is the practical reason to buy engine-specific paint instead of general high heat paint.
Colour choice changes how forgiving the job is
Aluminium and cast-iron grey shades hide overspray and thin spots. Gloss black shows every run and every dry patch, and it shows them in direct sunlight from ten feet away. If this is your first time spraying an engine in the frame, pick a shade close to the raw casting and let the small mistakes disappear. Our best engine paint roundup lists the shade ranges each brand offers.
Aerosol or a gun?
For one engine, aerosol wins outright. The conical nozzle on a decent engine enamel can sprays at odd angles, including inverted, and there is no gun to clean afterwards in a garage that still has a bike in the middle of it. If you are doing several engines a year the maths flips, and that is a different article.
When you should pull the engine anyway
In-frame painting is a compromise, and there are jobs where the compromise is not worth it. Pull the engine if you are stripping old paint chemically — paint stripper running down into the frame, wiring loom and swingarm bearings does damage you will be chasing for months. Pull it if you want media blasting, because grit will find its way past every mask into the cases and the chain run.
Pull it if the engine needs work anyway. If the cases are coming apart for a gearbox or a crank seal, painting them out of the frame is faster and the result is better. And pull it if you want a genuine oven cure, which is the only way to get engine enamel to full chemical hardness on day one instead of over the first month of riding.
What you are giving up by staying in the frame is edge quality on the hidden surfaces and the ability to cure properly. What you are keeping is your weekend. That trade is fair for a tidy-up and unfair for a restoration.
The prep sequence that decides everything
Follow this order. Every step out of sequence costs you a redo.
One. Let the engine go completely cold. Warm aluminium flashes solvent off the degreaser before it can work, and it flashes the paint before it can level.
Two. Bag and tape the intake, the electrics, the brake discs and the chain. Plastic bags and crepe tape, not just tape.
Three. Degrease twice. Spray, wait fifteen minutes, agitate the fin roots with a stiff nylon brush, rinse, dry completely, then do it again. The second pass is where you find the oil the first pass loosened.
Four. Scuff every surface that will take paint with a grey abrasive pad. You are not removing metal, you are giving the primer a mechanical key.
Five. Deal with rust on any steel fasteners or brackets now. Paint over active rust and it comes back through the film — our guide to paint for rusty metal covers the converter-versus-remove question.
Six. Final wipe with a wax and grease remover on a lint-free cloth, then do not touch the surface with bare hands again. Fingerprints are oil.
Seven. Prime, two thin coats, 15 to 30 minutes between them. Eight. Colour, two thin coats, and if you want a third, wait the full recoat window rather than laying it on wet.
If you are also refreshing wheels or callipers while the bike is on the stand, the same discipline applies — see our notes on brake calliper paint and paint for rims. And if you are working in an enclosed garage, read the OSHA painting and decorating guidance on ventilation and respirators before you start; aerosol engine enamel is not something to breathe. The EPA’s indoor air quality guidance is worth a look too if your garage shares a wall with the house.
The verdict
You can paint a motorcycle engine in the frame and get a result that holds for years — provided you accept that the paint is the easy part. Buy the solvent degreaser and the automotive crepe tape first, because those two decide whether the finish survives. Then heat-rated primer under ceramic engine enamel, two thin coats each.
Skip the lift only if you are painting side covers. The moment the underside of the cases is in scope, working off the floor is how the job gets abandoned half finished.
Questions people ask
Can you paint a motorcycle engine without removing it?
Yes. Mask the intake, electrics, brakes and chain, degrease twice, scuff, then spray heat-rated primer and engine enamel in two thin coats each. The finish will match an out-of-frame job on every surface you can see; the compromise is on hidden edges and the cure.
What paint do you use on a motorcycle engine?
Engine enamel rated to at least 500°F, ideally with ceramic resin. General-purpose spray paint fails on an air-cooled barrel within a season, and ordinary high heat paint resists heat but not fuel or brake fluid.
Do you need primer under motorcycle engine paint?
On bare or patchy castings, yes — and it must be a heat-rated engine primer, not body primer. Over sound, well-keyed existing engine paint you can go straight to colour after scuffing and degreasing.
How long before you can ride after painting the engine?
Give it 24 hours untouched, then bring the engine up to temperature gently on the first run rather than idling it hard. Full hardness on an in-frame job builds over the first several heat cycles.
Will engine paint peel off aluminium?
Only if oil was left in the surface or the casting was never keyed. Aluminium holds engine enamel well once it is genuinely clean and scuffed. Peeling is a prep failure, not a metal problem.
Can you spray motorcycle engine paint over old paint?
If the old film is sound, not lifting and not flaking, yes — scuff it flat, degrease, and spot prime any bare metal. If it is peeling anywhere, it will keep peeling under your new coat.
How many cans do you need for a motorcycle engine?
Most twins take one can of primer and one to two of colour for cases and barrels. Add a can if you are doing the underside, which drinks paint because you are spraying at an angle.
ThePaintly is reader-supported. Our picks are based on manufacturer specifications and what users report. When you buy through links on this site, we may earn an affiliate commission at no extra cost to you.