How to Paint a Concrete Floor That Won’t Peel in Year One
Updated: August 2026 · By Sophie Ulman
Knowing how to paint a concrete floor correctly is the difference between a coating that lasts a decade and one that starts peeling by spring. Concrete looks like a simple substrate, but its porosity, alkalinity, and moisture content make it one of the most unforgiving surfaces to paint. Skip even one prep step and you’ll be stripping and redoing the entire job within 12 months. Related: best driveway paint.
This guide walks you through exactly how to paint a concrete floor — from moisture testing and etching all the way to the final topcoat and cure window. Four coatings are reviewed below, and they are not interchangeable: a garage that parks a car, a basement that never sees a tyre, and a spalled patio that needs its cracks bridged are three different jobs with three different products.
Quick Picks: Best Concrete Floor Coatings
| Category | Product | Best For | Check Price |
|---|---|---|---|
| Best Overall | Rust-Oleum EpoxyShield Gray | Basements, utility rooms, garages | Amazon → |
| Best Budget | KILZ Porch & Patio Latex Floor Paint | Porches, patios, foot-traffic-only concrete | Amazon → |
| Best Kit | Rust-Oleum EpoxyShield Garage Kit | Full garage floors, 2.5-car coverage | Amazon → |
| Best for Cracked Concrete | KILZ Over Armor Textured Resurfacer | Spalled patios and pool decks — bridges cracks, adds grip | Amazon → |
One note before the reviews, because it is the mistake I see most often in this category: a floor paint and a floor resurfacer are not the same product. Paint is a thin film that takes the shape of whatever is underneath it. A resurfacer is a trowel-thick acrylic that fills what is underneath it. If your slab is sound, you want paint. If it is spalled and cracked, paint will telegraph every flaw and you want the resurfacer instead.
Four Concrete Floor Coatings Reviewed
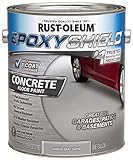
Rust-Oleum 225359 EpoxyShield Concrete Floor Paint
Rust-Oleum’s single-part acrylic EpoxyShield is the most forgiving thing on this page for a first coating job. It’s self-priming on clean, dry concrete, covers up to 300 sq ft per gallon on smooth sealed slabs (noticeably less on porous or rough concrete), and resists staining from oil, gasoline, and household chemicals once fully cured. The gray base formula works with most concrete surfaces — basements, utility rooms, storage areas — without the two-part mixing process that trips up beginners.
Dry time is 24 hours for light foot traffic and 72 hours before moving furniture back. Full chemical resistance takes 7 days. The one limitation: it’s an acrylic coating, not a true two-part epoxy, so it won’t hold up to heavy vehicle traffic long-term. For a residential basement or utility room floor, though, it’s exactly the right product and significantly more forgiving than a two-part kit during application.
✔ Self-priming on clean concrete — covers up to 300 sq ft per gallon with excellent stain resistance.
- No primer needed on clean concrete
- Resists oil and chemical stains
- One-part — easy mixing
- Durable acrylic formula
- Not for heavy vehicle traffic
- 7-day full cure required
Best for: Basement floors, utility rooms, and any indoor concrete surface that needs a clean, durable finish.
Check Price on Amazon →Via Amazon.com
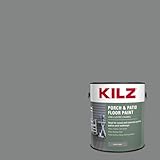
KILZ Porch & Patio Latex Floor Paint (Slate Gray, 1 Gallon)
This is a low-lustre latex enamel, not a coating system, and that is exactly why it belongs here. A gallon covers 300–400 sq ft on smooth concrete and 200–300 sq ft on rough or porous concrete, it is touch-dry in about an hour, and it recoats in 4–6 hours — so a porch you start on Saturday morning has two coats on it by Saturday evening. Nothing else on this page moves that fast. It carries a mildew-resistant finish, which matters on a shaded north-facing porch far more than hardness does.
The honest limitation is abrasion. A latex floor enamel has none of the cross-linked hardness of a two-part epoxy, so it scuffs where things get dragged and it will not survive hot tyre pick-up — park a car on it and the tyre lifts the film off in patches as it cools. Treat it as the right answer for concrete that only ever gets walked on: a covered porch, a patio, a basement floor with no workshop in it, a set of concrete steps. On those surfaces it is the cheapest honest job you can do, and the low-lustre sheen hides trodden dirt better than a gloss would.
✔ 300–400 sq ft per gallon on smooth concrete, touch-dry in 1 hour, recoat in 4–6 — the fastest turnaround here.
- Far higher coverage per gallon than any coating
- Same-day two-coat turnaround
- Mildew-resistant, interior or exterior
- Low-lustre sheen hides foot dirt
- Not for vehicle traffic — hot tyres will lift it
- Scuffs under dragged furniture or tools
Best for: Covered porches, patios, concrete steps, and basement floors that see feet and nothing heavier. If it takes a car, see the EpoxyShield kit below or our garage floor coating comparison.
Check Price on Amazon →Via Amazon.com
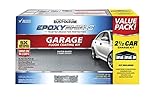
Rust-Oleum 261845 EpoxyShield Garage Floor Coating Kit
For anyone tackling a full garage floor who wants true two-part epoxy performance, this kit delivers everything in one package: two-part water-based epoxy coating, concentrated floor cleaner/etcher, decorative colour chips, and detailed instructions. Two-part epoxy is 5× harder than single-part acrylic coatings and holds up to daily vehicle traffic, oil drips, and the thermal cycling of a garage environment. The 2.5-car coverage covers approximately 500 sq ft — enough for most two-car garages with material to spare.
The mixing process requires attention: combine Part A and Part B, stir thoroughly, then apply within the pot life window (approximately 2 hours). This means you must apply continuously once mixed — stopping and resuming is not possible without a visible overlap line. On the upside, the colour chips scattered into the wet coat hide any minor application inconsistencies and give the floor a professional, showroom look. Walk-on ready in 24 hours, vehicle-ready in 3 days.
✔ True two-part epoxy — 5× harder than single-part coatings, vehicle-ready in 3 days.
- Two-part epoxy durability
- Includes cleaner and colour chips
- Covers 500 sq ft
- Resists vehicle traffic
- Must apply continuously once mixed
- More prep work required
Best for: Full two-car garage floors that need maximum durability and a showroom finish. Read what to do before you open an epoxy kit first — the prep window is shorter than people plan for.
Check Price on Amazon →Via Amazon.com
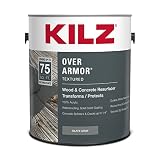
KILZ Over Armor Textured Resurfacer (Slate Gray, 1 Gallon)
This is the product for the slab that is too far gone to paint. Over Armor is a 100% acrylic resurfacer thick enough to conceal splinters and cracks up to a quarter of an inch, and it cures to a textured, slip-resistant surface rather than a smooth film. Coverage tells you everything about how thick it is: roughly 75 sq ft per gallon, against 300–400 for the KILZ floor enamel above. You are not painting the concrete, you are laying a new wearing surface over it.
Two limits that are easy to miss on the label. First, KILZ states plainly that it is not for drivable surfaces — no garage floors, no driveways, because hot tyre pick-up defeats it the same way it defeats a latex enamel. Second, the texture is permanent and it is coarse; it is right underfoot on a wet pool deck and unpleasant in a finished basement. Allow 72 hours before walking on it, and buy by the square foot rather than by instinct, because at 75 sq ft a gallon the material cost climbs fast on a large patio.
✔ Bridges cracks up to 1/4 inch and cures slip-resistant — about 75 sq ft per gallon.
- Hides cracks and spalling that paint would telegraph
- Genuinely slip-resistant when wet
- Works on wood, composite and concrete
- Lifetime limited warranty
- Not for garages, driveways or anything drivable
- 75 sq ft per gallon — four times the material cost
- Texture is permanent and too coarse for interiors
Best for: Weathered pool decks, cracked patios, and sidewalks where the surface itself needs rebuilding, not recolouring.
Check Price on Amazon →Via Amazon.com
More From ThePaintly
- Best paint for garage floors — 4 coatings that actually stick
- Best paint for a concrete porch floor
- Best paint remover for concrete — for when the old coat has to come off first
⚡ Pro Tips for Concrete Floor Painting
Test for moisture first. Tape an 18×18-inch square of plastic sheeting down, seal all four edges, and leave it at least 16 hours — that is the ASTM D4263 method, and the size and the seal both matter. Condensation underneath means moisture is migrating up through the slab, and coating over it delaminates. Profile the surface before you coat it. Acid etching is the usual DIY route, but read your product’s data sheet: some manufacturers now specify mechanical profiling — a diamond-cup grinder or shot blaster — over acid, because etching does very little on a hard steel-trowelled slab. Watch the temperature band, and use the one on your can. Single-part acrylics generally want 50°F and above; Rust-Oleum specifies 60–85°F for the EpoxyShield two-part kit, and that is a narrower window than most people check for.
🏗 Renovation Stage: PREP → PAINT
Painting concrete floors spans the PREP and PAINT stages of the Renovation Protocol. Complete all structural repairs and moisture testing before any coating application. See also: how to paint garage walls and garage paint colour guide.
The Coat I Had to Grind Off a Garage Floor
The first concrete floor I painted was my own garage, in April, on a slab poured directly on grade with no vapour barrier under it. The floor felt bone dry. I etched it, rolled two coats of a one-part epoxy, and it looked like a showroom for about eight months. Then the first warm, humid week of the following summer arrived and the coating came up in blisters the size of dinner plates — not peeling from the edges, lifting from the middle. That is the signature of vapour pressure pushing up through the slab, not of bad paint — the same failure I describe in the prep section of our garage wall painting guide.
I spent a Saturday with a rented grinder taking off a coating I had spent a weekend applying. What I should have done first takes 24 hours and costs nothing: tape a square of plastic sheeting down, seal all four edges, and come back the next day. If there is condensation under it, the slab is wet, and no amount of etching or expensive coating changes that. Since then I have never coated a slab without taping the plastic down first — and on two jobs it stopped me from starting at all.
Prep matters more than the brand. The cheapest coating over a properly tested, etched, and dry slab will outlast the most expensive epoxy rolled onto damp concrete, every single time.
A poured slab and a paver patio behave differently even though both are concrete. Pavers move, drain through the joints and hold moisture underneath, which is why can you paint concrete pavers is its own answer rather than a paragraph here. And if the slab you are coating is measured in parking bays rather than square feet, a roller stops making sense somewhere around the third coat — that is what the parking lot paint sprayers are for.
The Plastic Sheet Test Passes Slabs That Later Fail — Here Is Why
Every guide on this subject, mine included, tells you to tape plastic to the floor. Almost none of them tell you what that test actually is, which is a qualitative indicator — ASTM D4263, a yes-or-no signal that catches obvious moisture. It does not measure anything. A slab can come back dry under plastic in the morning and still push a coating off eighteen months later, and that gap is where most of the failure stories on forums live, including mine.
The flooring trade stopped relying on the plastic sheet years ago and uses two quantitative tests instead. ASTM F1869 is the calcium chloride test: a weighed dish of anhydrous calcium chloride sits under a sealed dome on the slab for 60–72 hours, and the weight it gains converts to a moisture vapour emission rate in pounds per 1,000 sq ft per 24 hours. ASTM F2170 is the in-situ relative humidity probe: you drill to 40% of the slab depth on a slab drying from one side, seal a sleeve in the hole, and read the internal relative humidity after it equilibrates. The second one is the more trusted of the two now, because it reads the moisture inside the slab rather than what happens to be leaving the top surface on a given day.
The numbers matter because coating manufacturers publish limits against them. Most consumer floor coatings sit somewhere around 3 lb per 1,000 sq ft per 24 hours and 75–80% internal RH; moisture-tolerant epoxy primers are sold specifically to go higher. Look up the limit for the product you are about to buy rather than assuming — it is on the technical data sheet, not the label, and it is the single number that decides whether the job lasts.
Is a rented RH probe kit worth it for a basement floor you are painting with a $40 gallon of enamel? Usually not — do the plastic test, and if it passes, accept the risk. But for a garage floor with a $200 epoxy kit and a weekend of grinding behind it, testing properly costs a fraction of doing it twice. I have done it twice. The test is cheaper.
How to Paint a Concrete Floor: The 7-Step Process
Learning how to paint a concrete floor properly means following these steps in sequence. Skipping any step — especially the prep stages — will result in peeling within months.
Test for Moisture
Tape an 18×18-inch plastic sheet to the concrete and seal all four edges. Leave it a minimum of 16 hours — overnight is fine, 24 is better. Condensation under the plastic, or a dark patch on the slab when you lift it, means moisture is rising from below. Do not proceed until you find and fix the source. Painting over active moisture is the mistake I see most often, and it fails every coating system eventually. If the slab passes but the floor matters, read the next section before you buy anything — a clear plastic sheet is not the whole test.
Clean the Surface Thoroughly
Sweep, then vacuum. Scrub with a stiff bristle brush, concrete cleaner, and water. Remove all grease, oil, and existing paint residue. For garage floors with heavy oil contamination, use a degreaser and scrub in multiple passes. Let the floor dry fully — at least 24 hours — before the next step. Family Handyman recommends using a TSP substitute for stubborn grease before any coating application.
Repair Cracks and Damage
Fill hairline cracks with concrete crack sealer and larger voids with hydraulic cement or fast-setting concrete patch. Let repairs cure completely — minimum 24–48 hours for most patch products. Sand any high spots flush with the surrounding floor. Surface irregularities covered with coating will telegraph through the finished surface if not addressed first.
Etch the Concrete
Surface profile is non-negotiable — a coating grips a profile, not a polish. An acid etch (muriatic acid or a proprietary concrete etcher) opens the pores of the surface. Apply per the manufacturer’s instructions, scrub with a stiff brush, rinse thoroughly and let it dry completely. The surface should feel like medium-grit sandpaper afterwards; if it is still smooth and glassy, etch again. On a hard steel-trowelled slab, etching sometimes never gets there no matter how many passes you make — at that point rent a diamond-cup grinder, which is what the coating manufacturers now specify anyway. Wear eye protection and acid-resistant gloves, add acid to water and never the reverse, and ventilate.
Apply Primer (If Required)
Single-part acrylic coatings like Rust-Oleum EpoxyShield Gray are self-priming on clean, etched concrete. True two-part epoxy kits include their own primer component. If you’re using a standard floor paint without self-priming properties, apply a dedicated concrete bonding primer and let it cure fully before the topcoat. Never skip primer on new concrete that has never been coated.
Apply the Coating in Sections
Start in the corner farthest from the door and work toward the exit — do not paint yourself into a corner. Use a 9-inch roller with a 3/8-inch nap for smooth surfaces or 1/2-inch for more textured concrete. Apply in 3-foot-wide strips, maintaining a wet edge. For the EpoxyShield two-part kit, apply all of Part A+B mixture within the pot life window — there is no stopping once mixing begins.
Respect the Cure Window
Most concrete coatings are touch-dry in 4–8 hours and walkable in 24–72 hours. But full chemical and mechanical hardness takes 4–7 full days. During this window, avoid heavy furniture, dragging items across the surface, or placing rugs. The EPA recommends ventilating during and after application to clear VOCs, particularly for two-part epoxy systems applied in enclosed spaces.
Floor Coverage Calculator
🧮 How Much Coating Do You Need?

Buying Guide: Choosing the Right Concrete Floor Coating
Acrylic vs. Two-Part Epoxy: Which Is Right for You?
Once you have ruled out a resurfacer, the core choice is between single-part acrylic and two-part epoxy. Acrylic coatings are easier to apply, more forgiving of surface prep imperfections, and can be applied by anyone with basic rolling experience. Two-part epoxy is significantly harder, more chemical-resistant, and better suited for floors that take vehicle traffic or heavy mechanical work. For most residential basement and utility floors, acrylic is the smarter choice. For garages and workshops, two-part epoxy is worth the added complexity.
Moisture: The Factor That Kills Coatings
Moisture migrating up through a concrete slab is the single leading cause of coating failure, regardless of product quality. If your basement or garage floor shows white powdery deposits (efflorescence) or if the plastic sheet test shows condensation, you need to address the moisture source before applying any coating. Family Handyman recommends applying a penetrating waterproofing sealer first if minor moisture is present.
Colour and Finish Selection
Most concrete coatings come in gray (the universal standard), tan, and occasionally brown. Decorative colour chips scattered into the wet coat mask minor application inconsistencies and give the floor a professional look. Satin and gloss finishes show less dirt but require more frequent cleaning than flat finishes. For most utility applications, a satin gray is the optimal choice — it hides scuffs, cleans easily, and doesn’t show footprints.
Coverage Rates: Plan for More
Manufacturer coverage rates assume smooth, sealed, non-porous concrete. Old concrete, rough aggregate, and previously stained floors absorb significantly more product. Add 15–20% to your calculated volume when buying. Running short mid-application with a two-part kit is particularly damaging — you cannot pause, and visible overlap lines will form if the first pass starts to cure before the second connects.
🎯 Verdict
Pick by what the floor has to survive, not by price. A basement or utility floor: Rust-Oleum EpoxyShield Gray, self-priming and forgiving. A porch, patio or set of steps that only takes feet: KILZ Porch & Patio latex enamel, cheapest per square foot and finished in a day. A garage that parks a car: the EpoxyShield two-part kit, and nothing softer, because hot tyre pick-up will strip anything less. A slab that is already cracked and spalling: KILZ Over Armor, which rebuilds the surface instead of painting over the damage. Then follow the seven steps — the difference between a floor that peels in six months and one that lasts ten years is almost entirely prep, and mostly it is the moisture test.
Frequently Asked Questions
Do I need to etch concrete before painting?
Yes — etching is essential when learning how to paint a concrete floor that actually adheres. Acid etching opens the surface pores and creates a mechanical profile for the coating to grip. Skip etching and the coating will delaminate within months, regardless of product quality.
How long does painted concrete floor last?
With proper prep, a single-part acrylic coating lasts 3–5 years on a residential floor. A two-part epoxy on a properly etched, dry surface can last 10+ years in a residential garage. The biggest variable is moisture — ongoing moisture infiltration will fail any coating system within 1–2 years.
Can I paint over old concrete paint?
Yes, if the existing paint is firmly bonded. Test by pressing tape onto the old surface and ripping it off. If paint comes with it, strip first. If it’s stable, clean, lightly sand, and coat over it. Do not apply two-part epoxy over acrylic — the systems are incompatible.
What is the best temperature to paint a concrete floor?
Narrower than most people assume, and product-specific. Single-part acrylic floor paints generally want 50°F and up, for the concrete as well as the air. Rust-Oleum specifies 60–85°F for the EpoxyShield two-part kit. Below the minimum the coating may never reach full hardness; above it, it skins over and blisters. Read the data sheet for the product in your hand.
How do I stop concrete floor paint from peeling?
Peeling is caused by: moisture in the slab, skipping the etch step, painting over contaminated concrete, and applying topcoat before primer has cured. Follow the full 7-step process — especially moisture testing and acid etching. If a floor has already peeled, strip completely, find the moisture source, and restart from Step 1.
How long does concrete floor paint take to dry?
Depends what you bought. KILZ Porch & Patio latex enamel is touch-dry in about an hour and recoats in 4–6. Concrete coatings are slower — touch-dry in 4–8 hours, walkable in 24–72. Rust-Oleum gives the EpoxyShield kit 24 hours to foot traffic, 3 days to vehicles, and roughly 7 days to full chemical resistance. Treat the floor gently until that 7-day mark.
Can I use regular floor paint on concrete?
No — regular floor paint will not hold up on concrete. Concrete’s alkalinity and thermal movement require a product specifically formulated for it. Using standard interior floor paint on concrete results in bubbling, peeling, or discoloration within weeks.