The Best Bathroom Wall Paints for Every Finish and Humidity Level
Updated May 2026 · ThePaintly Editorial Team
Most people reach for whatever flat or eggshell paint is already in the garage. Six months later, they’re scraping black mold off the grout lines. The best paint for bathroom walls isn’t just regular latex — it needs a built-in antimicrobial shield that survives daily steam, splash, and condensation without peeling.
We reviewed the 5 most popular mold-proof interior paints sold on Amazon and compared their finishes, dry times, coverage, and real-world durability. Whether you’re updating a powder room or repainting a master bath, one of these will protect your walls for years.
Quick Picks — Best Paints for Bathroom Walls
| Pick | Product | Finish | Best For |
|---|---|---|---|
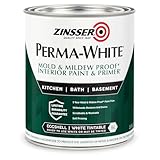
| 🥇 Best Overall | Zinsser Perma-White Eggshell | Eggshell | Balanced sheen + mold-proof |
| ✨ Best Satin | Zinsser Perma-White Satin | Satin | Mid-sheen, scrub-resistant |
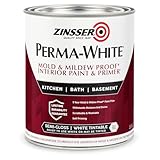
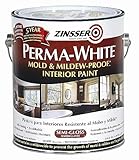
| 💧 Best for High Humidity | Zinsser Perma-White Semi-Gloss | Semi-Gloss | Steam showers, tub surrounds |
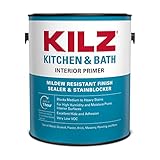
| 🔥 Best for Stains | KILZ Kitchen & Bath | Flat/Matte | Stubborn stains, odors |
| 💰 Best Value | Rust-Oleum Perma-White 2-Pack | Semi-Gloss | Multiple rooms, bulk savings |
Full Product Reviews
🔗 Related Guides
Best Mold-Resistant Bathroom Paints Best Paint for Bathroom Ceilings How to Prep Bathroom Walls Remove Old Paint with Steam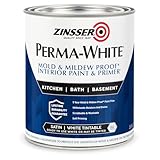
💡 Pro Tips Before You Paint
- Ventilate: Run the bathroom fan during application and for 30 minutes after each coat. This accelerates off-gassing and dry time.
- Skip the primer if using Perma-White: It’s self-priming on clean, oil-free surfaces. Adding a separate primer coat can actually reduce adhesion.
- Two thin coats beat one thick coat: Thick single coats trap solvents and peel faster. Apply thin, even layers and let each one cure fully before the next.
- Want a faster dry time? Check out these tips on drying paint faster — the same principles apply in bathrooms.
Renovation Stage: PAINT
This article covers the PAINT stage of your bathroom renovation. Surface prep and priming happen before this step. Once the paint is dry, consider a matching ceiling coat to complete the room.
🧮 Bathroom Paint Coverage Calculator

Buying Guide: What to Look For in Bathroom Wall Paint
Walking the paint aisle without a framework is how most people end up buying the wrong product. These are the four variables that matter most when choosing the best paint for bathroom walls.
1. Mold-Inhibiting Chemistry — Not Just “Mildew Resistant”
The phrase “mildew resistant” on a paint can is nearly meaningless — it usually refers only to the wet paint in the can, not the cured film on your wall. Look instead for paints that specifically advertise mold and mildew proof paint film. Zinsser Perma-White is the benchmark here, and its guarantee covers the cured film specifically. The EPA recommends controlling moisture at the source first, but a mold-inhibiting film provides the critical second line of defense.
2. Sheen Level — Match It to Your Moisture Zone
Not every wall in a bathroom sees the same humidity. A flat or eggshell finish is fine on walls opposite the shower. But the wall directly adjacent to a tub or shower stall needs a semi-gloss or gloss finish — the higher the sheen, the more water-shedding the surface. Using eggshell directly behind a shower head is one of the most common mistakes DIY painters make.
3. Self-Priming vs. Separate Primer
Modern mold-proof bathroom paints like Perma-White are self-priming on clean, properly prepped surfaces. This saves you money and time. However, if your walls have active stain bleed-through, previous water damage, or raw drywall, use a dedicated primer first. For stain-heavy surfaces, read our guide to the best mold-resistant primers before picking your topcoat.
4. Dry Time and Recoat Window
Bathroom renovations usually happen over a weekend. A paint that needs 24 hours between coats kills your schedule. The Perma-White line is touch-dry in 30 minutes and recoatable in 2 hours — the fastest cycle time of any mold-proof bathroom paint we tested. Family Handyman recommends painting bathrooms in stages — walls one morning, ceiling that afternoon — to keep the project on a single-day timeline.
How to Apply Bathroom Paint Correctly
The best paint fails on an unprepared surface. These five steps take 20 minutes and are the difference between a finish that lasts 10 years and one that peels in 10 months.
Step 1 — Remove Mildew
Mix one part bleach with three parts water. Scrub any visible mildew spots with a stiff brush. Let it sit for 10 minutes, rinse clean, and let the wall dry completely — at least 24 hours. Never paint over live mildew. Learn more in our complete bathroom wall prep guide.
Step 2 — Clean and Degrease
Soap film and body oil on walls prevent paint adhesion. Wash walls with TSP substitute (trisodium phosphate alternative) or a strong sugar soap solution. Rinse with clean water and let dry overnight.
Step 3 — Tape and Protect
Use painter’s tape on all fixtures, mirrors, and trim edges. Cover the floor with a canvas drop cloth — plastic sheets become slippery with paint drips.
Step 4 — Apply Paint in Two Thin Coats
Load a 3/8″ nap roller for smooth walls or 1/2″ nap for textured walls. Apply the first coat in a W-pattern, filling in without pressing. Let it cure the full 2 hours before the second coat. Two thin coats always outperform one thick coat.
Step 5 — Cure Before Use
Paint may be touch-dry in 30 minutes but it takes 48–72 hours to fully cure. Keep the shower and bathtub dry for at least 48 hours after the final coat. Using the shower too soon is the #1 cause of new paint peeling.
🏆 Our Verdict
For most bathrooms, Zinsser Perma-White Eggshell (B000LNYBOW) is the clear winner. It combines a genuine mold-proof film, self-priming formula, and versatile eggshell finish into one product. If your bathroom has a steam shower or jetted tub, upgrade to the Semi-Gloss version (B000C02C5O) on the walls nearest the water source. For multiple bathrooms or rental units, the Rust-Oleum 2-Pack (B002Y1M75O) delivers the lowest cost per square foot without sacrificing protection.