How to Paint PVC Pipe So It Won’t Peel or Flake
Paint peels off PVC pipe in sheets, and it usually does it within the first month. Not flakes — sheets. You can catch an edge with a fingernail and lift a six-inch strip off in one piece, still glossy on both sides. That is what failure looks like on plastic, and it happens because the paint never bonded to anything. It dried on top of the pipe like a skin. So the real question in how to paint PVC pipe is not which color you pick. It is whether the film has anything to hold onto.
PVC leaves the factory slick on purpose. It carries a mold-release residue and a hard, non-porous sheen that helps it slide out of the extruder and helps water slide through it later. Both of those qualities are hostile to paint. Standard latex and standard enamel both fail here for the same reason: they need microscopic tooth, and bare PVC has none.
The good news is that this is a fully solved problem, and it takes about fifteen minutes of prep per section. I have painted PVC for irrigation runs, exposed basement plumbing, a garage rack, and one very ambitious Halloween arch. The pipes that still look good are the ones where I scuffed and primed. The ones that failed are the ones where I was in a hurry.
What’s on this page
Why paint peels off PVC in the first place
Adhesion on porous surfaces is mostly mechanical. Wood and drywall have open structure, so paint sinks in slightly and locks itself in place. PVC has no open structure at all. There is nowhere for the paint to sink, so the bond has to be chemical instead — the primer has to soften the top layer of plastic slightly and fuse with it.
That is the whole difference between a bonding primer and a regular one. A regular primer is a stickier paint. A bonding primer contains solvents and resins engineered to bite into slick substrates and form a chemical bridge that the topcoat can grab. Skip that bridge and you have two separate layers sitting next to each other, held together by nothing but surface tension. The first temperature swing separates them.
Sanding matters for a second reason people miss: it removes the mold-release residue that scrubbing alone leaves behind. You are not trying to reshape the pipe. You are trying to kill the shine and take the slick film off with it.
Understand that one mechanism and the rest of how to paint PVC pipe becomes procedural. Every step in the sequence below is either creating that bridge or protecting it.
Quick picks at a glance
| Product | Role in the job | Best for |
|---|---|---|
| Rust-Oleum Specialty Plastic Primer | Bonding primer, sprayed | Bare white PVC you plan to topcoat any color |
| Krylon Fusion All-In-One | Paint and primer in one | Small runs where you want one product, not two |
| Dupli-Color Adhesion Promoter | Chemical bridge, clear | Fittings and elbows you cannot sand evenly |
| Krylon Fusion All-In-One Clear | Clear topcoat | Outdoor pipe that takes direct sun |
The 4 products that do the work
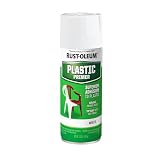
Rust-Oleum Specialty Plastic Primer Spray
This is a solvent-based bonding primer built specifically for rigid plastics, and the mechanism is worth understanding before you use it. The carrier solvent briefly softens the very top of the PVC surface, so the resin cures partially into the plastic rather than only on top of it. That is why the resulting film resists peeling instead of lifting at the edges. It dries to a slightly chalky, matte surface — that dullness is deliberate, and it is exactly the tooth your topcoat needs.
The limitation is real and worth planning around: it comes in white and grey, and it does not level. If you spray it heavy it will run on a vertical pipe and the run will still be there under your finish coat, visible as a raised line. On a 2-inch drain stack I sprayed one pass too close and got a sag about four inches long. Sanding it back flat cost me more time than the whole priming step would have.
- Genuine chemical bond to rigid PVC
- Leaves ideal matte tooth for any topcoat
- Cheap relative to the failure it prevents
- Runs easily on vertical pipe
- Strong solvent odor, needs real ventilation
- Awkward 30-minute-or-48-hour recoat rule
Via Amazon.com
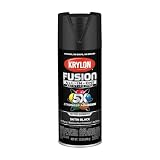
Krylon Fusion All-In-One
Fusion is the one product in this list engineered to be both the bond and the color. Its resin system is formulated to fuse directly with plastic substrates rather than sit on them, which is why it and Rust-Oleum 2X are the two names that come up constantly when the surface is PVC or hard vinyl. In practice it means fewer steps and one fewer recoat window to babysit.
Here is the honest limitation, and it is the reason I still keep separate primer on the shelf. Fusion tolerates a light scuff but it does not forgive a dirty pipe. I painted a section of irrigation line that had been sitting in a yard for two seasons, gave it a quick wipe, and skipped the sanding because the can says you can. Eleven months later it was fine on the clean lengths and lifting on the two spots where hard-water residue had dried. It bonds to PVC beautifully. It does not bond to whatever is on the PVC.
- Bonds to PVC with no separate primer
- Wide color range including satin and gloss
- Fast handling time for a plastic-rated paint
- Zero tolerance for surface contamination
- Full cure takes about a week
- Thin build — needs three coats for deep color
Via Amazon.com
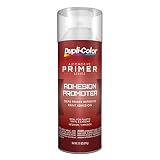
Dupli-Color Adhesion Promoter (Clear)
An adhesion promoter is not a primer and the difference matters here. It contains almost no pigment and builds almost no film — it is a solvent carrier that etches the plastic chemically and flashes off, leaving a molecularly receptive surface behind. That is precisely what you want on threaded fittings, tees, and elbows, where sandpaper cannot reach into the curves and the shine survives your best effort.
Its weakness is that it does nothing on its own. Spray it and walk away and you have wasted the can — you have a treated surface with no protection on it, and the window closes. It has to be followed by primer or paint while it is still chemically active, which on most days means within about ten minutes. Treat it as step one of a two-step move, never as a shortcut that replaces one.
- Reaches curves and threads sandpaper cannot
- Adds essentially no film thickness
- Works under both solvent and water-based topcoats
- Useless without an immediate follow-up coat
- Very short active window
- Clear, so you cannot see your coverage
Via Amazon.com
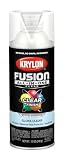
Krylon Fusion All-In-One Clear
Outdoors, the thing that kills a painted pipe is not adhesion — it is ultraviolet light chalking the color coat until it powders off under your thumb. A clear topcoat with UV resistance takes that degradation on itself and sacrifices its own surface instead of your color. It also seals the seam between your color coat and the world, which on a horizontal pipe run means fewer places for standing water to work in.
The limitation to be blunt about: clear coats amplify whatever is underneath them. Any brush mark, any bit of grit that landed in the color coat, any thin spot — the clear adds gloss and gloss reveals texture. On a pipe I had rushed, the clear coat made two dust nibs look like pebbles. If the color coat is not clean, fix it before you seal it.
- Takes the UV hit instead of your color coat
- Seals horizontal runs against standing water
- Same Fusion resin family, so it bonds predictably
- Magnifies every flaw underneath
- Adds a full extra cure cycle to the job
- Gloss version shows dust badly
Via Amazon.com
Pro tips from someone who has stripped a failed pipe
None of these are in the instructions on the can, and all of them changed how I paint round stock. This is the part of how to paint PVC pipe that you only learn by doing it badly first.
Two thin coats always beat one thick coat. Always. On round stock this is not a preference, it is physics — paint wants to sag around a curve, and a heavy pass will pool along the bottom of the pipe where you cannot see it until it dries into a ridge.
Rotate the pipe, do not walk around it. Lay it on two scrap blocks and turn it a quarter turn between passes. You get even coverage without changing your body position, and you stop fighting the overspray drifting back onto wet paint.
Spray a tack coat first on vertical pipe. A light mist, five minutes of set, then your real coat. It gives the wet paint something slightly grabby to sit on and it cuts runs dramatically. Family Handyman recommends the same tack-coat technique plus 50 percent overlap between passes, which is the other half of an even finish.
Do not sand the socket ends you still need to glue. Solvent cement needs the original wall thickness and a clean interior. Mask the last inch of any joint you have not cemented yet.
Check the can date before you trust it. Aerosol propellant and resin both age, and old bonding primer can go stringy in the can without looking different. If it has been in the garage for years, see how long paint actually keeps before you bet a whole project on it.
Renovation Stage: PRIME. Painting PVC pipe lives almost entirely in the priming stage. The color coat is the easy part and takes twenty minutes. Everything that determines whether the finish survives — degreasing, scuffing, and choosing a bonding product — happens before any color touches the plastic.
Spray can coverage calculator
Round pipe eats more paint than people expect, because you are painting a full cylinder, not a flat face. Enter your run below.

How to paint PVC pipe: the five steps
Every step below exists to solve one specific failure I have watched happen. None of them are optional if you want the finish to survive a full seasonal cycle. Read the whole sequence before you start, because two of the steps have timing windows that will punish you if you discover them halfway through.
Step 1 — Degrease before you touch sandpaper
Wash the pipe with warm water and dish soap, then rinse and dry it completely. If there is oil, marker, or hard-water scale, follow with a wipe of isopropyl alcohol on a clean rag. Do this first. Sanding a greasy pipe grinds the grease into the scratches you just made, and now the contamination is deeper than any solvent will reach.
Step 2 — Scuff to 220 grit until the shine is gone
Fold 220-grit paper around the pipe and work along its length, not around it. You are not removing material. You want a uniform dull grey with no glossy patches left, especially along the printed stamp line, where the ink is slicker than the plastic. A sanding sponge handles curves better than flat paper and gets into the shoulder of a fitting.
Step 3 — Wipe the dust off, then bond
Tack the sanding dust off with a barely damp cloth and let it flash dry. Then apply your bonding product: plastic primer for straight runs, adhesion promoter for fitting-heavy assemblies. This is the step that decides the outcome. Two light passes, eight to ten inches from the surface, each one just enough to wet the plastic without pooling.
Step 4 — Color in thin coats, respecting the recoat window
Apply the color 15 to 30 minutes after the primer if you are working inside the fast window, or wait the full 48 hours. Keep the can moving before you press the tip and keep passes overlapping about halfway. Three thin coats look better than two medium ones on round stock, every time. If you are brushing latex instead of spraying, thinning slightly gives you a flatter film on a curve — here is how to thin latex properly without wrecking the binder.
Step 5 — Cure before you handle, seal if it lives outside
Let it sit a week before you clamp, thread, or bury it. Handling hardness and film hardness are not the same thing, and a hose clamp on day two will emboss the finish permanently. Outdoor pipe gets a UV clear coat at this stage. Indoor pipe does not need it.
When NOT to paint PVC pipe at all
There are three situations where the answer to how to paint PVC pipe is simply: don’t.
Pipe carrying hot water. Repeated thermal cycling expands and contracts the wall enough to shear a paint film off over time, and no primer changes that. If it runs above roughly 100°F, leave it bare or insulate it instead.
Pipe that still needs to be cemented. Solvent weld joints have to bond plastic to plastic. Paint inside a socket is a release agent, and the joint will fail under pressure. Assemble first, paint second.
Pipe with existing paint that is already lifting. Painting over a failing film gets you a thicker failing film. Strip it back to bare plastic or you are just adding weight to something already letting go. Sunlight-degraded PVC that has gone chalky and brittle is the same story — the surface itself is failing, and paint cannot hold a substrate together.
One safety note that is not optional: bonding primers and adhesion promoters are strong-solvent products, and the vapors they release are exactly the compounds the EPA flags for indoor air quality. Spray outdoors or in a genuinely ventilated space with a respirator, not a dust mask.
Prep checklist, in order
Print this or keep it on your phone. If you only remember one thing about how to paint PVC pipe, remember that steps one through six all happen before any color goes on — and they are the ones that decide whether you are doing this again next spring.
| # | Step | Why it matters |
|---|---|---|
| 1 | Wash with soap and water, dry fully | Removes mold-release residue and dirt before sanding drives it in |
| 2 | Wipe with isopropyl alcohol if oily | Handles grease and marker that soap leaves behind |
| 3 | Scuff with 220 grit until uniformly dull | Kills the factory sheen and gives mechanical tooth |
| 4 | Mask any un-cemented socket ends | Keeps paint out of joints that still need to be glued |
| 5 | Remove sanding dust with a damp cloth | Dust under primer becomes grit in your finish |
| 6 | Apply bonding primer or adhesion promoter | Creates the chemical bridge PVC cannot provide itself |
| 7 | Two to three thin color coats | Prevents sags and runs on a curved surface |
| 8 | Cure seven days before handling | Film hardness lags handling hardness by about a week |
If you want the surface-by-surface version of this logic, the same bonding rules govern paint choice on plastic generally, and the aerosol side of it is covered in more depth in our guide to spray paint for plastic. For large exterior plastic surfaces rather than pipe, painting vinyl siding adds a heat-absorption rule that pipe does not have.
The verdict
Prep matters more than the brand. I mean that literally here: a mid-priced enamel over a properly scuffed and primed pipe will outlast an expensive one sprayed on bare plastic, and it is not close. The product choices in this article are good, but they are the second-most important decision you make.
If you want the shortest reliable path through how to paint PVC pipe, it is this: degrease, scuff to 220, hit it with Rust-Oleum Specialty Plastic Primer, then two thin coats of your color inside the 30-minute window. If the run is short and the pipe is genuinely new, Krylon Fusion All-In-One collapses that into one product with almost no loss. Outdoors, add the clear coat — UV is the failure mode you cannot prep your way around.
Leftover aerosol and half-used primer should not go in the household trash. Here is how to dispose of leftover paint responsibly when the job is done.
FAQ
Do you have to sand PVC pipe before painting?
For anything you want to last, yes. A 220-grit scuff removes the factory sheen and the mold-release residue in one pass. Paint-and-primer products like Krylon Fusion are rated for unsanded plastic and will hold on new, clean pipe — but on pipe that has been outdoors or handled, skipping the scuff is the most common reason it peels.
Why does paint peel off PVC pipe?
Because it never bonded. PVC is non-porous, so ordinary paint has no tooth to grip and no chemical affinity for the plastic. It dries into a film sitting on top of the pipe, and the first temperature swing or knock separates them. A bonding primer fixes this by chemically fusing with the plastic surface itself.
What primer sticks to PVC pipe?
A bonding primer rated for rigid plastic — Rust-Oleum Specialty Plastic Primer is the common choice. For fittings and elbows you cannot sand evenly, an adhesion promoter like Dupli-Color works better because it etches chemically instead of relying on scratches. Standard drywall or wood primer will not hold on PVC.
Can you paint PVC pipe without primer?
Only with a paint formulated to fuse with plastic, and only on a clean surface. Krylon Fusion All-In-One and Rust-Oleum 2X are built for it. Regular spray enamel or latex without a bonding step will fail, usually within the first month.
How long does paint need to cure on PVC pipe?
Handling hardness comes in about an hour. Full film hardness takes roughly seven days. Those are different things — a clamp, a hose, or a threaded connection applied on day two will dent a finish that feels completely dry to the touch.
Can you paint PVC pipe that carries water?
Cold water, yes — paint the exterior only and keep it out of any joint you still need to solvent-weld. Hot water lines are a different answer: the thermal cycling flexes the pipe wall enough to shear the film off over time, and there is no primer that prevents it.
Does painted PVC pipe hold up outdoors?
It does, if you seal it. The adhesion problem is solved by the primer; the outdoor problem is ultraviolet light chalking the color coat until it powders. A UV-resistant clear topcoat takes that degradation instead of your color and roughly doubles how long the finish looks new.