Does Plasti Dip Really Come Off Clean, or Are You Peeling It for a Week?
Updated: September 2026 | By Sophie Ulman
Get the coat count wrong and you don’t peel a sheet off your wheel — you pick black confetti out of the lug recesses with a trim tool for three hours. That is the failure mode nobody warns you about. Plasti Dip is sold as the reversible finish, the one you can change your mind about, and it genuinely is. But reversibility is not a property of the can. It is a property of how thick you sprayed it, and that decision is made months before you ever try to remove it.
I dipped a set of five-spoke wheels with three coats once, because I ran out of cans on a Sunday and didn’t want to drive back to the store. Eight months later it took me an entire Saturday afternoon to get it off — flake by flake, out of every lug hole. Here’s what I learned: the cheapest part of a dip job is the extra can you almost didn’t buy.
Does Plasti Dip really come off clean?
Yes — and the qualifier matters more than the answer. Sprayed thick enough, the cured film behaves like a sheet of vinyl. You lift an edge with a fingernail, get a grip, and pull. On a flat hood or a smooth-face wheel it comes away in one or two large pieces and leaves nothing behind.
Sprayed thin, the same product behaves like a completely different material. The film never builds enough internal strength to hold together under tension, so instead of stretching off the surface it tears. You get shreds. And the thinner it is, the harder it grips into surface texture, which is why thin coats leave a peppered residue in exactly the places you can’t reach.
So the honest answer is that Plasti Dip removal isn’t really a removal question at all. It’s an application question you answered months earlier. Two variables decide it: how many coats you sprayed, and how complicated the shape underneath is.
The coat count that decides everything
The manufacturer’s own guidance puts the minimum at four to five coats, with five to seven as the optimum range. That is not a marketing number designed to sell you extra cans — it is the point at which the film gets thick enough to survive being pulled off in one piece.
Community experience lines up with it, and sharpens it. Two coats on a flat panel will still peel, because there is nothing for the film to catch on. The same two coats on a wheel with spoke crevices and lug recesses will not — you need five to seven there, and people who have done a lot of wheels tend to say six full-coverage coats is where easy removal actually starts.
| Coats sprayed | Flat panel or smooth wheel face | Spoked or crevice-heavy wheel |
|---|---|---|
| 1–2 | Peels, but in small pieces | Shreds — expect residue in recesses |
| 3–4 | Peels in large pieces | Tears at every edge and crevice |
| 5–7 | Peels as a sheet | Peels cleanly — this is the target |
| 8+ | Peels as a sheet, slightly softer edge detail | Peels as a sheet; worth it on winter wheels |
There’s a second reason to hit the higher end of the range on wheels. A film that peels in one sheet also survives brake dust, wheel cleaner and a pressure washer for longer. Thickness buys you both ends of the job at once.
Pro tips from the driveway, not the can
Spray one deliberate tack coat, then build. The first pass should look almost transparent. Every pass after that goes on wet enough to level. If your first coat is heavy you get runs in the spoke valleys and those are the spots that tear first.
Build a thick pull tab on purpose. Before your final coat, hit the inner lip of the wheel with two extra passes. That’s where you’ll start the peel a year from now, and a thick edge is the difference between a clean grip and picking at it with a fingernail.
Two thin coats always beat one thick coat — and on dip, six thin coats beat three thick ones for the same reason. Thick coats skin over and stay soft underneath, and a soft film tears.
Warm the cans. Cold aerosol sprays coarse and lays down a rough, low-strength film. A bucket of warm tap water for ten minutes changes the atomisation more than any technique adjustment you can make.
Peel predictor: will yours come off in sheets?
Based on the manufacturer’s 4–7 coat guidance and what actually happens on complex wheels. Answer honestly about the coats — most people undercount.

If dip is wrong for your wheels: what to spray instead
Here is the part most articles skip. On a genuinely intricate wheel — mesh, thin multi-spoke, deep recesses behind the lugs — a clean peel is possible but it is a lot of cans and a lot of patience. If you already know you want the colour to stay, dipping is the long way round to a finish you’ll eventually strip anyway. Wheel paint is a permanent film and it doesn’t ask you to plan the removal.
These four are the wheel-specific products I keep coming back to, and they cover the four situations that actually come up. If you want the wider comparison, the full breakdown lives in our guides to the best paint for car rims and the best wheel paint overall.

RAPTOR 1K Wheel Paint, Satin Black
This is a single-component urethane rather than a straight acrylic lacquer, which is the reason it belongs on a wheel that gets abused. Urethane cures to a harder, more chemically cross-linked film, so wheel cleaner and brake dust sit on the surface instead of softening it. On a mesh or multi-spoke wheel — the exact geometry where dip refuses to peel cleanly — that hardness is what lets you scrub the recesses without cutting through the finish.
The honest limitation is atomisation. It lays down heavier than a thin lacquer, so if you crowd the can into a spoke valley you’ll get a run there and nowhere else. Keep the can moving across the valley rather than pausing in it, and accept that a wheel this shape takes longer to spray than a smooth face.
Pros
- Hard urethane film survives wheel cleaner
- Satin hides spoke-edge imperfections
- No separate clear needed for most uses
Cons
- Runs easily if you pause in a valley
- Long true cure before road use
- Colour range is narrow
Via Amazon.com
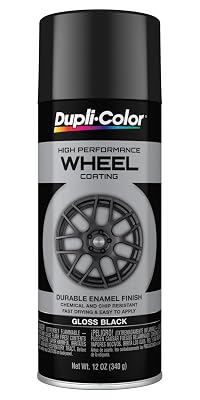
Dupli-Color HWP108 High Performance Wheel Paint (Gloss Black)
Dupli-Color’s wheel line is formulated with a higher-temperature binder than general-purpose spray enamel, which matters because a wheel sits next to a brake rotor that regularly runs far hotter than anything else you’d spray at home. Ordinary enamel softens and prints tyre-machine marks under that heat cycling. This one holds its surface hardness through it.
Where it disappointed me was coverage over a dark repair. Sprayed straight over a sanded curb-rash patch it took four coats before the patch stopped ghosting through, which is more than the can suggests. Prime the repair first and it’s a two-coat job. That’s a prep failure on my part, not a product fault, but it’s worth knowing before you buy one can and assume it’s enough.
Pros
- Heat-tolerant binder built for wheels
- Fine spray pattern, easy to control
- Widely stocked, easy to colour-match later
Cons
- Needs primer over any bare repair
- Gloss highlights surface defects
- One can rarely does a full wheel properly
Via Amazon.com

NADAMOO Aluminum Wheel Spray Paint (Semi-Gloss Black, 4-Pack)
Buying four cans together solves a specific problem that catches people out on wheel jobs: batch variation. Aerosol pigment loading can shift slightly between production batches, and semi-gloss shows that shift more than either flat or full gloss. Four cans from one pack are one batch, so wheel four matches wheel one.
The trade-off is that a four-pack commits you before you’ve sprayed a test panel. Semi-gloss is the safest wheel sheen — it hides more than gloss and stays cleaner-looking than flat — but if you were undecided between finishes, buy one can first. The limitation isn’t the paint, it’s the commitment.
Pros
- One batch across all four wheels
- Semi-gloss hides spoke imperfections
- Enough volume to do the job properly
Cons
- Commits you before a test spray
- Less common brand to colour-match later
- Overkill for a single wheel
Via Amazon.com

Rust-Oleum High Performance Wheel Spray Paint (Clear Coat)
A clear coat over wheel paint isn’t cosmetic insurance, it’s chemical insurance. Most wheel cleaners are alkaline or acidic by design, because that’s how they dissolve baked-on brake dust. A clear layer takes that chemical hit so the pigmented coat underneath never sees it, which is why a cleared wheel still looks right after two winters and an uncleared one goes chalky.
It also permanently ends the reversibility conversation. Once you clear over a wheel you are not peeling anything off it — you’re stripping or sanding. If you’re still deciding between a peelable finish and a permanent one, don’t reach for this yet. Once it’s on, the decision is made.
Pros
- Shields colour from alkaline wheel cleaner
- Deepens gloss noticeably on dark colours
- Same wheel-rated binder family as the colour
Cons
- Removes any chance of peeling it off later
- Blushes if sprayed in high humidity
- Needs a scuff if the recoat window closes
Via Amazon.com
How to choose between peelable and permanent
Ask how long you actually want the colour
A properly applied dip job is rated three to five years in its standard form, and seven to ten years in the UV-stabilised version. If your honest answer is “until I get bored,” peelable wins easily. If the answer is “this is the colour now,” you’re paying a durability tax for an escape hatch you’ll never use.
Look at the wheel, not the car
Geometry decides more than anything else here. Flat and simple peels off at four coats. Mesh, thin multi-spoke and deep lug recesses need five to seven and still fight you at the edges. Count the crevices honestly before you count cans — that’s the real input.
Colour changes the maths
Bright yellows, oranges, greens, pinks and fluorescents are the shades that show UV fading first. If you want one of those, either commit to the UV-stabilised route or accept it as a one-season look. Prep matters more than the brand you buy, but with these colours the chemistry genuinely does set a ceiling.
Be honest about your patience on removal day
This is the one nobody weighs properly. Peeling a well-sprayed hood takes ten minutes. Rescuing an under-sprayed multi-spoke wheel takes an afternoon and a solvent. The Family Handyman guide to refinishing wheels walks through the permanent route — two coats of primer, three of colour, two of clear — and it’s a fair benchmark for the effort either path costs you.
When not to dip at all
When you’re not going to spray five coats. This is the whole article in one line. Three coats on a complex wheel is the worst of both worlds — it isn’t durable enough to be permanent and it isn’t thick enough to peel. If the budget only covers three coats, paint it instead.
On brake calipers or anything that gets genuinely hot. A peelable rubber film is not a high-temperature coating. Calipers need caliper-rated paint, full stop.
Over a surface that isn’t fully degreased. The film bonds to whatever is on top — wax, tyre shine, old wheel cleaner residue. It’ll lift early in patches and peel unevenly everywhere else.
Indoors or in a closed garage. These are solvent-carried aerosols. The EPA notes that indoor VOC concentrations run up to ten times higher than outdoors, and a multi-coat spray session in a closed space is exactly how you get there. Spray outside or with real cross-ventilation.
Prep steps that decide the peel
Everything that goes wrong on removal day was decided in these four steps.
1. Degrease properly, not casually. The official prep is an anti-static wax and grease remover, or isopropyl alcohol on a clean lint-free cloth. Not soapy water, not a quick detailer — those leave exactly the residues you’re trying to strip. Any surface still holding wax will let go early.
2. Mask more than feels necessary. Overspray on tyre sidewalls doesn’t peel like it does on smooth metal, because rubber texture grabs the thin film. Mask the tyre, mask the caliper, mask the brake disc face.
3. Build a deliberate thick edge. Two extra passes on the inner lip before your last coat. That’s your grip point on removal day and it costs you thirty seconds now.
4. Count coats out loud. Genuinely. People undercount by one or two because a light pass doesn’t feel like a coat. Aim for five to seven full-coverage coats on a wheel and let the last one flash off properly before you touch anything.
If overspray does land where it shouldn’t, plastic trim and bumpers are their own problem — our notes on painting plastic bumpers and choosing a primer for plastic cover the surfaces where a solvent clean-up can do more damage than the overspray did.
What to do when it won’t peel
If you’re already past the point of prevention, there are two routes. A dedicated dip dissolver softens the film so it releases in larger pieces rather than flakes — this is the intended product and the least aggressive one. Brake cleaner also works on stubborn residue, but it’s far harsher and will attack finishes it lands on, so keep it off painted bodywork and plastic trim entirely.
Work in sections, give the solvent time to actually penetrate rather than scrubbing immediately, and use a plastic trim tool instead of anything metal. If the residue is sitting on painted plastic, be especially careful — a clear coat on plastic is thinner than you think and solvent will haze it.
The verdict
Plasti Dip comes off clean — but only above five coats, and only if the shape underneath is simple enough to let a sheet release. On a hood, a mirror cap or a smooth wheel face, it does exactly what it promises. On a multi-spoke wheel with deep lug recesses sprayed at three coats, it doesn’t peel; it disintegrates, and you lose an afternoon.
So decide at the can-buying stage, not the removal stage. Committing to the colour? Paint it and clear it. Keeping your options open? Buy the extra can, spray five to seven coats, build a thick edge on the inner lip, and the escape hatch will actually be there when you want it.
Plasti Dip FAQ
Does Plasti Dip peel off clean?
Yes, if it was sprayed thick enough. At five to seven full-coverage coats it lifts as a sheet like vinyl. At one or two coats it tears into small pieces and leaves residue in any texture or recess.
How many coats of Plasti Dip do you need?
The manufacturer suggests a minimum of four to five coats, with five to seven as the optimum. Wheels with crevices and winter wheels benefit from a couple more on top of that.
How long does Plasti Dip last on wheels?
The standard non-UV product is rated roughly three to five years, and the UV-stabilised version seven to ten. Coat count and spray technique move that number more than anything else, and so does how you clean the wheels afterwards.
What removes Plasti Dip that won’t peel?
A dedicated dip dissolver first — it softens the film so it releases in larger pieces. Brake cleaner works on stubborn residue but is much harsher and will attack finishes it contacts, so keep it away from bodywork and plastic trim.
Does Plasti Dip fade in the sun?
Bright yellows, oranges, greens, pinks and fluorescents can show fading after prolonged UV exposure. A protective dip coat over the top helps, and the UV-stabilised version is rated considerably longer than the standard one.
How should you prep wheels before dipping?
Use an anti-static wax and grease remover, or isopropyl alcohol on a clean lint-free cloth. The goal is removing every trace of grease, oil, wax and old cleaner residue, because anything left behind stops the film bonding evenly.
Is dipping or painting better for wheels?
Dipping wins if you genuinely intend to change your mind, and if you’ll commit to five or more coats. Painting wins on durability, on intricate wheels, and any time the colour is a decision rather than an experiment.