Paint for Plastic Bumpers: What Bonds and What Flakes Off
Updated: July 2026 | By Sophie Ulman
Get the paint for plastic bumpers wrong and you will see it within a month: fine cracks along every flex point, then flaking at the corners where the bumper takes the most movement. A bumper is not a fender. It bends when you nudge a curb, it swells in July heat, and it shrinks on a cold morning. Regular spray paint is rigid, so it splits the second the plastic moves underneath it. The right paint for plastic bumpers flexes with the panel instead of fighting it.
I have refinished more scuffed bumpers than I can count, and the pattern is always the same. The people who skip the flex step and the adhesion promoter are the ones repainting six months later. So this guide is built around one question: will the finish still be intact after a full year of curb taps, car washes, and seasonal swings? Below are the five products I reach for, plus the prep that decides whether any of them hold.
Quick picks at a glance
| Product | Best for | Type | Stage |
|---|---|---|---|
| Dupli-Color Trim & Bumper | Restoring factory black trim and bumpers | Flexible aerosol color | PAINT |
| SEM 39103 Bumper Coater | Body-shop-grade flexibility | Flexible aerosol coating | PAINT |
| Dupli-Color FB106 Flexible Bumper Coating | Priming before color-match paint | Flexible primer-coat | PRIME |
| Rust-Oleum 251572 Adhesion Promoter | Stopping peel on slick plastic | Clear promoter | PREP |
| Rust-Oleum 286793 Bonding Primer | Bare or sanded plastic | Bonding primer | PRIME |
The 5 best paint and prep picks for plastic bumpers
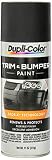
Dupli-Color Trim & Bumper Paint
This is a flexible coating built specifically for thermoplastic and polyurethane bumpers, which is exactly why it survives movement that cracks ordinary enamel. The binder stays elastic after it cures, so when the panel flexes the film stretches with it instead of shattering. Dupli-Color also loads it with UV blockers under the Fade-X name, and that matters more than people think, because sun is what turns a repaint chalky and gray by the second summer.
Where it shines is factory-look black trim and bumper cladding. The first time I used it on a faded truck bumper, I sprayed one heavy coat to save time and got a patchy, mottled finish. I stripped it and did it right: two thin coats, ten minutes apart. Night and day. The honest limitation is color range. This is a trim-restoration product, not a body-color match, so if your bumper is painted the same red as the car, this is not your answer.
- Genuinely flexible on real bumper plastic
- UV package resists fade and chalking
- Dries to a clean satin factory look
- Limited to trim colors, not body-match
- Needs light scuffing to grip glossy plastic
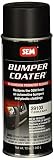
SEM 39103 Flexible Bumper Coater (Black)
SEM is what a lot of collision shops actually spray, and the reason is the resin. It is engineered to stay flexible even in thin films, so it moves with polypropylene and TPO bumpers that shrug off cheaper coatings. It also lays down a slight texture that matches the grained finish of OEM cladding, which is the detail that makes a repair invisible instead of obviously repainted.
I keep a can of this for cladding and lower valances that take stone chips. What painters on the automotive forums point out, and I have seen the same, is that it stays soft longer than hardware-store paint, so you need real cure time before you handle the panel. Rush it and you will leave a fingerprint. Give it the day, and it grips like it grew there. The trade-off is that it comes mainly in black textures, not gloss body colors.
- Body-shop-level durability and flex
- Texture matches OEM grained cladding
- Excellent adhesion on tough polyolefin plastic
- Longer cure time before handling
- Mostly black textured finishes
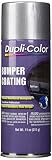
Dupli-Color FB106 Flexible Bumper Coating (Gray)
Think of this as the flexible foundation under a body-color repair. It is a sandable, elastic coat that gives your topcoat something that bends the same way the bumper does. When you plan to spray a color-match paint over the top, this gray coating stops the classic failure where a rigid primer cracks and telegraphs those cracks straight up through your finish.
I reach for it whenever a bumper needs to end up body color rather than black. Lay it over an adhesion promoter, scuff it lightly, then shoot your color. The honest catch is that this is a middle-of-the-system product, not a one-and-done. On its own it is a primer gray, so it only earns its keep as part of a full flexible stack. Skip it under body paint on a bumper and you are gambling on cracks.
- Elastic base that protects the topcoat
- Sands smooth for a level color coat
- Pairs cleanly with color-match aerosols
- Not a finish color on its own
- Needs a promoter under it on slick plastic
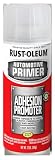
Rust-Oleum 251572 Automotive Adhesion Promoter
This clear promoter is the single cheapest insurance you can buy for paint for plastic bumpers. Raw automotive plastic, especially polyolefin, is so slick that paint beads and peels off in sheets. The promoter chemically etches that surface at a level you cannot see, giving your primer or color a grip it would never get on its own. It flashes dry in about ten minutes, so it barely adds time.
I treat it as non-negotiable on any bare or glossy bumper. Two light passes, then paint within the recoat window on the can. Miss that window and the promoter loses its bite, so do not spray it and walk away for the afternoon. The limitation is obvious but worth stating: it is a prep coat, not a color. It does nothing you can see, which is exactly why beginners skip it and then wonder why their finish sheets off.
- Dramatically cuts peeling on bare plastic
- Flashes dry in about 10 minutes
- Works under most bumper primers and colors
- Must recoat within the can window
- Invisible, so easy to forget
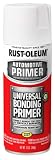
Rust-Oleum 286793 Universal Bonding Primer
When a bumper has been sanded to bare, dull plastic, a bonding primer gives your color a uniform, gripping surface across patched and untouched areas alike. This one bonds to hard-to-coat surfaces without a separate etch step in many cases, which simplifies the stack for a straightforward repair. It levels minor scuffs and sanding marks so your topcoat reads smooth rather than blotchy.
I lean on it when a repair spans filler, sanded plastic, and old paint, because it unifies all three into one predictable base. The first time I skipped a bonding primer on a patched bumper, the color flashed differently over each surface and looked like a map. Never again. Its limit is that on very glossy, untouched polyolefin I still lay the clear promoter first. Belt and suspenders on bumper plastic beats a redo.
- Unifies mixed repair surfaces
- Grips hard-to-coat plastic
- Levels light sanding marks
- Still want a promoter on slick polyolefin
- Flat white base needs a color topcoat
Two thin coats always beat one thick coat. Always. A heavy pass on a bumper traps solvent underneath, and that soft layer is what lets the finish peel later. Wipe the whole panel with a plastic-safe prep cleaner before you touch sandpaper, because rubbing dirt in just grinds contamination deeper. Warm the can in a bucket of warm water for a few minutes in cold weather so the paint atomizes fine instead of spitting. And keep the panel moving off the car if you can: a bumper laid flat on sawhorses gets even coverage that vertical spraying never matches.

How to choose paint for plastic bumpers
The choice comes down to three questions: is the bumper black trim or body color, is the plastic bare or already painted, and how much flex does the panel see? Answer those honestly and the right paint for plastic bumpers falls out quickly. Guessing is what leads to a redo.
Flexibility is the whole game
Bumpers are engineered to absorb impact, so they move. Any paint for plastic bumpers has to move with them. Look for the words flexible, elastomeric, or bumper coater on the label, and be suspicious of general-purpose spray paint that claims to work on everything. If a can does not mention flex, it will crack on a bumper. That is the mistake I see most often.
Match the paint to the plastic type
Most bumpers are polypropylene, TPO, or polyurethane. The first two are slick, low-energy plastics that reject paint unless you use an adhesion promoter first. This Old House and the DIY guides at Family Handyman both stress the same point: on automotive plastic, surface prep drives adhesion more than the color you pick. Prep beats product on a bumper, every time.
Black trim versus body color
If you are restoring faded black cladding, a dedicated trim-and-bumper aerosol is the fast, clean answer. If the bumper is painted your car color, you need a flexible primer plus a color-match topcoat and a flexible clear. Those are two different jobs, and buying the wrong one is the number one reason people repaint twice. If you also work on other trim, our guides on paint for car interior plastic and the best spray paint for plastic cover the softer and rigid plastics respectively.
Do not use regular hardware-store spray enamel on a flexible bumper, full stop. It has no flex agent, so it splits along every stress line the first time the panel bends or the temperature swings. It also has no way to grip raw polyolefin, so even where it does not crack, it peels. If the only can you have says nothing about plastic, flex, or bumpers, put it down. The same goes for painting over a bumper that is already cracking, oily, or peeling: strip and clean it first, or your new finish inherits every flaw underneath. For old finishes that must come off, see the best paint remover options and use a plastic-safe method.
Prep steps that decide everything
Durability on a bumper is roughly half product and half preparation. Skip these and the best paint for plastic bumpers on the market will still fail.
Start by washing the panel with soap and water, then a plastic-safe prep solvent to pull off wax, road film, and silicone. Scuff the surface with a gray scuff pad or fine sandpaper so the coating has some tooth. Wipe again with the prep cleaner and let it flash off. On bare or glossy plastic, lay two light passes of adhesion promoter and stay inside the recoat window. Then prime if you are going body color, and finally spray two thin color coats with full flash time between them. If you spray other automotive parts, the same discipline shows up in our wheel paint and chrome spray paint guides. For broader plastic projects, the best paint for plastic roundup is worth a read. The EPA also has guidance on safe solvent handling and disposal that is worth two minutes before you start spraying.
If the bumper is body colour, the can is the problem
Everything above is an aerosol, and on black cladding an aerosol is genuinely the right call. Body colour is where cans run out of road. A bumper is a wide, curved, continuous panel, and a rattle can gives you roughly eight seconds of usable fan before the tip starts to spit — which means you are blending wet edges across a metre of curve with a tool that cannot hold a steady film. That is why spray-canned bumpers so often read a shade off from the fenders in daylight.
A gravity-feed gun fixes the two things that actually cause the mismatch: a consistent film thickness, and a fan wide enough to cross the panel in one pass. It also lets you shoot the adhesion promoter, the flex primer and the colour through the same set-up, which is how the stack ends up as one bonded film instead of three sprayed layers.
TCP Global Professional HVLP Spray Gun, 1.3 mm Gravity Feed with 1-Litre Cup and Air Regulator
This is the full-size gun rather than a touch-up gun: a 1.3 mm stainless needle and nozzle set, a one-litre aluminium cup, and a micrometer air regulator with a gauge that mounts at the gun inlet. The 1.3 mm tip is the standard size for basecoat and clear, both of which are light-to-medium viscosity — which is exactly what a flex-additive bumper colour is once it is reduced.
The regulator is the part that earns the money. Bumper colour goes wrong when the film thickness drifts, and film thickness drifts when pressure drifts as the compressor cycles. A gauge at the gun means you set a number, write it down, and shoot the fenders the same way next week when you blend the repair in.
- Consistent film, which is what makes a bumper match the fenders
- Shoots promoter, flex primer and colour through one set-up
- Stainless needle and nozzle, so reducer will not pit it
- Wants roughly 4.2 to 7.1 CFM, more than a pancake compressor holds
- You have to reduce and strain every cup
- Total overkill for black trim restoration
When not to buy it: if your bumper is black textured cladding, close this section and buy the Dupli-Color. The gun does nothing for you there and you will not open the box twice. And price your compressor before you price the gun — on this one the compressor is the expensive half.
When NOT to paint a plastic bumper yourself
Skip the rattle can in these four cases. I have repainted bumpers I should have sent out, and the repaint cost more than the body shop would have.
The panel is metallic or pearl. Metallic flake orients differently from a spray can than it does from a gun, and the bumper will read a shade off from the fenders in daylight no matter how good your blend is. Solid colors and black cladding forgive you. Silver does not.
The bumper has parking sensors or a radar module behind it. Coating thickness and metallic content interfere with the sensor return, and manufacturers publish maximum film builds for exactly that reason. Repainting over sensors is a warranty and safety conversation, not a paint conversation.
The plastic is cracked, not just scuffed. Paint bridges a crack for one winter and then reopens along it. Cracked bumper covers need plastic welding or an epoxy repair first — and if the crack runs through a mounting tab, the cover needs replacing.
It is below 50°F or above 80% humidity. Adhesion promoter flashes wrong outside that window, and it is the promoter, not the color, that determines whether the job survives. Wait for the weather. The same rule governs any spray paint on plastic.
Frequently asked questions
Can you paint plastic bumpers without an adhesion promoter?
You can, but you should not on bare or glossy plastic. Without a promoter, paint for plastic bumpers tends to peel off slick polyolefin in sheets within months. The promoter costs little and adds about ten minutes.
What kind of paint is best for plastic bumpers?
A flexible or elastomeric coating made for bumpers. It stretches with the panel instead of cracking. Rigid enamel splits the first time the bumper flexes or the weather turns.
Do I need to sand a plastic bumper before painting?
Yes. A light scuff with a gray pad or fine sandpaper gives the coating tooth to grip. Skip it on glossy plastic and even flexible paint can lift at the edges.
Will bumper paint match my car color?
Trim-and-bumper aerosols come mainly in black and gray. For a body-color match you need a flexible primer plus a color-match topcoat and a flexible clear coat.
How long does painted bumper plastic last?
With a promoter, flexible paint, and two thin coats, a good repair holds for years through curb taps and seasonal swings. Skip the prep and it can fail within a single season.
Can I use regular spray paint on a car bumper?
No. Standard spray paint has no flex agent and no grip on automotive plastic, so it cracks and peels fast. Always choose a product labeled for bumpers or plastic.