Best Paint to Use on Pumpkins: 5 Picks That Won’t Peel
The best paint to use on pumpkins is standard craft acrylic — on a real pumpkin, on a foam craft pumpkin, on a wooden one. The only surface that needs something different is slick plastic, which wants a multi-surface acrylic or a plastic-bonding spray. That is the whole answer, and everything below is about the two things that actually decide whether your design survives to Halloween: what you do to the pumpkin before the paint, and what you do not spray on foam.
One thing worth knowing up front: painting is the more durable choice than carving. A carved pumpkin breaches the skin and typically starts going soft in three to five days. An uncarved painted pumpkin keeps its rind intact and, with a wipe-down first, routinely holds for several weeks.
Match the Paint to the Pumpkin Surface
Pumpkin is not one surface. Real rind is waxy and slightly porous, foam is solvent-sensitive, plastic is slick and non-porous, and wood drinks the first coat. Here is what each one actually needs:
| Pumpkin type | Use this | Prep | The failure to avoid |
|---|---|---|---|
| Real (uncarved) | Craft acrylic | Bleach-water wipe, dry fully | Painting a damp rind — paint lifts in sheets |
| Foam / craft (faux) | Craft acrylic, brushed | None, or gesso for a smooth base | Solvent spray paint — it dissolves the foam |
| Plastic | Multi-surface acrylic or plastic-bonding spray | Scuff, degrease, bonding primer | Skipping primer — the paint peels off in strips |
| Wooden | Acrylic or chalk paint | Light sand + primer | One thick coat that raises the grain |
| White pumpkins | Craft acrylic (fewer coats) | Same as real | Overworking a light base you did not need to cover |
Acrylic is the default for a reason, and it is not just my preference — Family Handyman reaches the same conclusion, on the grounds that acrylic is fast-drying, opaque enough to cover in fewer coats, and adheres well to an uneven, textured surface. It is water-based, it bonds to a waxy rind better than tempera, it dries fast enough to layer in an afternoon, and it will not attack foam. Tempera and washable kids’ paint are safe and easy to clean up but flake off the rind within days — fine for a Saturday project, not for a display.
The Foam Warning: Never Spray a Craft Pumpkin With Solvent Paint
Most faux “craft” pumpkins — the ones sold at Hobby Lobby, Michaels and every autumn end-cap — are expanded polystyrene foam under a thin skin. The solvents and propellants in ordinary spray paint dissolve polystyrene on contact. You do not get a bad finish; you get a pitted, melted crater that appears within seconds and cannot be sanded out.
If you want a sprayed finish on foam, use a can explicitly labelled foam-safe, or seal the whole pumpkin with two coats of brushed acrylic or gesso first — the cured acrylic film acts as a barrier between the solvent and the foam. Test on the underside either way.
How to Prep a Real Pumpkin So the Paint Holds
Prep matters more than the brand here, same as every other painting job. A real pumpkin arrives carrying field dirt, mould spores and a natural wax bloom. All three work against you.
1. Wipe it down with bleach solution
One tablespoon of household bleach per quart of water. Dampen a cloth and wipe the entire shell including the stem and the base. This kills the surface bacteria and fungal spores that start rot from the outside, and it strips the wax film that stops acrylic gripping. It is the single highest-return two minutes in the whole project.
2. Dry it completely — then wait longer
Towel it and leave it an hour in a warm room. Acrylic applied over a rind that is still cool and damp bonds to moisture instead of to the pumpkin, and lifts in sheets a day later. If you are trying to compress the schedule, the ambient conditions do more than the product does — see how to make paint dry fast.
3. Prime only where it earns its place
Real pumpkins do not need primer. Plastic and wood do. On plastic, a bonding primer is the difference between a design that survives being picked up and one that peels at every fingerprint — the same principle covered in our guide to the best primer for plastic.
4. Two thin coats
Two thin coats always beat one thick coat, and on a curved, ribbed surface it is not close. Thick acrylic pools in the ribs, skins over, and cracks when the pumpkin flexes as it slowly dehydrates. Let each coat go fully matte before the next.
Sealing: What It Does and What It Does Not Do
A clear acrylic sealer protects the artwork from rain, handling and UV fade. Worth doing on anything going outside. Two thin passes from about ten inches, not one wet coat.
What sealer does not do is stop a real pumpkin rotting. Decay runs from the inside out, driven by the flesh and the stem, and a topcoat has no reach into that. Sealing keeps your design intact right up until the pumpkin collapses underneath it. Set expectations accordingly — and if you want a finish that genuinely holds up outdoors on faux pumpkins, the products in our best clear coat for spray paint roundup are the ones to reach for.
Sophie’s Note: The Year I Melted Six Pumpkins
I bought a set of six foam craft pumpkins with the plan of doing a graduated white-to-charcoal set for a mantel — the kind of thing that takes an afternoon and lasts for years. I had half a can of matte black spray left over from a furniture job and started with the darkest one.
The surface bubbled before I finished the first pass. Not “went patchy” — visibly sank, like the pumpkin was deflating in one spot. I stopped, and it kept eating into the foam for another few seconds after the spraying stopped. That pumpkin went in the bin; the other five got brushed acrylic and are still on the mantel four autumns later.
The lesson I would give anyone starting a pumpkin project: brush on foam, spray only on plastic and only after a bonding primer. And test on the underside first, every single time.
Design Ideas That Suit a Ribbed Surface
- Paint pens over a base coat — the only reliable way to get crisp lettering across ribs. Let the base cure overnight first or the pen tip drags wet acrylic. Our picks are in the best acrylic paint pens guide.
- Ombre across a group — easier than ombre on a single pumpkin, and it reads better on a step or mantel.
- Chalkboard-style — matte black base, chalk pen on top. Redraw it weekly without repainting.
- Half-dipped — tape a clean waterline and paint the bottom half only. Forgiving, and it hides the ribs entirely.
- Kids’ designs — washable paint plus stickers. Accept that it is a one-week decoration and let them go at it.
If a coat goes on too heavy and runs down a rib, do not chase it with a brush — let it set and follow the repair method in how to fix paint drips.
Best Paint Products for Pumpkins
Five acrylics that cover the realistic range of pumpkin projects — a single autumn shade, a full colour set, a budget workhorse, and a kids’ kit.
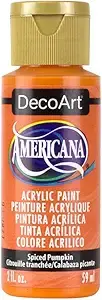
DecoArt Americana Acrylic Paint, Spiced Pumpkin
Best for: a single-colour project on real pumpkins where you want opaque coverage in two coats rather than four.
Why it works: heavily pigmented for a craft acrylic, so it covers a dark orange rind without the base tone bleeding through.
Limitation: the finish dries flat matte. On anything going outdoors you will want a gloss or satin clear over the top, both for shine and for rain resistance.
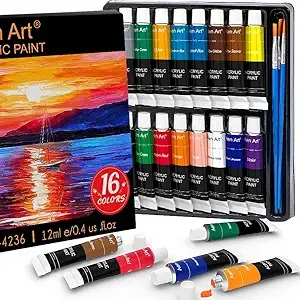
Aen Art Acrylic Paint Set (16 Colors)
Best for: a multi-pumpkin display where you need a palette rather than one shade — ombre sets, patterned groups, or a table of mini pumpkins.
Why it works: sixteen colours removes the mixing step, which matters when you are working across several pumpkins and need the shade to repeat exactly.
Limitation: the tubes are small. On a full-size pumpkin needing two coats, a single tube of one colour will not finish the job — buy two of whatever your dominant shade is.
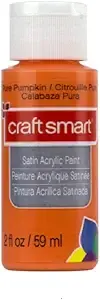
Craft Smart Satin Acrylic Paint (Pure Pumpkin)
Best for: anyone who wants a slight sheen without adding a separate clear coat — the satin finish reads well on a ribbed surface because it picks up the shadow lines.
Why it works: satin acrylics carry more binder relative to pigment, which is what produces the sheen and also makes the film a little more flexible on a surface that shrinks as it ages.
Limitation: that extra binder shows brush marks if you load the brush. Thin it slightly with water and lay it on in light passes.
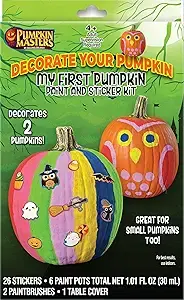
Pumpkin Masters My First Pumpkin Paint & Sticker Kit
Best for: children under about eight, where the point is the afternoon rather than the finish lasting until Halloween.
Why it works: the kit pairs washable paint with stickers, so a child who cannot yet control a brush still ends up with something they are pleased with.
Limitation: washable paint is washable — a rain shower or a damp hand will smear it. Keep these indoors, and do not seal them expecting a fix; sealer over a washable film traps a layer that never properly hardens.
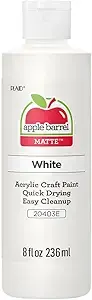
Apple Barrel Acrylic Paint (Assorted Colors)
Best for: painting a lot of pumpkins on a budget, or a first attempt where you would rather not be precious about how much paint you use.
Why it works: it is the cheapest acrylic that still behaves like acrylic — it bonds to a cleaned rind and to foam without attacking it.
Limitation: pigment load varies noticeably by colour. Yellows and light shades are thin and need three coats over orange rind; the darks cover in two. Buy extra of the pale colours, not the dark ones.
When NOT to Paint a Pumpkin
- It already has a soft spot. Press the base and the stem end. Any give means decay has started inside, and no amount of paint or sealer reaches it. You will have a beautifully finished pumpkin collapsing on your porch in a week.
- You plan to carve it too. Pick one. Carving breaches the rind and drops the lifespan to three to five days, which wastes the paint job.
- You want to eat it afterwards. Craft acrylic is non-toxic to handle, not to eat, and it soaks into the rind. Paint the display pumpkin, cook a different one.
- It is a foam craft pumpkin and all you have is regular spray paint. Wait and buy a brush-on acrylic. There is no technique that makes solvent spray safe on bare polystyrene.
- Temperatures are near freezing. Acrylic needs roughly 50°F to form a proper film. Below that it dries powdery and rubs off.
Frequently Asked Questions
What is the best paint to use on pumpkins?
Craft acrylic, for real pumpkins, foam craft pumpkins and wooden ones alike. It bonds to a waxy rind, dries fast enough to layer, and will not attack foam. Slick plastic pumpkins are the exception — those want a multi-surface acrylic or a plastic-bonding spray over a bonding primer.
Can you use spray paint on real pumpkins?
Yes. Real pumpkin rind is not solvent-sensitive, so ordinary spray paint is fine on it. Wipe and dry the pumpkin first, then build up thin passes rather than one wet coat — heavy spray pools in the ribs and cracks as the pumpkin dehydrates.
Why did my spray paint melt my craft pumpkin?
Because it was polystyrene foam underneath. The solvents in standard spray paint dissolve polystyrene on contact and keep eating into it for several seconds after you stop. Use a foam-safe can, or seal the pumpkin with two coats of brushed acrylic or gesso first.
Do you need primer on a pumpkin?
Not on a real pumpkin — a bleach-water wipe and a full dry is all the prep it needs. Plastic and wooden pumpkins do need primer: plastic for adhesion, wood to stop the first coat soaking straight in.
How long do painted pumpkins last?
An uncarved real pumpkin that was wiped down before painting commonly holds for several weeks — considerably longer than a carved one, which typically starts going soft in three to five days. Foam and plastic pumpkins last indefinitely and can be stored and reused each autumn.
Does sealing a pumpkin stop it rotting?
No. Sealer protects the paint from rain, handling and fading, but decay works from the flesh outward and a surface coating has no reach into it. The bleach wipe before painting does more for longevity than any topcoat applied after.
Is acrylic paint on pumpkins safe for kids?
Craft acrylics labelled non-toxic are safe to handle and safe on skin contact, but they are not washable once dry and they are not food-safe. For young children, washable or tempera paint cleans up far more easily — accept that the design will only last a few days.
Final Verdict
Craft acrylic on almost everything, a bonding primer under anything slick, and a brush — not a spray can — anywhere near foam. Wipe the pumpkin with bleach solution before you start, dry it properly, and put on two thin coats instead of one thick one. That sequence is what separates a display that lasts through October from one you are scraping off the porch in week two.
About the author — Sophie Ulman
Sophie Ulman has renovated and painted more rooms than she can count — and made every mistake in the book so you don’t have to. She focuses on real-world durability: not how products perform on day one, but whether the repair holds through a full seasonal cycle.
ThePaintly is reader-supported. We only recommend products we’ve personally evaluated. When you buy through links on this site, we may earn an affiliate commission at no extra cost to you.