How to Paint Vinyl Shutters So They Don’t Warp or Fade
Choose the wrong color and you will paint vinyl shutters twice. Vinyl is a plastic that softens with heat, and a dark coat turns a shutter into a solar panel. The panel bows away from the siding, the screw holes elongate, and no amount of good paint fixes a warped shutter. The second failure is peeling — vinyl is slick and chalky at the same time, so paint that goes on beautifully sheets off in the first freeze.
Both failures are prep and color decisions, not brand decisions. Get those two right and a shutter repaint lasts eight to ten years. Get them wrong and you are back on the ladder next spring.
The first time I sprayed a set of vinyl shutters, I did them in place on a July afternoon in a deep navy the homeowner picked from a fan deck. They looked incredible for six weeks. By late August, the two on the south wall had bowed a full inch off the siding and one had cracked at the mounting boss. Here is what I learned: on hollow vinyl, the color is a structural decision, not a decorative one.
What’s on this page
Before You Paint Vinyl Shutters: The Two Decisions That Matter
Everything else on this page is detail. These two calls decide whether the job holds.
Decision one: how dark can you actually go?
Vinyl panels distort when the surface temperature climbs past roughly 165–175°F. Solar heat absorption is driven mostly by Light Reflectance Value, or LRV — a 0-to-100 scale where higher means the color throws more light back. Sherwin-Williams built its VinylSafe line around a published floor of LRV 55 or higher for exactly this reason.
That floor was written for siding. Shutters get treated as trim, and plenty of pros will tell you the rule does not apply. It does not apply to wood or aluminum-clad trim, and that is where the confusion comes from. A hollow vinyl shutter is the same PVC as the siding next to it, with less backing behind it and more air inside. If anything it moves sooner.
So here is my working rule after the navy job. On a north or east wall, or under a deep porch roof, you can drop to about LRV 40 and be fine. On a south or west wall in full sun, stay at LRV 55 or above. Factory-dark shutters exist because manufacturers mix heat-stable pigments into the vinyl itself. A can of paint does not replicate that.
Decision two: on the wall or off the wall?
Take them down. It costs you an hour with a nut driver and it buys you three things: you can paint all six sides, you can lay them flat so the coat levels instead of sagging, and you avoid masking the siding entirely. Shutters that are painted only on the face wick moisture through the back edge and lift within two seasons.
Number the back of each shutter with a permanent marker as you remove it. Vinyl shutters are rarely as identical as they look, and the screw holes will not line up if you shuffle them.
Quick Picks at a Glance
Five products, one for each stage of the job. You will not need all five — the sprayer only makes sense above roughly a dozen shutters, and the restorer is for people who should skip paint entirely.
| Product | Stage | Best for |
|---|---|---|
| Krud Kutter No-Rinse Prepaint Cleaner | Prep | Stripping chalk and mildew off weathered vinyl |
| Zinsser Bulls Eye 1-2-3 Plus Spray Primer | Prime | Bonding to slick vinyl without sanding |
| Krylon Fusion All-In-One | Paint | Four to eight shutters, no primer step |
| HomeRight Super Finish Max | Paint | Twelve or more shutters in a weekend |
| Rust-Oleum Wipe New ReCOLOR Kit | Restore | Faded-but-sound shutters you should not paint |
The Five Products I Actually Use
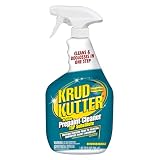
Best First Step on Chalky Shutters
Krud Kutter No-Rinse Prepaint Cleaner / TSP Substitute, 32 oz
Weathered vinyl develops a powdery surface layer as UV breaks down the resin and frees the pigment and filler. Wipe a shutter with your palm and if it comes back white, that is chalk. Paint applied over chalk bonds to the powder, not to the vinyl, and the powder is already letting go. This cleaner uses surfactants plus a mild etch to lift the chalk and micro-roughen the surface, which is why it substitutes for the sanding step that vinyl will not tolerate anyway.
No-rinse is the part that matters on a shutter job. You are usually working on sawhorses in a driveway, and a rinse-and-dry cycle adds a full day of waiting. The honest limitation: on shutters with heavy black mildew streaking, this will not kill the spores. I hit those with a diluted bleach wash first, let them dry hard, and then use this as the second pass.
- No rinse, no dry time penalty
- Etches slick vinyl without abrasives
- Cheap relative to the failure it prevents
- Will not remove embedded mildew
- Spray head clogs if stored partly used
Best for: shutters ten years or older that leave chalk on your hand.
Via Amazon.com
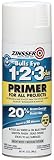
Best Bonding Primer for a No-Sand Job
Zinsser Bulls Eye 1-2-3 Plus Spray Primer, White, 13 oz
A bonding primer is not the same thing as a standard primer. Standard primer is built to seal porous surfaces so the topcoat stops soaking in. A bonding primer is built to grip surfaces that offer no tooth at all — glass, tile, glossy trim, vinyl. The 1-2-3 Plus resin is formulated to wet out and mechanically key into a slick substrate, which is the whole reason you can skip sanding. On vinyl, sanding is a bad idea regardless: you cut through the UV-stable outer layer and expose raw resin underneath.
The aerosol version is the right call for shutters specifically. Louvers eat brush time and a brush leaves stipple in the slats that shows through the topcoat. My limitation on this one is coverage: 13 oz primes about two and a half standard shutters at proper film thickness, so buy more cans than the math suggests. Running out mid-shutter and coming back the next day leaves a visible lap line.
- Grips slick vinyl with no sanding
- Blocks the old color so the topcoat reads true
- Recoat in an hour
- Coverage per can is low on louvers
- White only, so a dark topcoat needs an extra coat
Best for: shutters you want to change color on, not just refresh.
Via Amazon.com
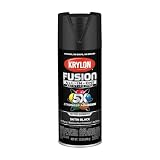
Best No-Prime Spray for a Handful of Shutters
Krylon Fusion All-In-One, Satin, 12 oz
Fusion carries the adhesion promoter in the paint itself rather than in a separate primer coat. That is genuinely useful on plastic, and it is the one aerosol I trust straight onto clean vinyl. It also stays flexible after curing, which matters more than people think — a shutter expands and contracts across a wider range than the wall behind it, and a brittle film cracks at the louver corners first.
I keep cans of this in the truck for one-off jobs and small runs. The honest limitation is the one this whole article is about: the satin black looks fantastic and I will not put it on a south-facing wall. On a shaded elevation it has held for me for three winters with no chalking. In full afternoon sun on hollow vinyl, you are betting against physics. Pick a lighter shade in the same line for those walls.
- No separate primer step on clean vinyl
- Stays flexible through freeze-thaw
- Wide color range including light neutrals
- Aerosol cost climbs fast past six shutters
- Dark shades are a heat risk on sunny walls
Best for: four to eight shutters on a shaded or north-facing elevation.
Via Amazon.com
Best for a Whole House of Shutters
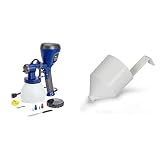
HomeRight Super Finish Max HVLP Sprayer
Past about a dozen shutters, aerosols stop making financial sense and start making physical sense too — your finger gives out. An HVLP gun atomizes at low pressure, which is what you want on louvers. High pressure blows paint through the slat gaps and puts more of it on your driveway than on the shutter. The brass tip set matters: the green 2.0mm tip handles thinned exterior latex, which is the coating I would actually use for a full-house repaint.
The limitation is thinning. Straight exterior acrylic is too heavy for this gun and will spit. I thin about ten percent with water and run it through the included viscosity cup until it drains in the target window. That is a real step, not an optional one, and if you skip it you will spend the afternoon cleaning the nozzle instead of painting. If you would rather compare full-size options, our guide to the best exterior paint sprayer covers the bigger units.
- Low overspray on louvered slats
- Three brass tips cover primer through stain
- Pays for itself against aerosols around twelve shutters
- Requires thinning and viscosity testing
- Cleanup is fifteen minutes every single time
Best for: twelve or more shutters, or a shutter job plus a front door and trim in the same weekend.
Via Amazon.com
Best When You Should Not Paint at All
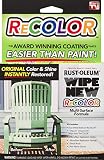
Rust-Oleum Wipe New ReCOLOR Kit, 60 mL
This is the product I recommend when someone describes shutters that are faded but structurally perfect. It is not paint. It is a wipe-on clear polymer that soaks into the oxidized surface layer and restores the original pigment depth, then cures to a sealed film. Because nothing is sitting on top as a separate coat, there is no adhesion to fail and no film to peel at the edges.
The catch is that it can only bring back a color that is still in the vinyl. On shutters that have gone from black to a pale grey-brown, it works remarkably well. On shutters that have gone genuinely chalky-white, it does not have enough pigment left to revive and you are back to painting. Test one shutter in a corner before you commit — the kit is small and the disappointment is cheap at that scale.
- No peeling risk at all
- Shutters can stay on the house
- No heat penalty on dark shutters
- Cannot change the color
- Fails on severely chalked vinyl
Best for: factory-dark shutters that have faded but have not cracked or chalked through.
Via Amazon.com
Pro Tips From the Ladder
Do the chalk test before you buy anything. Dry palm, firm wipe, look at your hand. White residue means you are buying cleaner first and paint second. No residue means you can skip straight to primer.
Paint all six sides. Top edge, bottom edge, both ends. Water finds the one edge you skipped and gets behind the film from underneath.
Work the louvers first, faces last. Spray into the slats at an angle from both directions, then come back and lay off the flat faces. Do it the other way around and you will drag overspray across a finished face.
Two thin coats always beat one thick coat. On vinyl this is not a preference. A heavy coat cures skin-first and traps solvent underneath, and that soft layer is what lets the whole film shear off in a hailstorm.
Stop at 85°F. Above that the paint flashes before it levels and you get orange peel on every flat face. Early morning in the shade is the whole trick.
Renovation Stage: PREP
This job lives or dies at the prep stage. The chalk test and the color decision happen before a single can is opened, and neither one can be corrected later with a better topcoat. Prep matters more than the brand — durability here is about half product quality and half surface preparation, and on vinyl the split leans even further toward prep.
How Much Will You Need?
Enter your shutter count and method. This assumes two thin coats on all six sides of a standard 15" x 55" shutter.

Choosing a Product to Paint Vinyl Shutters With
You are choosing on three properties, and only three. Ignore everything else on the label.
Flexibility, measured as elongation
Elongation is how far the cured film stretches before it tears. A vinyl shutter moves noticeably across a day — expanding in afternoon sun, contracting overnight. A rigid film cannot follow that movement, so it cracks at the louver corners where the stress concentrates. This is exactly why 100 percent acrylic latex outperforms oil-based enamel here, even though the enamel feels tougher in your hand. The same logic applies when you paint vinyl siding or vinyl window frames.
Adhesion to a non-porous surface
Vinyl offers no tooth. Either the coating carries its own adhesion promoter, like Krylon Fusion, or you build the grip with a bonding primer underneath. There is no third option. Standard exterior primer over vinyl is the most common failure I get called out to look at, and it always looks the same — a sheet of paint lifting cleanly with the vinyl underneath still glossy.
Light Reflectance Value
Say the number out loud when you are at the paint counter: ask for the LRV of the color, not just the name. Most people who paint vinyl shutters skip this and pick from a chip. The LRV is printed on the back of most fan decks and available on every major manufacturer’s site. On a sunny elevation, anything under 55 is a gamble, and under 40 is not a gamble at all — it is a repaint.
What about a topcoat or clear sealer?
Skip it. A clear coat over exterior acrylic adds a second film with its own expansion rate, and the two layers fight each other through a seasonal cycle. Exterior acrylic is already UV-stable. Adding a sealer on top is how you turn an eight-year job into a four-year one.
When NOT to Paint Vinyl Shutters
They are cracked or brittle. Squeeze a corner. If it flexes, paint it. If it feels like a cracker and creaks, the plasticizer is gone and paint will not restore structure. Replacement shutters cost less than the labor of painting bad ones twice.
They are faded but sound. Restorer beats paint here, every time. No film means nothing to peel.
You want dark on a south wall. This is the one I will not bend on. If the homeowner insists on black on a full-sun elevation, the honest answer is replacement shutters in factory black, not paint.
The house was built before 1978 and you plan to scrape. The EPA Renovation, Repair and Painting rule applies to disturbing paint on pre-1978 housing, and shutter frames and surrounds are often original. Test before you scrape anything.
How to Paint Vinyl Shutters in Six Steps
1. Remove and number
Back the mounting screws out with a nut driver and number the back of each shutter with a marker as it comes down. Lay them out on sawhorses or a drop cloth, face up.
2. Wash, then chalk-test again
Hose them down, scrub with a stiff brush and detergent, rinse. Let them dry completely — an hour in the sun, longer in humidity. Then run the palm test one more time. Chalk that survives a wash needs the prepaint cleaner.
3. Clean and etch
Spray the prepaint cleaner on, work it with a scrub pad into the louvers, wipe it off with a clean rag. No rinse. Let it flash off for twenty minutes before you go near it with primer.
4. Prime, if you are changing color
Two thin coats of bonding primer, an hour apart. If you are staying in the same family and using Fusion, you can skip this entirely. If you are going from brown to white, do not skip it — you will chase the old color through four topcoats otherwise.
5. Paint the louvers, then the faces
Angle into the slats from the left, then from the right, then lay off the flat surfaces. Two thin coats, front and back, with the edges caught on each pass. If your shutters have movable louvers, open and close them once while the paint is still soft so they do not seize shut. This Old House covers the template-and-number method in detail if you are doing a full house.
6. Cure before you rehang
Touch-dry is not cured. Give them a full 24 hours before they go back on the wall, and 72 hours before the first rain if you can time it. Paint that gets clamped against siding while still soft will print the siding texture into the finish permanently.
If the shutters are part of a larger exterior project, the sequencing in our guide to painting a house exterior will save you from repainting trim twice. And if you have decided the shutters need a specific product rather than a method, our best paint for vinyl shutters breakdown goes deeper on color lines.
The Verdict
If you are doing four to eight shutters on a shaded wall, buy Krylon Fusion and the prepaint cleaner and be done in an afternoon. If you are changing color, add the Zinsser bonding primer — that is the combination that lasts. Past twelve shutters, the HomeRight sprayer and a quart of exterior acrylic will cost you less and finish better.
And if your shutters are just faded, do not paint vinyl shutters at all. Wipe on the restorer, keep them on the house, and spend the weekend on something else.
Questions I Get Asked
Do you have to sand vinyl shutters before painting?
No, and you should not. Sanding cuts through the UV-stable outer skin and exposes raw resin that fades faster than what you removed. Clean with a prepaint cleaner and use a bonding primer instead. That gives you the grip sanding would provide, without the damage.
Can you paint vinyl shutters black?
On a north-facing or shaded wall, yes. On a south or west wall in full sun, no. Black sits around LRV 5, which pushes surface temperature past the point where hollow vinyl distorts. Factory-black shutters use heat-stable pigment mixed into the vinyl, which paint cannot replicate.
What kind of paint sticks to vinyl shutters?
100 percent acrylic latex exterior paint, either over a bonding primer or in a self-priming formula like Krylon Fusion. Avoid oil-based enamel. It cures harder and more brittle, and it cracks at the louver corners once the shutter starts moving with the seasons.
How long does paint last on vinyl shutters?
Eight to ten years when the surface was properly cleaned and the color stayed above LRV 55. Two to four years when it went on over chalk. The gap between those two numbers is prep, not product.
Can you paint vinyl shutters while they are on the house?
You can, but the back edge stays bare and that is where water gets behind the film. If you leave them up, at minimum run a brush along the top and bottom edges from underneath. Taking them down takes about an hour and roughly doubles the service life.
Should I use a paint sprayer or a brush on shutters?
Spray, if you have more than a few. Louvered slats are almost impossible to brush without leaving stipple, and a brush drags the paint into the slat corners where it puddles. A low-pressure HVLP gun or an aerosol both handle louvers better than any brush will.
Will painted shutters fade faster than factory ones?
Slightly, yes. Factory color is pigment mixed through the vinyl, so it fades evenly and slowly. Paint is a surface film and chalks from the top down. A quality exterior acrylic narrows the gap but does not close it. Family Handyman makes the same point about vinyl siding.