
Best Way to Paint a Popcorn Ceiling Without Losing Texture
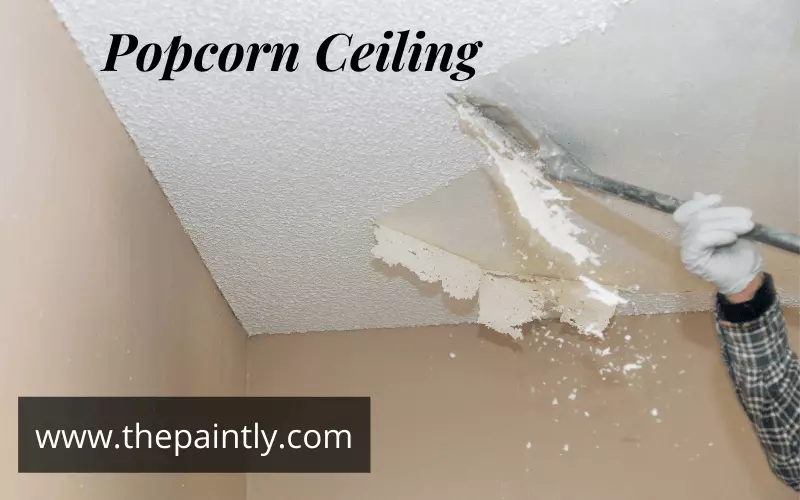
The best way to paint a popcorn ceiling is not the way you paint anything else in the house, and the reason is mechanical rather than cosmetic. Popcorn texture is loose particles held on with a water-soluble adhesive. Wet paint softens that adhesive. Roll over the same wet patch twice and the roller lifts the texture off in clumps, leaving bald grey drywall in the middle of a fresh white ceiling — damage that costs a texture-repair can and a day of drying to put right.
Read this before you touch the ceiling
If your home was built before the late 1970s, the popcorn texture may contain asbestos. Painting it is generally considered safer than scraping it, because a sound painted film encapsulates the material – but only if you do not disturb it. No sanding, no scraping, no wire brushing, no aggressive washing. If the texture is already flaking or damaged, stop and have it tested before you go any further. The EPA’s guidance on asbestos in the home explains what testing involves and why disturbing the material is the risk, not the material sitting there intact.
The first popcorn ceiling I painted, I rolled it like a wall. Back and forth, working the roller over the same patch to even out the coverage, the way you would chase a thin spot on plaster. Within about a minute I was pulling texture off in clumps and staring at bare drywall through the middle of the room. Here is what I learned, and it is the one rule that governs this entire job: load the roller heavily, make one pass in one direction, and never go back over wet texture.
Where the Standard Advice Goes Wrong
Almost every guide to this job tells you the same two things: use the thickest nap you can find, and crisscross the roller in X and W patterns to force paint into the crevices. Family Handyman says exactly that, and half of it is right.
The thick nap is right. The crisscross is what took my ceiling apart. Crisscrossing means the roller crosses ground it has already wetted, and by the second crossing the adhesive under that texture has had thirty seconds of water on it. On a sound, previously painted ceiling you will usually get away with it. On bare texture, on a ceiling that has been washed, or on anything over about forty years old, you will not.
The reason people crisscross is real, though: on a textured surface you genuinely cannot see where you have already been. Shadows from the texture hide the wet edge. So the fix is not to cross-roll harder — it is to remove the need to check, by loading enough paint to cover in one pass and by using a paint that tells you where it has been. That is the whole method, and everything below follows from it.
Roller Nap and Paint Choice: The Two Decisions That Matter
Everything else on this job is technique. These two are equipment, and getting them wrong makes good technique impossible.
| Choice | Use this | Why the alternative fails |
|---|---|---|
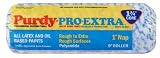
| Roller nap | 3/4 inch minimum, 1 to 1-1/4 inch for heavy texture | A short nap cannot reach into the valleys, so you press harder – and pressing is what tears the texture off |
| Roller cover type | Thick woven synthetic, new | A cheap knitted or used cover sheds fibres into the texture where you cannot pick them out |
| Paint | Flat or matt ceiling paint, undiluted | Any sheen exaggerates every shadow the texture casts and highlights every missed spot |
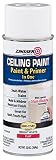
| Colour | Colour-change ceiling paint (goes on tinted, dries white) | On a shadowed textured surface you cannot see your wet edge – and not seeing it is what makes people re-roll |
| Loading | 5-gallon bucket and grid, roller filled to capacity | A tray under-loads the nap, and an under-loaded roller only covers if you press |
If the ceiling is stained rather than just tired, do not try to cover it with more coats of ceiling paint. Water and nicotine stains bleed straight through water-based paint no matter how many coats you apply. Spot-prime the stain with a shellac or oil-based stain-blocker, let it dry, then paint the whole ceiling. Two thin coats over a sealed stain will hold. Six coats over an unsealed one will not.
The Two Tools That Make the One-Pass Rule Possible
Neither of these is a luxury item. The method above only works if the roller carries enough paint to cover in a single pass, and if you can see where that pass ended.
The Method, Step by Step
Five steps. Read all of them before you open the tin, because two of them are decisions you cannot reverse once the ceiling is wet.
1. Clear the room and sheet everything
Take out what you can. Push the rest into the middle and cover it, then sheet the floor wall to wall — a 1-inch nap on a ceiling spatters far more than a wall roller, and the drops land everywhere. Tape plastic over light fittings and ceiling fans rather than trying to cut around them. Open a window. This is the step people rush, and it is the only one that is purely about not creating a second job for yourself.
2. Dust dry, and only dry
Popcorn texture traps dust and cobwebs, and paint over dust does not bond. Use a dry microfibre duster or a vacuum brush attachment held just clear of the surface. Do not wash it, do not use a damp cloth, do not sand or scrape the edges to make a neat line. Water and abrasion both release the same adhesive the paint is about to soften, and on a pre-1980 ceiling scraping is the specific thing the asbestos guidance tells you not to do.
3. Cut in the perimeter with a brush
Use an angled sash brush and work two to three inches out from the wall. Load the brush generously but lay the paint on with almost no pressure — let the bristle tips deposit it rather than scrubbing it in. If the texture runs right into the corner, dab rather than drag. One loaded dab covers; three light drags tear.
4. Roll the field in three-foot sections, one direction
Fill the roller from a bucket and grid until it is genuinely heavy, then roll a three-foot section in a single direction and move on. Overlap the previous section by an inch or two while it is still wet at the edge, but do not re-enter ground you have finished. If a spot looks thin, leave it — the second coat will take it. Chasing a thin spot on wet texture is how bald patches happen.
5. Let it dry fully, then cross the direction
Four hours minimum, longer in a humid room, and dry means dry to the touch across the whole ceiling and not just near the window. Then run the second coat perpendicular to the first. Perpendicular is safe now for the same reason the crisscross was dangerous before: the adhesive is sealed under a cured film, so the roller has nothing left to lift. Two thin coats, applied this way, cover better than three thick ones ever will.

If the Texture Comes Off Anyway
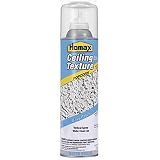
It happens, and it is recoverable if you stop immediately. Do not try to feather the surrounding texture over the gap and do not keep rolling to disguise it — a wet edge next to a bald patch just makes the patch bigger. Let the whole area dry completely, then respray the texture, let the repair cure, and paint over it with the rest of the ceiling.
Roller or Sprayer: An Honest Comparison
A sprayer is better for this specific surface, and I say that as someone who rolls most ceilings. Nothing physically contacts the texture, coverage into the valleys is even, and a room takes minutes instead of hours. The trade-off is masking: everything in the room and every wall surface needs covering, and overspray gets everywhere you did not protect. For one small room the masking time cancels out the speed gain. For a whole floor of a house it does not.
Roll it if the room is small, the texture is sound, and you are careful. Spray it if you have several rooms, if the texture is fragile, or if you have already lost a patch to the roller once.
When NOT to paint a popcorn ceiling
- The texture is already loose or falling. Paint adds weight and moisture. A ceiling that is shedding will shed faster, not slower.
- There is an active leak or a fresh water stain. Fix the leak, let the ceiling dry fully, then seal and paint. Painting a wet ceiling traps moisture in the texture and it will let go.
- Pre-1980 texture that is damaged. Damaged means potentially friable. This is a testing question, not a painting question.
- You are planning to remove the texture within a few years. Painted popcorn is much harder to scrape off than unpainted – the paint film binds it. Decide which project you are doing before you start.
The Prep That Decides the Result
Prep matters more than the brand on every job, and on this one it matters more than usual because you cannot correct mistakes afterwards. On a wall you sand out a run and repaint it. On popcorn, the correction is the damage. That is why the dusting, the sheeting and the choice of nap all happen before a tin is opened, and why the only decision left once you are up the ladder is which direction you are rolling.
The cutting-in and sequencing detail in our guide on the best way to paint a ceiling applies here in full, and the roller and extension-pole choices are covered in best ceiling paint rollers. If you are still deciding on the shade before you commit, best ceiling paint colour is worth ten minutes. And if you have decided the texture is coming down instead, the paint you want afterwards is a different product entirely — that is covered in best ceiling paint after popcorn removal.
Frequently Asked Questions
Can you paint over a popcorn ceiling?
Yes, and on an intact texture it is the easiest and safest way to refresh it. The technique is what differs from a flat ceiling: a long-nap roller, a heavy load of paint, one pass in one direction, and no going back over wet texture.
Do I need to prime a popcorn ceiling first?
Only if it is bare, previously unpainted texture, or if there are stains. Bare texture is extremely absorbent and will drink a topcoat unevenly. Stains need a stain-blocking primer or they bleed through. A previously painted, unstained ceiling can go straight to two topcoats.
What roller nap is best for a popcorn ceiling?
Three-quarter inch as a minimum, and one to one and a quarter inch for a heavy, deep texture. The nap needs to reach into the valleys without you applying pressure, because pressure is what pulls the texture loose.
Why is my popcorn texture coming off while I paint?
You rolled back over an area that was already wet. The moisture softens the adhesive holding the particles, and the second pass lifts them. Stop, let the area dry completely, and touch up the bald patch with texture repair spray before continuing.
How much paint does a popcorn ceiling need?
Considerably more than a flat ceiling of the same footprint – the texture has far more surface area. Buy at least 25 to 50 percent more than the tin’s stated coverage suggests, and buy it all at once so the batch matches.
Should I paint the popcorn ceiling or remove it?
Paint it if the texture is sound and you can live with the look – it is a day’s work instead of a week’s. Remove it if you want a flat ceiling and the material has tested clear of asbestos. What you should not do is paint it now and remove it in two years, because the paint film makes removal significantly harder.
Can I use a regular wall paint on a popcorn ceiling?
You can, but pick a dead flat one. Wall paints are usually formulated with some sheen, and sheen on a textured ceiling catches the light across every bump and shadow, so the surface reads uneven even when the coverage is perfect. Ceiling paint is flatter and thicker-bodied on purpose.
Affiliate Disclosure: ThePaintly is reader-supported. Our picks are based on manufacturer specifications and what users report. When you buy through links on this site, we may earn an affiliate commission at no extra cost to you.

I found it helpful. Thanks
Accurate information. Keep up the good work..