What Nap Roller Do You Need for a Textured Ceiling?
Use a nap that is too short on a textured ceiling and the paint bridges the peaks while the valleys stay grey. You will see it the moment the light hits it from the side, and no second coat fixes it — you have to go back with the right cover and do the whole ceiling again. That is why the best paint roller for textured ceiling work is chosen by nap depth first and brand second. Related: best paint to cover water stains on ceiling.
The short answer: three-quarters of an inch for popcorn and heavy texture, half an inch for orange peel and knockdown, three-eighths for light stipple or smooth drywall. Everything below is the reasoning, the covers I would actually buy, and the one situation where a roller is the wrong tool entirely.
What nap should you use on a textured ceiling?
Nap is the pile depth of the cover, and it is the only spec that really decides whether the paint reaches the bottom of the texture. Match it to the depth of the profile, not to the size of the room:
- ¾″ nap — popcorn and acoustic ceilings, heavy knockdown, anything with a profile you can feel with a fingertip. This is the default for a genuinely textured ceiling, and it is the one most homeowners skip.
- ½″ nap — orange peel, light knockdown, sand-finish. Enough pile to fill a shallow profile without carrying so much paint that it rains on you.
- ⅜″ nap — light stipple, skim-coated drywall, smooth ceilings. On real popcorn it bridges the peaks and leaves the valleys bare.
- 1″ to 1¼″ nap or a slit-foam acoustical cover — deep 1970s popcorn and stucco. A slit-foam cover flexes into the profile instead of pressing down on it, which is why it pulls fewer kernels loose than a woven nap does.
Width is simpler: 9″ is the standard for ceiling work and it is what every extension pole and tray is built around. Go wider only if you are covering a warehouse. Our roundup of paint roller covers breaks down the fabric side of the same decision, and large paint rollers covers the 12″ and 18″ options if the ceiling really is that big.
Fabric matters less than nap, but it is not nothing. Woven polyester sheds almost no lint and releases paint evenly. Knit microfibre holds more paint per load, which means fewer trips to the tray overhead — a real advantage when your arms are above your head. Avoid cheap foam on texture entirely; it tears.
Why Roller Choice Matters for Rough Ceilings
When looking for a paint roller for rough ceilings, consider:
- A 9″ width for fast, even coverage.
- ½″ nap for deeper textures; ⅜″ nap for medium textures.
- Woven polyester or acrylic blends to minimize lint.
- Compatibility with extension poles to reduce arm strain, essential overhead.
High-quality options available at Lowe’s and Amazon include Purdy’s White Dove series (⅜″ or ½″ nap) and Valspar’s textured ceiling roller covers—both excellent for challenging surfaces.
The 3 roller covers I would actually buy
Three covers, one for each depth of texture. All three are 9″ and fit any standard frame and extension pole.
Purdy White Dove 9″ roller cover, ¾″ nap — best for popcorn
Who this is for: anyone painting an actual popcorn or heavy-knockdown ceiling.
Why it works: the ¾″ woven pile reaches the bottom of the profile in one pass, and Purdy’s woven fabric releases paint instead of shedding fibres into it — on a ceiling you cannot pick lint out of, that matters more than it does on a wall.
The real limitation: a ¾″ cover fully loaded is heavy, and you feel every ounce of it overhead. Use an extension pole, not a ladder and a short handle, or your shoulders will quit before the ceiling is done.
Best for: a full popcorn ceiling in one or two rooms.

Purdy White Dove 9″ roller cover, ½″ nap — best for orange peel
Who this is for: orange peel, sand finish and light knockdown — the texture most houses built after about 1990 actually have.
Why it works: ½″ is the sweet spot where the cover still fills a shallow profile but does not carry so much paint that it drips on you between passes.
The real limitation: on deep popcorn it bridges. If you can push a fingernail into the texture and feel it disappear, you want the ¾″ above instead.
Best for: whole-house ceilings with a shallow, even profile.
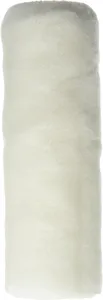
Valspar Microfibre 9″ roller cover, ⅜″ nap — best budget pick
Who this is for: light stipple, skim-coated drywall, or a ceiling you are painting once and not thinking about again.
Why it works: knit microfibre holds noticeably more paint per load than woven at the same nap, so you make fewer trips to the tray with your arms up.
The real limitation: ⅜″ is genuinely too shallow for popcorn, whatever the packaging implies. Buy it for the texture it suits, not for the price.
Best for: smooth-to-lightly-textured ceilings on a budget.

What I got wrong the first time
The first textured ceiling I painted, I used the ⅜″ cover that came bundled with the frame, because a roller is a roller. It looked fine while it was wet. Then the afternoon sun came through the window at a low angle and the whole ceiling was a field of grey pinholes — every valley in the texture still showing the old colour through the new. I put a second coat on, which did nothing, because the problem was never coverage. The nap simply never touched the bottom of the profile.
I redid it with a ¾″ cover and it was right in one pass. The cover cost about eight dollars. The lesson cost me a Saturday and a gallon of ceiling paint.
The other half of the job is prep, and prep matters more than the brand on the cover. A textured ceiling holds years of dust in every crevice, and paint will not bond to it. Vacuum the ceiling with a brush attachment before anything else — our guide on how to clean walls before painting covers the method, and it applies overhead too.
Cutting in where the ceiling meets the wall
A 9″ cover cannot get into the corner without loading the wall, so cut the perimeter first with a brush or a 4″ mini roller, then roll the field into the wet edge you left behind. Do not try to reverse that order. Our walkthrough of the best way to paint edges between wall and ceiling has the taping sequence, and it saves more time than it costs.
How to stop a ceiling roller from dripping on you
Overhead drips are almost always a loading problem, not a cover problem. Four things fix it:
- Purdy’s dense woven nap resists oversaturation and dripping.
- Valspar’s microfibre woven knit holds paint evenly and reduces spatter.
- Roll the loaded cover out on the tray ramp until it stops shedding paint. A cover that is dripping in the tray will drip on your face.
- Use a deep-nap cover at a slower pace rather than a shallow one pressed hard. Pressure squeezes paint out sideways; that is what spatters.
Repairing texture before you paint it
If the ceiling has a bald patch from a leak or a drywall repair, fix the texture before you paint, not after. Roll-on texture compounds go on with a stipple-pattern cover and are the easiest way to blend a small area. For a whole ceiling, or for coarse popcorn a roller cannot replicate, that is a spray job — see our guide to texture guns for popcorn ceilings for the hopper-gun side of it.
Either way, let the repair dry fully and prime it before the finish coat. Fresh compound is thirsty and will flash a dull patch straight through the paint — a proper drywall primer is what stops that.
Using the same covers on textured walls
These same covers work on walls, with one adjustment: drop a nap size. Gravity is not pulling paint out of the cover on a vertical surface, so a ½″ nap on a textured wall behaves roughly like a ¾″ does overhead. On flat drywall, ⅜″ is all you need and anything deeper just leaves stipple you did not ask for.
How to Use Like a Pro
- Clean the surface remove dust using methods from our how to clean walls before painting guide.
- Prime stained or repaired areas, referencing best drywall primer suggestions.
- Cut edges first using brush or edger before rolling large areas; see our best way to paint edges between wall and ceiling for technique.
- Load roller properly, rolling off excess to reduce drip, key for ceiling paint roller no drip performance.
- Roll with a “W” or “M” motion for even paint spread and minimal overlap marks.
- Maintain a wet edge, blending sections seamlessly to avoid lap lines.
- Keep your extension pole steady and change roller covers as needed, especially if lint or texture builds up.
When NOT to roll a textured ceiling
Three times a roller is the wrong call
A roller is the wrong tool in three situations, and pushing through anyway costs you the ceiling:
- The popcorn is loose or already flaking. Any roller, at any nap, applies sideways force. If kernels come away on your fingertip when you rub the ceiling, rolling will strip patches of it. Spray the ceiling instead, or scrape and re-texture it properly.
- The ceiling predates about 1980 and has not been tested. Popcorn texture from that era may contain asbestos. Painting over intact texture is fine; scraping, sanding or aggressively rolling it is not. The EPA has clear guidance on asbestos in the home — read it first.
- There are water stains. They bleed through ceiling paint within days no matter how many coats you roll. Spot-prime with a shellac-based stain blocker, let it dry, then paint.
And one honest note on the covers above: none of them will hide a bad ceiling. A roller distributes paint. It does not fix texture.
If the ceiling passes all three checks, the rest is straightforward. Our step-by-step ceiling painting walkthrough covers the sequence, choosing a ceiling paint covers what goes in the tray, and how long it takes to paint a room will keep your weekend estimate honest.
The picks, in one line each
Match the nap to your texture
- Purdy White Dove 9″ ¾″ nap roller: Best overall performer on heavily textured ceilings; virtually lint and drip-free.
- Purdy White Dove 9″ ½″ nap roller: the pick for orange peel, sand finish and light knockdown. Lighter overhead.
- Valspar Microfibre 9″ ⅜″ nap roller: the budget pick for light stipple and smooth ceilings. Holds more paint per load than woven at the same nap.
Final words
If you take one thing from this page: the best paint roller for textured ceiling work is a 9″ woven cover with a ¾″ nap, on an extension pole, over a vacuumed ceiling. Drop to ½″ only if the texture is shallow. The cover costs a few dollars more than the wrong one and saves you an entire second coat.
Cut the perimeter first, roll into the wet edge, and resist the urge to press. Two thin coats beat one thick coat everywhere else in painting — on a textured ceiling, one correctly-loaded coat beats both.
Textured ceiling rollers: common questions
What nap roller is best for a popcorn ceiling?
Three-quarters of an inch, at minimum. Deep 1970s popcorn often wants 1 inch or a slit-foam acoustical cover. A 3/8-inch nap — the one bundled with most roller frames — bridges the peaks and leaves the valleys unpainted.
Can you roll a popcorn ceiling without pulling the texture off?
Usually, if the texture is sound. Load the cover lightly, use a slow single pass in one direction, and never back-roll. If kernels come off on your fingertip when you rub the ceiling, the texture is already loose and rolling will strip it — spray it instead.
Is a 9-inch or 18-inch roller better for ceilings?
Nine inches for almost every home. It balances on an extension pole, fits a standard tray, and does not fight you overhead. An 18-inch cover only earns its weight on very large open ceilings, and it needs a heavier frame and a bucket screen rather than a tray.
Should I use a foam or woven roller on a textured ceiling?
Woven for general texture — it sheds almost no lint and releases paint evenly. Slit foam, specifically the acoustical type, for deep popcorn, because it flexes into the profile instead of pressing on it. Plain smooth foam is the wrong choice; texture tears it.
How many coats does a textured ceiling need?
One, if the nap is right. Texture roughly doubles the surface area compared with a flat ceiling, so a correct-nap cover carrying enough paint covers in a single pass. If you are reaching for a second coat, the usual cause is a nap that was too short, and a second coat will not fix that.
Do I need to prime a textured ceiling before painting?
Only the problem areas. Spot-prime water stains with a shellac-based blocker and prime any fresh texture repair, because new compound absorbs unevenly and flashes through the finish. An intact, clean, previously painted ceiling does not need a full prime coat.
Why does my ceiling look patchy after rolling?
Two common causes. Either the nap was too short and the valleys never took paint, which shows as a grey pinhole pattern in raking light, or you let the wet edge dry between sections and are seeing lap lines. The first needs the right cover and a full recoat; the second needs faster work in smaller sections.
About the author
Sophie Ulman has renovated and painted more rooms than she can count — and made every mistake in the book so you don’t have to. She focuses on real-world durability: not how products perform on day one, but whether the repair holds through a full seasonal cycle.
ThePaintly is reader-supported. Our picks are based on manufacturer specifications and what users report. When you buy through links on this site, we may earn an affiliate commission at no extra cost to you.