How to Paint Your Car DIY: Booth, Basecoat and 2K Clearcoat
סרטון
Introduction: Why DIY Auto Painting Can Save You Thousands
If you’ve ever wanted to know how to paint your car DIY and truly achieve showroom-quality results without a dealership price tag, you’re in the right place. Professional auto body shops charge anywhere from $1,000 to $10,000+ for a full repaint — a figure that puts most car owners in a difficult position. Consequently, more and more enthusiasts are turning to home-based solutions that deliver remarkable outcomes at a fraction of the cost.
The DIY auto painting movement has exploded in recent years, and it’s not hard to understand why. Furthermore, the tools and products available to home painters in 2026 are genuinely professional-grade. With the right preparation, the correct products, and a structured process, you can achieve a finish that rivals any body shop. In addition, you’ll gain a deep understanding of your vehicle and a sense of accomplishment that no check can buy.
Look at our guide for Best Engine Paint here
This guide walks you through every step — from setting up a proper spray environment to laying down that final crystal-clear coat. Whether you’re covering rust, refreshing faded paint, or doing a full color change, this is your definitive 2026 roadmap.
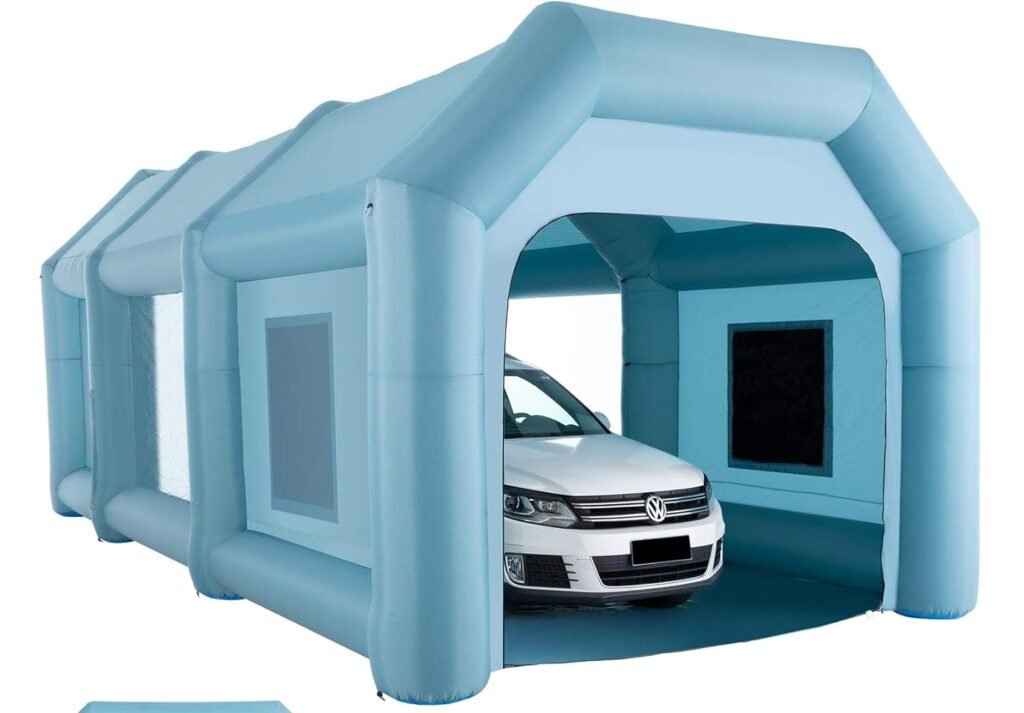
Setting Up Your DIY Spray Booth with the Orion Motor Tech Inflatable Paint Booth (20x10x10 ft, two blowers)
One of the biggest mistakes beginner painters make is skipping a proper spray environment. Dust, wind, and humidity are the enemies of a clean finish. Consequently, investing in a controlled spray space isn’t optional — it’s essential.
Why a Portable Inflatable Booth Changes Everything
The Orion Motor Tech Inflatable Paint Booth (20x10x10 ft, two blowers) is a game-changer for the home painter. Furthermore, it eliminates the need to rent a commercial spray booth, which can cost $50–$150 per session. This inflatable tent creates a sealed, dust-controlled environment that inflates in under five minutes.
Key features of the Orion Motor Tech booth:
- Full vehicle coverage with sealed zippered entry panels
- Built-in ventilation ports compatible with standard blower fans
- Weather-resistant PVC construction for outdoor and garage use
- Transparent paneling that maximizes natural and artificial light
- Compact storage when deflated — fits in a standard duffel bag
In addition, the controlled airflow design dramatically reduces paint overspray contamination, giving your finish a smoother, more professional look straight out of the gun.
CHECK PRICE HERE: Orion Motor Tech Inflatable Paint Booth (20x10x10 ft, two blowers)
Booth Setup Tips
Before inflating, choose a flat surface away from trees, and sweep or blow out your garage floor thoroughly. Consequently, any debris on the ground can kick up during spraying and ruin a wet coat. Position your blower fan at the rear vent and always ensure fresh air is entering from the front. Furthermore, hang a single work light inside the booth at a 45-degree angle to help you spot runs and thin spots as you work.
check our guide for How to Make a DIY Spray Paint Booth
The Step-by-Step DIY Car Painting Process
Now that your environment is set, it’s time to walk through the full painting process. Furthermore, following these steps in sequence is non-negotiable — shortcuts here lead to peeling, bubbling, or uneven finishes that no amount of clearcoat can fix.
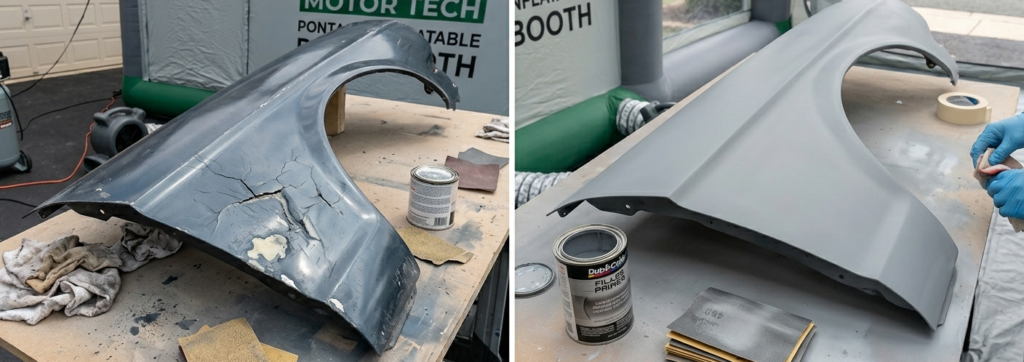
Step 1: Surface Preparation (The Most Important Phase)
Preparation accounts for roughly 80% of your final result. Consequently, this phase deserves the most time and attention. Start by washing the entire vehicle with a degreasing soap, then clay-bar the surface to remove embedded contaminants.
Sand all painted surfaces using the following progression:
- 180-grit to remove old clear coat and flatten rust edges
- 320-grit to smooth out the 180-grit scratches
- 600-grit wet sanding for the final smooth surface before primer
In addition, use a dual-action orbital sander for large panels and hand-sand contours and door jambs. After sanding, wipe every surface down with a tack cloth and then an IPA (isopropyl alcohol) wipe to eliminate all oil and dust.
Step 2: Addressing Paint Chips and Scratches with Dupli-Color Scratch Fix
Before you spray your base coat, deal with any chips, deep scratches, or small rust spots using the Dupli-Color Scratch Fix. This product is uniquely valuable in the DIY workflow because it delivers factory-matched color in a precision pen applicator, allowing spot-level repairs that integrate seamlessly with your overall paint job.
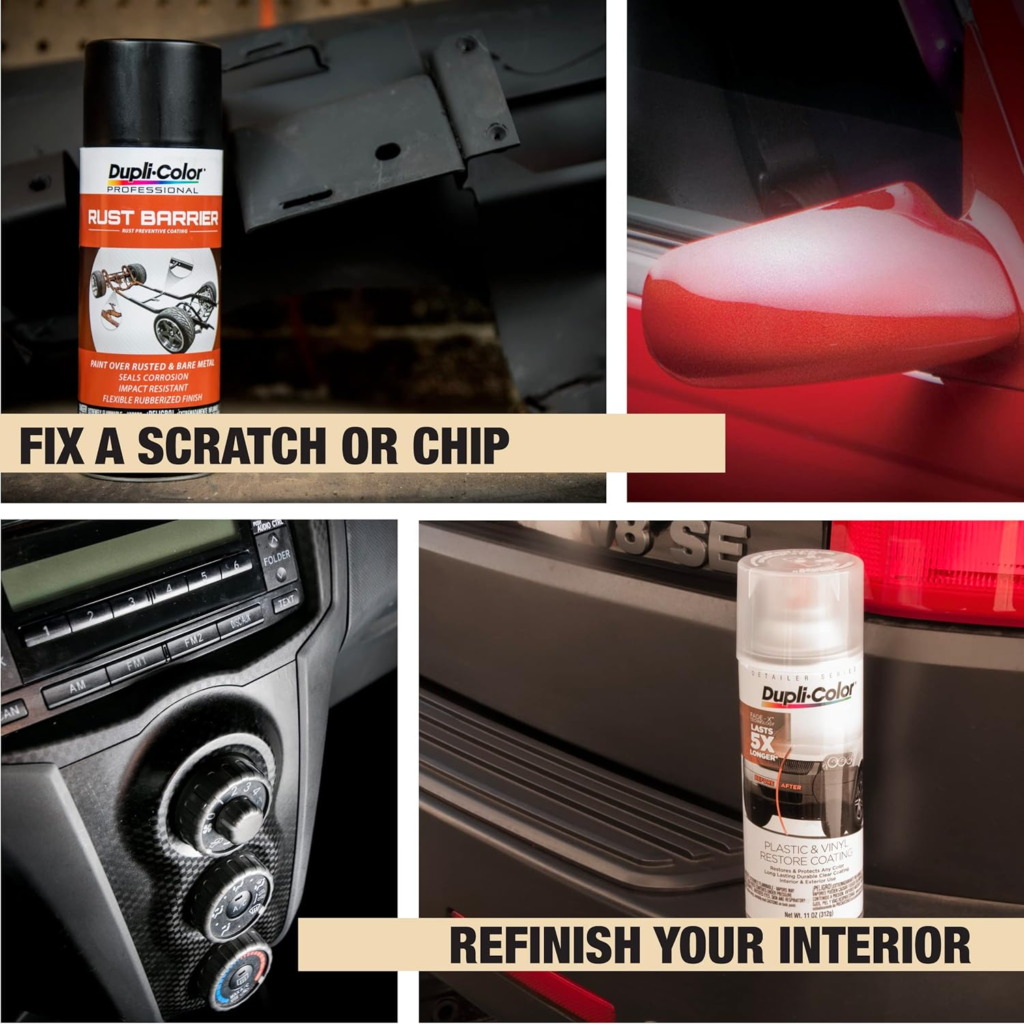
Apply the Dupli-Color Scratch Fix in thin, layered passes. Furthermore, allow each layer to flash off (approximately 5–10 minutes) before adding the next. Consequently, building up thin layers prevents the micro-pooling that causes a raised “blob” look on the repaired area. Once dried fully (24 hours), wet sand with 800-grit before proceeding.
CHECK PRICES HERE FOR: Dupli-Color Scratch Fix All-in-1 Touch-Up Paint
Step 3: Masking and Priming
Mask off all glass, rubber trim, wheels, and emblems with automotive masking tape and paper. Furthermore, use a flexible fineline tape around curves and door edges for clean separation lines. In addition, tape off any areas where you want a clean color boundary.
Apply your primer in two to three thin coats, allowing 15–20 minutes between coats. Consequently, a well-primed surface gives your base coat maximum adhesion and helps you identify any remaining imperfections before color goes on. Spot-block sand any primer runs with 400-grit before your color stage.
Step 4: Applying the Base Color Coat
Mix your base color according to your paint supplier’s ratio. Hold your spray gun (or can) 6–8 inches from the surface, overlapping each pass by 50%. Furthermore, use a consistent, fluid arm movement — stopping mid-panel causes sags and tiger-striping.
Apply two to three medium-wet coats of base, allowing adequate flash time between each. In addition, watch your lighting angle carefully — the Orion booth’s internal light helps you catch holidays (thin or missed areas) in real time. Consequently, catching these early means you fix them before the clear goes on, not after.
Step 5: Sealing the Finish with USC Spray Max 2K High Gloss Clearcoat
This step is where your paint job transforms from amateur to professional. The USC Spray Max 2K High Gloss Clearcoat is a two-component (2K) aerosol clearcoat that chemically cross-links after activation, creating a rock-hard, UV-resistant finish comparable to what’s sprayed in commercial booths.
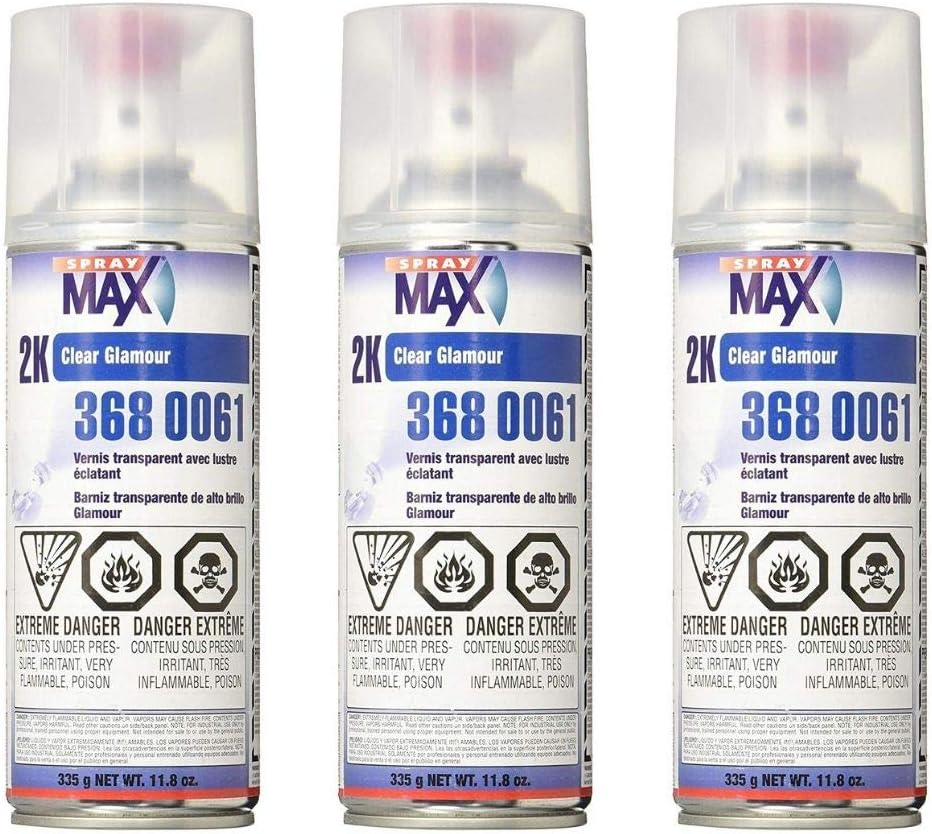
To activate the 2K can, press the button on the bottom firmly until you feel it click. Furthermore, shake vigorously for two full minutes after activation. You have approximately 24–48 hours to use the can once activated, so plan your clear-coat session accordingly.
Apply the USC Spray Max 2K in three wet coats, with 10-minute flash times between each. Consequently, this builds the film thickness required for machine polishing later. In addition, the high-gloss formula self-levels beautifully in a controlled booth environment, reducing orange peel texture significantly.
CHECK PRICES HERE: USC Spray Max 2K High Gloss Clearcoat Aerosol
Step 6: Final Wet Sanding and Polishing
After your clear coat cures for a minimum of 24 hours (48 is ideal), begin wet sanding with 1500-grit, followed by 2000-grit, and finally 3000-grit. Furthermore, this step removes any orange peel, dust nibs, or light runs without breaking through the clear. Consequently, the surface will look hazy and dull at this stage — that’s normal.
Machine polish with a DA polisher using a medium-cut compound followed by a finishing polish. In addition, finish with a spray wax or paint sealant for long-term protection. The result: a smooth, mirror-like surface that looks completely professional.
Clearcoat Durability Comparison Table
Choosing the right clearcoat is critical for longevity. Furthermore, not all aerosol clears are equal. Here’s how the USC Spray Max 2K stacks up against common alternatives:
| Product | Type | Hardness | UV Resistance | Polishable | Avg. Durability | DIY-Friendly |
|---|---|---|---|---|---|---|
| USC Spray Max 2K High Gloss | 2-Component (2K) | Very High | Excellent | Yes | Longest of the aerosol options | ✅ Yes |
| Rust-Oleum 2X Clear | 1K Acrylic Lacquer | Low | Poor | No | Shortest — expect to redo it | ✅ Yes |
| Dupli-Color Clear | 1K Acrylic | Low–Medium | Fair | Limited | Short to moderate | ✅ Yes |
| Automotive Shop Urethane | 2K Urethane | Very High | Excellent | Yes | Longest overall | ⚠️ Gun Required |
| SprayMax 3-1 Primer Clear | 2K Epoxy-Urethane | High | Good | Yes | Moderate to long | ✅ Yes |
Consequently, for any serious DIY paint job where durability and gloss retention matter, the 2K clearcoat category is the clear winner. In addition, the USC Spray Max 2K uniquely bridges the gap between aerosol convenience and professional-grade chemistry.
The Three Products That Do the Most Work
Touch-Up: Dupli-Color Scratch Fix
Best For: Touch-up repairs, paint chip correction, pre-paint prep Why We Recommend It: Factory-matched colors, precision pen applicator, integrates with full paint jobs Skill Level: Beginner–Intermediate
Check the current price: Dupli-Color Scratch Fix All-in-1 Touch-Up Paint
The Spray Space: Orion Motor Tech Inflatable Paint Booth (20x10x10 ft, two blowers)
Best For: Home painters who need a clean, controlled spray environment Why We Recommend It: Inflates in minutes, fits full vehicles, eliminates contamination Skill Level: All levels
Check the current price: Orion Motor Tech Inflatable Paint Booth (20x10x10 ft, two blowers)
The Clearcoat: USC Spray Max 2K High Gloss Clearcoat
Best For: Final clearcoat on full repaints and panel repairs Why We Recommend It: True 2K chemistry in aerosol form, professional hardness, UV stable, polishable Skill Level: Intermediate
Check the current price: USC Spray Max 2K High Gloss Clearcoat Aerosol
Conclusion: Your Professional DIY Paint Job Starts Today
Learning how to paint your car DIY is one of the most rewarding skills an automotive enthusiast can develop. Furthermore, with the right setup — particularly the Orion Motor Tech Inflatable Booth — and premium products like the Dupli-Color Scratch Fix and USC Spray Max 2K clearcoat, the quality gap between home and commercial results is smaller than ever in 2026.
Consequently, the investment in quality materials pays off not just in finish quality, but in longevity. A well-executed 2K clearcoat job can protect your vehicle’s color for five to seven years or more. In addition, the skills and confidence you build on your first project carry directly into every future repair and respray.
Take your time on prep, trust your process, and don’t rush the cure times. Furthermore, the painters who get the best results are never the fastest ones — they’re the most methodical. Your car deserves nothing less than your best effort, and this guide gives you everything you need to deliver exactly that.
ThePaintly.com is a participant in the Amazon Services LLC Associates Program. As an Amazon Associate, we earn from qualifying purchases. All product recommendations are based on independent research and editorial judgment.
Read This Before You Open a 2K Aerosol
Everything above assumes you understand what you are spraying, and this is the one section on the page that is not about finish quality. Two-component clearcoats and primers cure using an isocyanate hardener. That chemistry is what gives them their hardness, their UV stability and their polishability — and it is also a respiratory sensitiser. Once someone becomes sensitised to isocyanates, the reaction can recur at exposures far below the level that caused it, and it does not reverse.
What that means in practice, in a home garage:
- A dust mask does nothing. Neither does a paper respirator or a cloth mask. Isocyanate vapour passes straight through particulate filtration. You need a properly fitted air-supplied respirator, or at minimum a full-face cartridge respirator rated for organic vapour with fresh cartridges, and you need to know it seals against your face.
- Ventilation is not a substitute. An open garage door moves the vapour around; it does not remove it from where you are standing. A booth with an extraction fan does.
- Keep everyone else out. That includes people in the next room and pets. The overspray does not stay in the booth.
- Cover skin. Nitrile gloves, long sleeves, eye protection. Skin contact contributes to sensitisation.
- If you cannot do the above, use a 1K clear. It will not last as long and it will not polish out the same way, and that is a genuine trade-off worth making rather than one to talk yourself out of.
None of this is a reason not to paint your own car. It is a reason to buy the respirator before you buy the clearcoat.
The Panel I Ruined by Rushing the Flash Time
The first door skin I ever cleared came out with a fine wrinkle across the lower third, like the surface of the paint had shrunk against itself. I assumed I had contaminated it — silicone, fingerprints, something. I stripped it and did it again and got the same result in a slightly different place.
What I was actually doing was laying the second coat on before the solvent in the first had flashed off. The trapped solvent had nowhere to go but up, and it lifted the skin of the coat above it. The label had told me the flash time and I had read it as a suggestion because the surface felt dry to a knuckle.
Dry to the touch and flashed off are two different states, and on a warm day the gap between them is wider than it feels. Set a timer, walk away, and come back. Almost every DIY clearcoat failure I have seen since has been someone doing what I did — being efficient at the exact point in the job where efficiency costs you the panel.
When You Should Not Paint the Car Yourself
- The car is a metallic or pearl colour and you are doing a partial repair. Metallic flake orientation changes with gun distance, air pressure and even humidity, so a repaired panel can match perfectly in the shade and be visibly different in sunlight. Blending metallic is the hardest thing in refinishing and it is not a first project.
- There is rust coming through from behind the panel. Painting over it hides it for a season and then it lifts in a wider area than before. Rust that starts on the inside of a panel has to be addressed from the inside.
- You cannot control dust or temperature. Below roughly 60°F most automotive coatings will not cure properly, and a windy driveway puts grit in every coat. If you cannot get a clean, still, warm space, the finish will show it regardless of technique.
- The car is a lease or you plan to sell soon. A visibly amateur respray reduces value more than the original damage did in most cases. Touch-up and spot repair are the better economics there.
- You only need to fix chips and scratches. A full respray is a large job to solve a small problem. A touch-up pen and a light polish handles stone chips, and it is the fix most people searching for this actually need.
DIY Car Painting Questions People Actually Ask
Can you really paint a car at home and get a professional finish?
On solid, non-metallic colours, yes — the limiting factor is almost always the environment rather than skill. Dust, temperature and airflow decide more of the outcome than the gun does. On metallic and pearl finishes, matching is genuinely difficult and a partial repair will usually show.
What is the difference between 1K and 2K clearcoat?
1K clear dries by solvent evaporation and stays soluble, so it stays softer and cannot be properly polished. 2K clear cures through a chemical reaction with a hardener, giving a much harder, more UV-stable film that can be wet sanded and buffed. The trade-off is the isocyanate hardener, which requires proper respiratory protection.
Do I really need a spray booth to paint a car?
You need controlled air, which a booth is the easiest way to get. The booth is not about looking professional; it stops airborne dust landing in wet clear, and an extraction system pulls solvent vapour away from you. A portable inflatable booth is the affordable version of that in a home garage.
How long should I wait between coats?
Whatever the product label says, measured, not judged by touch. Dry to the touch and fully flashed off are different states, and recoating before the solvent has left the first coat is what causes wrinkling and lifting. Warm weather makes the surface feel ready sooner than it is.
Is a touch-up pen good enough for stone chips?
For chips down to primer or metal, yes, and it is the right tool. Clean the chip, remove any loose paint and rust, build the colour up in thin layers below the level of the surrounding paint, let it shrink, then level and polish. The failure mode is applying too much at once and leaving a raised blob that catches the light worse than the chip did.
Do I have to sand the whole car before painting?
You have to give the whole area you are painting a mechanical key, which usually means scuffing rather than sanding to bare metal. Bare metal only needs to be exposed where there is damage, rust or failed paint. Taking a sound factory finish back to steel creates work and rust risk you did not have.
What temperature do I need to paint a car?
Check the specific product, but most automotive coatings want a surface and ambient temperature comfortably above 60°F with moderate humidity. Cold slows or stops the cure, and high humidity can cause a milky blush in the clear. The panel temperature matters as much as the air temperature — a cold door skin in a warm garage is still cold.
If the job is engine bay rather than bodywork, the heat requirements are completely different and that is covered in our guide to the best engine paint. For interior plastics and trim, see paint for car interior plastic, and for wheels there is wheel paint. If you are building the spray space itself, how to make a DIY spray paint booth covers the fixed version.
Written by Sophie Ulman. ThePaintly is reader-supported: when you buy through links on this site we may earn an affiliate commission at no extra cost to you.