The Best Paint for ATV Plastics That Won’t Peel or Fade
Updated: July 2026 | By Sophie Ulman
Choose the wrong paint for ATV plastics and you’ll be watching it peel off in sheets after the first power-wash — or worse, wiping it away with a splash of gas at the pump. Raw ATV fenders are polypropylene, one of the slipperiest plastics there is, and standard spray paint has nothing to grip. Get it right, though, and a faded, chalky quad looks factory-fresh for three to five seasons of trail abuse.
The first time I repainted a set of Honda fenders, I skipped the adhesion promoter to save twenty minutes. Two rides later, the paint was flaking at every edge where the plastic flexed. I stripped it, did it properly, and the second attempt is still holding four years on. That mistake is the whole reason this guide leads with prep, not color.
Quick picks: the best paint for ATV plastics
| Product | Best for | Why it works |
|---|---|---|
| Krylon Fusion All-In-One | Best overall | Bonds to bare polypropylene with no separate primer |
| Rust-Oleum Specialty Vinyl | Flexible, faded fenders | Stays flexible so it won’t crack when plastic bends |
| Bulldog Adhesion Promoter | The prep step that stops peeling | Chemically grips slick plastic before your color goes on |
| Rust-Oleum Specialty Plastic Primer | Stubborn OEM plastic | Extra bite for glossy factory panels |
| Krylon Fusion Clear | UV protection | Locks in color and blocks the sun that fades it |
The 5-can system: 2 paints and the 3 products that make them stick
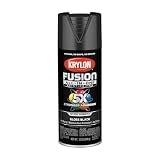
Krylon Fusion All-In-One (Gloss Black)
Fusion’s whole trick is a solvent blend that softens the top layer of the plastic for a few seconds and lets the paint chemically knit into it, instead of just sitting on the surface. That’s why it grips polypropylene fenders that reject ordinary enamel — no separate bonding coat required for most panels.
On chalky ATV fenders, a 320-grit scuff before spraying is what gives it something to hold. The one honest limitation: it hates humidity. Sprayed on a muggy day, the finish can dry gritty and blotchy. Keep it under 60% humidity and 55-75°F or it fights you.
- No separate primer on most plastics
- Flexes with the fender
- Wide color range
- Very sensitive to humidity
- Needs light coats to avoid runs
Best for: Riders repainting bare or lightly faded fenders who want one can that primes and colors in a single step.
Check Price on Amazon →Via Amazon.com
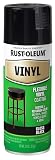
Rust-Oleum Specialty Vinyl Spray (Black)
This one cures to a genuinely elastic film rather than a hard shell — the resin stays rubbery so it moves when the plastic moves. On an ATV, that matters. Fenders flex every time you load them or drop off a ledge, and a rigid paint cracks at exactly those stress points.
I sprayed a set of sun-bleached quad flares with this and the color evened out beautifully, hiding the chalky gray. The trade-off is durability against abrasion: where a boot heel scuffs it repeatedly, it wears faster than a hard enamel. It restores color better than it armors against rocks.
- Stays flexible — won’t crack on flex points
- Great at reviving faded color
- Sprays at any angle
- Softer against abrasion than hard enamel
- Limited color selection
Best for: Faded, flexible fender flares and mud guards that bend often and need color restored, not armor plating.
Check Price on Amazon →Via Amazon.com
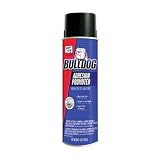
Klean-Strip Bulldog Adhesion Promoter
Bulldog isn’t a color — it’s the invisible layer that decides whether your paint stays on. It lays down a tacky, chemically active film that bonds to slick polyolefin plastic on one side and grabs your topcoat on the other. Think of it as double-sided tape for paint.
This is the product I skipped on that first Honda job, and adding it is the single change that took my fender paint from weeks to years. Spray a light, even mist, let it flash for a couple of minutes, then paint within the window on the can. Miss that window and you re-coat — it’s not a “do it whenever” primer.
- Dramatically cuts peeling on bare plastic
- Dries fast, no mixing
- Works under most spray topcoats
- Short recoat window
- Goes on invisible — easy to miss a spot
Best for: Anyone painting bare OEM ATV fenders who wants the paint to survive gas splash and power-washing.
Check Price on Amazon →Via Amazon.com
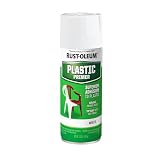
Rust-Oleum Specialty Plastic Primer
Some factory ATV panels come with a slick mold-release coating that even good paint slides off. This primer is built to bite into exactly those glossy, stubborn plastics and give a toothy base your color can lock into. It’s the belt-and-suspenders move for panels you don’t trust.
I reach for this on high-gloss plastics — think shiny fender tips and headlight surrounds — where a scuff alone isn’t enough. One caution from experience: build it in thin coats. Laid on thick, it stays soft underneath and your topcoat prints a thumbnail dent for days.
- Grips glossy factory plastic
- Sandable, even base
- Cheap insurance against peeling
- Stays soft if applied thick
- Adds a step and dry time
Best for: Glossy OEM panels and mold-release plastics where an adhesion promoter alone leaves you nervous.
Check Price on Amazon →Via Amazon.com
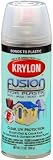
Krylon Fusion Clear Coat
UV is what actually kills ATV plastic color — the sun breaks down the pigment and leaves that chalky gray haze. This clear lays a UV-resistant shield over your finish and adds a sacrificial layer that takes the trail scuffs instead of your color coat. It also deepens the gloss.
I clear over every fender job now. On a black-fendered quad I run in full sun, the cleared panels still look wet two summers later while an un-cleared test corner has already dulled. Two thin coats — always. One heavy coat of clear will orange-peel on you and there’s no hiding it.
- Blocks fade-causing UV
- Takes scuffs so color doesn’t
- Boosts gloss depth
- Orange-peels if sprayed heavy
- Adds cost and a cure day
Best for: Any ATV that lives outside in the sun and needs its fresh color to actually last a few seasons.
Check Price on Amazon →Via Amazon.com
Where this falls in your project: PAINT stage
Refinishing ATV plastics is a PAINT-stage job, but it leans hard on the two stages before it. The color you choose is only as good as the prep and prime work underneath. That’s the same lesson that runs through every plastic project on this site, from general spray paint for plastic to painting 3D prints: prep beats product, every time.

If you are doing a whole set of panels, not one fender
The five-can system above is built for a fender or two, and for that it is the right answer. A full plastics set is a different job. Front and rear fenders, side panels, a rack cover and a set of fender flares is somewhere north of eight cans once you count the adhesion promoter and the clear — and every one of those cans is a slightly different day, a slightly different temperature, and a slightly different arm speed.
That is where the colour goes wrong on a full set. Not adhesion — the promoter handles adhesion. It is that the fenders end up reading as three subtly different shades of the same colour, and you only see it when the machine is back together in daylight.
TCP Global Professional HVLP Spray Gun, 1.3 mm Gravity Feed with 1-Litre Cup and Air Regulator
A full-size gravity-feed gun with a 1.3 mm stainless needle and nozzle set, a one-litre aluminium cup, and a micrometer air regulator with a gauge at the gun inlet. The 1.3 mm tip is the standard size for light-to-medium viscosity material, which is what a reduced plastic-safe colour is.
One litre in the cup is the whole point on a plastics set: you mix once, you write down the pressure and the fan, and every panel gets identical material at identical pressure. That is the only way a six-panel set comes out as one colour. It also lets you shoot the adhesion promoter and the UV clear through the same gun, so the stack cures as one film.
- Every panel gets identical material and pressure
- One mix covers a full set, no can-to-can variation
- Shoots promoter, colour and UV clear through one set-up
- Wants roughly 4.2 to 7.1 CFM, more than a pancake compressor holds
- You must reduce and strain the paint yourself
- Pointless for a single scuffed fender
Best for: a full plastics set, a colour change, or anyone who has already repainted a quad once and watched the panels come out mismatched.
Check Price on Amazon →Via Amazon.com
When not to buy it: one faded fender does not justify this. Buy the Fusion, scuff to 320, and you are done in an afternoon for a fraction of the money. The gun is for the second machine or the full colour change — and check what your compressor actually holds before you buy it, because that is the real cost of switching.
How to choose the right paint for ATV plastics
Match the paint to the plastic, not the color chart
Most ATV fenders are polypropylene or polyethylene — the same slick family as milk jugs. Ordinary enamel has nothing to bond to on these. You need paint labeled for plastic adhesion, or a plain topcoat riding on top of an adhesion promoter. Grab the wrong can and no amount of technique saves it.
Flexibility beats hardness on a moving fender
Your fenders flex constantly. A brittle, ultra-hard finish looks great on day one and cracks at the flex lines by season’s end. Prioritize a paint that stays a little elastic. This is where the specialty vinyl formula earns its place over harder automotive enamels.
Plan for UV or plan to repaint
Sun is the enemy. The single biggest reason ATV plastic goes chalky is UV breakdown, not wear. If your quad lives outside, a UV clear coat isn’t optional — it’s the difference between color that lasts two seasons and color that lasts five. The same logic applies to painted engine components and wheels that bake in the sun.
When NOT to use this: skip painting and replace instead
Paint for ATV plastics can’t fix everything. If a fender is cracked, gouged deep, or has become brittle and chalky all the way through, no coating will hold — it will just flake off the failing plastic underneath. Badly warped or sun-rotted panels are a replacement job, full stop.
Also skip DIY paint on any panel with a factory textured grain you want to keep — spray paint fills and flattens that texture, and there’s no getting it back. If original texture matters to you, leave it raw or use a dedicated plastic dye instead of a coating.
Prep steps that actually stop the peeling
Durability here is maybe 50% product and 50% surface prep — and honestly, on slick ATV plastic, prep is the bigger half. Rush it and the best paint for ATV plastics still peels. Here’s the sequence that has held up for me:
- Degrease first. Wash panels with dish soap, then wipe with a wax-and-grease remover. Mold-release oils are invisible and they kill adhesion.
- Scuff, don’t gouge. Scuff-sand with 320-grit until the sheen is gone and uniform. You want tooth, not deep scratches.
- Wipe again. Remove every speck of sanding dust with a tack cloth. Dust under paint becomes a bump forever.
- Promote adhesion. Lay down your adhesion promoter or plastic primer and respect the recoat window on the can.
- Two thin coats. Color goes on in light passes, not one heavy blast. Then clear it. Two thin coats always beat one thick coat.
For a deeper walk-through of prepping slick surfaces, my general guide to painting plastic and the car interior plastic guide both drill into the same adhesion principles. The Family Handyman team echoes the same point: on plastic, prep is where projects are won or lost. And when you strip old coatings, dispose of the solvent waste per EPA hazardous waste guidance — don’t pour it down a drain.
The verdict
For most riders, Krylon Fusion All-In-One is the best paint for ATV plastics — it bonds to bare polypropylene without a separate primer and flexes with the fender. Back it with Bulldog Adhesion Promoter on stubborn panels and seal everything with Krylon Fusion Clear for UV. Prep it right and that combination survives years of trail abuse instead of weeks.
Do you have to sand ATV plastics before painting them?
Yes — and this is the step people skip because every can promises it bonds to plastic without prep. Fusion really does knit into raw polypropylene. What it cannot do is knit into the mould-release wax that was on the panel when it left the factory, or into the silicone from six years of tyre shine and trail spray. The paint bonds beautifully to the contamination, and the contamination lets go of the plastic.
The first time I painted a set of quad fenders I degreased them, sprayed them, and skipped sanding entirely because the can said no primer needed. They looked showroom for about three weeks. Then a branch caught the front fender on a trail and the paint peeled back in one continuous sheet the size of my hand, like a sticker. Underneath, the plastic was still glossy. The paint had never touched it.
Here’s the sequence that has held up since, and it takes about twenty minutes a panel:
- Wash with dish soap and hot water first, before you sand. Sanding a dirty panel drives the contamination into the scratches instead of removing it. Wash, rinse, dry.
- Wipe with isopropyl alcohol, not lacquer thinner. Thinner attacks soft ATV plastics and leaves a hazy, softened surface that stays tacky under paint.
- Scuff with 320-grit by hand, not a machine. You are not removing material, you are killing the gloss. Every square inch should go from shiny to uniformly dull. Machine sanding heats polypropylene fast enough to melt and glaze it, which is worse than not sanding at all.
- Blow off the dust, then wipe with alcohol a second time. Sanding dust is the most common reason a good paint job comes out gritty.
- Shoot the adhesion promoter within the hour. Scuffed plastic starts picking up airborne oils and static-held dust immediately. If the panel sits overnight, wipe and re-scuff.
Can you skip the sanding on a brand-new, never-installed OEM panel? Sometimes — new plastic that has been degreased twice will take Fusion directly. But new panels are exactly where mould release is heaviest, so I still scuff. The twenty minutes is insurance against redoing the whole job.
And the part that decides everything: prep matters more than the brand. A properly scuffed, properly degreased fender under a basic can of Krylon will outlast a filthy one under anything you can buy. Then two thin coats — two light passes always beat one heavy one on a flexing panel, because a thick film cracks the first time the plastic bends in the cold.
If you’re working on interior panels rather than fenders, the surface behaves differently — see the paint for car interior plastic guide, where flexibility matters less and abrasion resistance matters more. For hard, non-flexing plastic parts, the 3D print painting method transfers almost directly.
Paint for ATV plastics: frequently asked questions
Do I need primer to paint ATV plastics?
Not always — an all-in-one bonding paint like Krylon Fusion skips it on most panels. But on glossy factory plastic, a dedicated adhesion promoter or plastic primer is what keeps the paint from peeling. When in doubt, use one.
Why does paint peel off ATV plastic so fast?
Because ATV fenders are slick polypropylene and ordinary paint has nothing to grip. The mistake I see most often is skipping the degrease and adhesion promoter. Slick, oily plastic sheds paint within weeks no matter the brand.
Will painted ATV plastics survive gas and power-washing?
Yes, if you prep properly and add a UV clear coat. A bonded, cleared finish shrugs off fuel splash and a normal wash. A rushed job with no promoter will bubble the first time gas hits it.
How many cans of paint for ATV plastics do I need?
Figure roughly one 12-oz can per two to three panels for two coats, plus a can of clear. A full quad set of fenders usually takes two to three color cans. Use the calculator above for your panel count.
Can I paint ATV plastics a different color than factory?
Absolutely — that’s the appeal. Just cover a dark factory color with a light one in extra thin coats so it fully hides. Prime first if you’re going from black to a bright color.
Is vinyl dye better than paint for ATV plastics?
Dye soaks in and keeps the factory texture, which paint fills. If you want to preserve grain and only refresh color, dye wins. For a color change or a glossy finish, paint plus clear is the better call.