The Best Crack-Covering Paints for Interior Walls
Updated May 2026 · ThePaintly Editorial
You paint the wall, step back, and the crack is still there — staring through the fresh coat. It happens because most people use the wrong product at the wrong stage. The right paint to cover cracks in walls isn’t always a paint at all. Sometimes it’s a flexible compound, a patch-and-prime combo, or an elastomeric filler that seals the gap before topcoat ever touches the wall.
We tested five products across a range of crack types — hairline fractures, stress cracks near corners, and wider shrinkage cracks in drywall — and ranked them by how cleanly they hide under a standard flat latex topcoat. Here’s what actually works.
Quick Picks at a Glance
| Product | Best For | Type | Check Price |
|---|---|---|---|
| DAP CrackShot 1 Gal | All-purpose cracks — best overall | Spackling paste | Amazon → |
| 3M Patch Plus Primer | Speed — patches and primes in one step | Patch + primer combo | Amazon → |
| DAP ElastoPatch Textured | Textured walls — sand or orange-peel finish | Elastomeric compound | Amazon → |
| Goodbye Cracks Spray | Hairline cracks — invisible bridging | Elastomeric spray | Amazon → |
| Red Devil Crack Patch | Deep cracks — premium flexible fill | Acrylic spackling | Amazon → |
Full Product Reviews
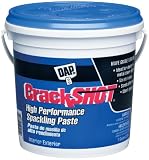
DAP CrackShot is the benchmark in crack-filling spackling pastes. It goes on smooth with a putty knife, shrinks almost imperceptibly during drying, and sands to a dead-flat surface that disappears under paint. On drywall seams and wider shrinkage cracks, it delivers a genuinely paintable surface in about two hours — no flash and no re-coating with primer required on already-painted walls.
The gallon size makes it the sensible choice for anyone working through a full room rather than patching a single nail hole. One quart covers roughly 15–20 linear feet of standard hairline cracks filled with a 3/4-inch putty knife. It cleans up with water while wet and doesn’t emit the sharp chemical smell of solvent-based fillers.
Key fact: Professional knife-grade formula won’t shrink or flash — two properties that cause most DIY patches to show through paint.
✅ Pros
- No shrinkage — fills once
- Ready in 1–2 hours
- Economical gallon size
- Sands without dragging
❌ Cons
- Still requires a topcoat
- Not for cracks wider than ¼ inch
- Overkill for single holes
Best for: Rooms with multiple cracks, drywall stress fractures, and seams needing a true professional-grade spackling.
Check Price on AmazonVia Amazon.com
🔗 Related ThePaintly Guides
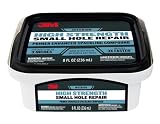
3M engineered this as the fastest possible path from crack to painted wall. It patches, primes, and seals in a single application — skipping the separate primer step that catches most DIYers off-guard. On smooth drywall, the surface is ready for topcoat in 30 minutes. The built-in primer prevents flashing, which is the blotchy semi-gloss spot you see when flat paint absorbs differently over an unprimed patch.
Its main limitation is coverage: the 8 oz tube is sized for spot repairs, not room-wide crack campaigns. It also has slightly less flexibility than elastomeric options, so it works best on stable walls rather than walls with ongoing movement or settlement. For small to medium repairs in a house that’s stopped settling, nothing beats the convenience.
Key fact: Eliminates the primer step — paint straight over the patch in 30 minutes without getting flash spots or blotchy coverage.
✅ Pros
- Patch + prime in one product
- Ready in 30 minutes
- No flashing under topcoat
- Trusted 3M formulation
❌ Cons
- Small 8 oz coverage area
- Not ideal for flexible/moving walls
- Pricier per oz than spackling
Best for: Quick repairs on stable walls, nail holes, small gouges, and anyone who wants to skip the separate priming step.
Check Price on AmazonVia Amazon.com
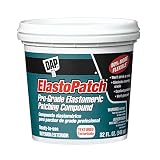
Smooth-wall spackling looks wrong on an orange-peel or sand-texture wall — it leaves a glassy patch that catches light at the wrong angle. DAP ElastoPatch Textured solves this by including fine aggregate particles that mimic the surface texture of most factory-applied drywall finishes. Apply with a knife or brush, feather the edges, and the patch blends with the surrounding texture after paint.
The elastomeric base gives it flexibility after curing — it moves slightly with the wall rather than cracking again at the repair site. This is a significant advantage on walls that experience seasonal humidity swings or minor thermal movement. The 32 oz tub is the right size for most room repairs without leaving excessive leftover product.
Key fact: Contains aggregate particles that replicate factory orange-peel and sand texture — patches blend into the wall rather than creating a smooth spot.
✅ Pros
- Matches factory wall texture
- Flexible after curing
- Interior and exterior rated
- Feathers cleanly at edges
❌ Cons
- Texture match varies by wall
- Needs practice to feather correctly
- Still needs topcoat paint
Best for: Textured drywall, stucco-look walls, and orange-peel finishes where smooth spackling would create a visible mismatch.
Check Price on AmazonVia Amazon.com
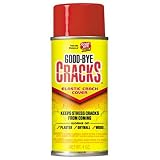
Hairline cracks are the hardest to fill with a knife. The gap is too thin to accept spackling cleanly but wide enough to telegraph through paint as a visible line. Goodbye Cracks is an elastomeric liquid that flows into the crack on contact, then dries to form a flexible film that moves with the wall. Applied over a clean surface, it becomes invisible under a latex topcoat.
The 4 oz bottle is brush-applied or can be painted on with a small roller. It dries in about an hour and accepts standard interior flat or eggshell paint. On plaster walls with spider-web hairline cracking — sometimes called crazing — it’s the most efficient solution available. No spackling, no sanding, just brush on, dry, paint.
Key fact: Designed specifically for hairline cracks where spackling can’t make contact — it wicks into the gap by capillary action and forms a flexible permanent film.
✅ Pros
- No sanding required
- Works on hairline and spider cracks
- Paintable in 1 hour
- Flexible permanent film
❌ Cons
- Small 4 oz bottle — limited area
- Not for cracks wider than 1/16 inch
- Requires clean, dust-free surface
Best for: Plaster walls with hairline crazing, spider cracks, and any fracture too thin to accept spackling with a putty knife.
Check Price on AmazonVia Amazon.com
Red Devil’s Crack Patch uses a high-solids acrylic formula that resists cracking at the repair site more aggressively than standard spackle. It’s the product to reach for when you’re working on a wall that’s cracked before — one where a cheap filler failed and the crack re-opened within months. The premium acrylic binder locks into the substrate and doesn’t become brittle when temperatures fluctuate.
Application is straightforward: overfill slightly, let it cure fully, sand to flat. The extra cure time (3–4 hours versus 1–2 for standard spackling) is the tradeoff for the durability. For walls near exterior-facing surfaces, HVAC vents, or areas prone to seasonal movement, this is the most permanent solution in the category.
Key fact: Premium acrylic binder resists re-cracking at the repair site — the right choice for walls that have already failed once with standard spackling.
✅ Pros
- Resists re-cracking long-term
- High-solids premium formula
- Excellent adhesion to old plaster
- Good for repeat-failure cracks
❌ Cons
- 3–4 hour cure time
- Pricier than standard spackling
- Not needed for minor hairline cracks
Best for: Repeat-failure cracks, walls near vents or exterior-facing surfaces, and anywhere you need maximum durability from a wall repair.
Check Price on AmazonVia Amazon.com
🔗 More ThePaintly Guides
⚡ Pro Tips for Crack Repair That Holds
- Never paint over loose edges. Run a putty knife along the crack first to remove any flaking paint or friable plaster. A weak edge means the repair peels within a year.
- Dampen plaster before patching. Old plaster is porous and pulls water from wet filler too fast. Mist the crack with a spray bottle first. The filler cures at the right rate instead of crumbling at the surface.
- Feather wider than you think you need to. A 2-inch crack needs a 6-inch feathered patch to be invisible under paint. Tight edges catch light and telegraph the repair.
- Always apply two thin coats over deep cracks rather than one thick coat. A thick application shrinks more during drying and is more likely to crack at the center.
Renovation Stage: REPAIR
Crack repair happens before priming and painting. Do not skip this stage — paint will not hide structural cracks, only postpone the re-work.
Crack Coverage Calculator
🧮 How Much Filler Do You Need?
Enter your crack length and depth to estimate how much spackling paste you need.

How to Choose the Right Product for Your Cracks
Match the Product to the Crack Width
Crack width is the single most important variable. Hairline cracks — thinner than a sheet of paper — need a liquid elastomeric treatment like Goodbye Cracks because spackling can’t make contact inside the gap. Standard cracks up to 1/8 inch wide accept knife-applied spackling cleanly. Cracks wider than 1/8 inch need a high-solids compound like Red Devil Crack Patch, applied in two layers to prevent center shrinkage.
If you can see daylight through a crack or feel cold air near it, the crack is structural and no paint product will fix it permanently. Consult a contractor before applying any finish treatment.
Textured vs. Smooth Walls — the Often-Missed Factor
Smooth-wall spackling on a textured wall creates a flat spot that catches raking light and looks worse than the original crack. DAP ElastoPatch Textured exists specifically for this problem — its aggregate particles create a surface that blends with factory texture finishes. On smooth walls, standard spackling is the better choice because the aggregate particles create an unintended rough spot.
Check your wall texture in low-angle light from a flashlight before choosing your product. A slight orange-peel or sand texture almost always means you need the textured compound.
Speed vs. Durability — the Trade-off
3M Patch Plus Primer is the fastest option: 30 minutes to topcoat, no primer needed. But its formula prioritizes convenience over long-term flexibility. On walls with slight ongoing movement — near doors, windows, or exterior-facing surfaces — the faster-curing patch is more likely to re-crack than a premium acrylic formula like Red Devil.
If you’re repairing a wall that’s cracked in the same spot twice before, don’t choose on speed. Choose Red Devil Crack Patch and give it the full 4-hour cure. The extra time is cheap insurance against doing the same job again next year.
When to Prime Before Painting
Standard spackling absorbs paint differently than the surrounding wall — it’s more porous, and flat paint tends to look flat and dull over the patch while looking slightly sheen on the surrounding wall. This creates the “flashing” effect. The solution is to spot-prime the patched area with a PVA primer or shellac-based primer before applying topcoat. The only exception is 3M Patch Plus Primer, which has primer built into the formula. For every other spackling product, add a spot-prime step.
Reading the Crack Before You Fill
Run a screwdriver lightly along the crack edge. If material crumbles away, the surrounding substrate is weak and needs removing before filling. A stable crack with firm edges on both sides is ready for direct filler application. According to the EPA’s mold guidelines, cracks in areas with moisture exposure should be sealed completely before painting — a partially filled crack in a humid room becomes a moisture channel. Additionally, Family Handyman’s crack repair guide recommends widening hairline cracks slightly with a can opener before filling — a technique that creates better mechanical bite for the filler.
Prep Steps Before You Cover Cracks
- Clear the area. Remove switch plates, outlet covers, and any hardware near the crack. Tape drop cloths to protect flooring (15 min).
- Cut loose edges. Use a putty knife or utility knife to remove any flaking paint or loose plaster along the crack edges. Press firmly — if material lifts, remove it (10 min).
- Clean the crack. Vacuum out dust and debris. Wipe with a damp cloth and let dry. Filler won’t adhere to a dusty or wet surface (10 min + 30 min drying).
- Apply filler. Press filler firmly into the crack. Overfill slightly. Feather at least 3 inches on each side. For deep cracks, apply two thin layers (30 min + cure time).
- Sand and spot prime. Sand the patch flush. Spot-prime with PVA primer. Let dry before topcoating (30 min + 1 hr dry).
Our Verdict
For most walls, DAP CrackShot is the sensible default — it fills cleanly, doesn’t shrink, and works on any stable surface. For hairline cracks too thin for a knife, Goodbye Cracks is the only liquid option that actually works. If you’re repairing a textured wall, switch to DAP ElastoPatch Textured so the patch doesn’t create a smooth spot. In a hurry? 3M Patch Plus Primer gets you to topcoat in 30 minutes. And for any crack that’s failed before, Red Devil Crack Patch is the highest-durability option in the group.
Frequently Asked Questions
Can you paint directly over wall cracks without filling them?
Not effectively. Paint alone — even thick formulas — will not bridge cracks wider than a human hair. The crack telegraphs through the paint film, often within days of application. You need to fill the crack first, then prime, then paint. The only exception is a purpose-made elastomeric crack sealer like Goodbye Cracks, which is designed specifically to bridge hairline fractures before painting.
What is the best paint to cover cracks in walls permanently?
No paint covers cracks permanently on its own — the crack must be filled and sealed first. For permanent results, use a high-quality spackling compound (DAP CrackShot or Red Devil Crack Patch), spot-prime the repair, then apply your topcoat. This three-step process is the industry standard and produces repairs that last for years without re-cracking.
Does thick paint hide wall cracks?
Thick paint hides cracks less than most people expect. A flat latex applied at double the normal thickness still has a dry film build of only 3–4 mils — nowhere near enough to bridge a structural crack. Textured paint additives like HOMAX do help hide surface irregularities, but they’re most effective after the crack has been filled and the surface is already close to flat.
How do I fill cracks in walls before painting?
Clean out the crack, removing any loose material. Apply spackling paste with a putty knife, pressing firmly into the void. Overfill slightly and feather 3+ inches on each side. Let cure fully (1–4 hours depending on product). Sand flush, dust off, and spot-prime before topcoating. For hairline cracks, skip the spackling and use a liquid elastomeric crack sealer instead.
Why do cracks reappear after painting?
Cracks reappear for three main reasons: (1) the filler wasn’t flexible enough to move with the wall, (2) the substrate was still damp when filled, or (3) the underlying cause of the crack (settling, thermal movement, moisture) is still active. Flexible acrylic spackling handles movement better than rigid fillers. If the same crack opens repeatedly, it indicates ongoing wall movement that needs structural attention before cosmetic repair.
Do I need to prime after filling cracks?
Yes, for almost all spackling products. Most fillers are more porous than the surrounding wall and absorb paint at a different rate. This causes “flashing” — a dull spot over the patch. Spot-priming with a PVA or shellac-based primer before your topcoat eliminates this. The exception is 3M Patch Plus Primer, which has primer built into the formula and can be topcoated directly.
What causes hairline cracks in walls?
Hairline cracks in walls are almost always caused by normal building movement. New homes typically show hairline cracks in the first 1–2 years as the structure settles. Older homes develop them from seasonal thermal expansion and contraction. Plaster walls are especially prone because plaster is brittle and less flexible than drywall compound. Structural cracks — those wider than 1/4 inch, diagonal, or accompanied by door/window binding — require a structural assessment.