Best Limewash Paint in 2026: Walls, Brick and Full Exteriors
Updated August 23, 2026 · 12 min read · By Sophie Ulman
Finding the best limewash paint is the single most important decision in a limewash project — and it’s where most DIYers get it wrong. Real limewash has a specific chemistry: it’s made from slaked lime (calcium hydroxide) that carbonates as it dries, creating a matte, breathable, naturally varied finish you can’t replicate with standard latex. Buy the wrong product and you get a flat paint with some texture added. Buy the right one and you get a wall that looks like it belongs in a Tuscan farmhouse.
This guide cuts through the marketing noise. We reviewed the top limewash paints available on Amazon in 2026 — sorted by authenticity of finish, ease of application, coverage rate, and value. Whether you’re limewashing a single accent wall or tackling a whole interior, there’s a clear pick for your situation below.
Quick Picks at a Glance
| Pick | Product | Best For | Coverage |
|---|---|---|---|
| 🧱 Best for Brick & Exterior | Romabio Classico Limewash — Cristallo White, 2.5 L | Unpainted brick, stone and masonry, inside or out | 325–450 sq ft per gallon after dilution |
| 🏠 Best for a Whole Exterior | Romabio Classico Limewash — Bianco White, 15 L / 4 gal | Full house facades — same paint, bulk container | 325–450 sq ft per gallon after dilution |
| 🪨 Best Mineral Limewash for Interior Walls | Meoded Lime Wash — Off White, gallon | Real slaked-lime finish on drywall and plaster | 250–300 sq ft per gallon over two coats |
| 💰 Easiest DIY (limewash effect) | ALL-IN-ONE Limewash Paint — Manor House, gallon | A faux limewash look with no mineral chemistry to manage | 450–500 sq ft per gallon |
| 🖌️ The brush you actually need | Meoded Lime Wash Crosshatch Brush | Every mineral limewash — a roller will not make the texture | — |
A note on that table: the first three are genuine mineral limewash — slaked lime that carbonates and hardens into the wall. The fourth is a limewash-effect paint, which is a different product doing a visual impression of the same thing. Both are legitimate choices. They are just not interchangeable, and the difference matters most on the surfaces covered further down. If you are still deciding whether limewash is the right finish at all, what limewash paint actually is covers the fundamentals, and limewash versus chalk paint settles the comparison people most often get stuck on.
Top Limewash Paint Reviews
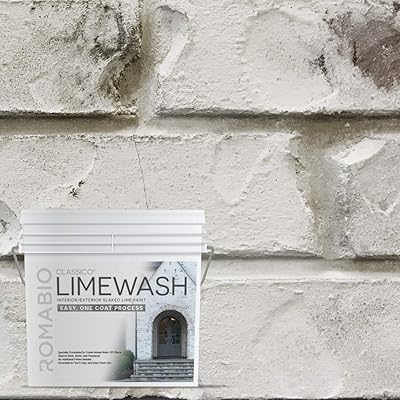
Romabio Classico is the benchmark for authentic limewash paint in the U.S. market. It’s made in Italy using traditional slaked lime — not a latex paint with a limewash effect added after the fact. The result is the real carbonation process: as the paint dries, CO₂ from the air reacts with the calcium hydroxide, creating a hard, breathable mineral film with natural color variation that looks genuinely aged rather than artificially distressed.
Application is straightforward for anyone willing to read the instructions. You apply it wet, work it into the surface in a crosshatch motion, then go back with a damp brush or cloth to vary the texture and wipe back depth where you want a lighter effect. Romabio states 325–450 sq ft per gallon after dilution, and that figure holds on the porous masonry the paint is designed for. On smooth interior drywall you should plan for well under half of it, because a non-porous surface takes far more material to build the same depth. Note the container size too: the standard tin is 2.5 litres, about two-thirds of a gallon, so a single tin covers considerably less than the per-gallon number suggests. Romabio Classico is the go-to choice for anyone who wants the real thing, not a convincing imitation. It’s available in dozens of color options and works on drywall, plaster, brick, and concrete block.
Key fact: Romabio Classico is a mineral paint — it bonds chemically to masonry and mineral surfaces rather than sitting on top, which is why it never peels or chips the way latex does.
- Authentic mineral limewash — genuine carbonation finish
- Works on drywall, plaster, brick, concrete
- Dozens of colors; fully mixable
- Breathable — won’t trap moisture in masonry
- Higher price per gallon than synthetic alternatives
- Lower coverage (~150 sq ft/gal) on porous surfaces
- Requires practice to get consistent variation
Best for: Interior walls, drywall accent walls, brick, plaster, fireplace surrounds
Check Price on Amazon →Via Amazon.com
Related: Planning to limewash wood paneling or shiplap? See our guide to painting wood paneling — it covers the key prep differences between limewash on wood versus drywall or masonry.
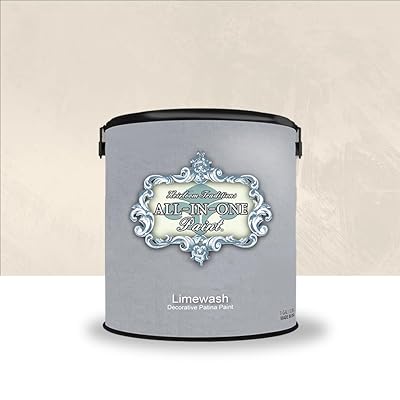
The ALL-IN-ONE Limewash Paint is the most accessible limewash paint for homeowners who want the look without the premium price. It’s a water-based lime wash designed for interior walls — not a true mineral limewash, but a product engineered to produce convincing color variation and depth on smooth and semi-smooth drywall. Application is more forgiving than authentic mineral limewash: you apply it with a brush or roller, then work it with a damp cloth to create texture and variation before it sets.
Heirloom Traditions rates the gallon at 450–500 sq ft, and because the technique deliberately leaves 50–70% of the base coat showing through rather than covering it, that figure is realistic in practice — which makes it noticeably more economical than mineral options for large rooms. The finish has slightly less depth and authenticity than Romabio Classico but is still a significant visual upgrade over flat paint. For a first-time limewash project on a single accent wall or a guest bedroom, the ALL-IN-ONE hits the value sweet spot. It’s also easy to clean up with water and dries faster than mineral limewash, which matters if you’re on a weekend timeline.
Key fact: Heirloom Traditions rates the ALL-IN-ONE gallon at 450–500 sq ft — well ahead of mineral limewash on the same wall, because the method covers only 50–70% of the surface by design.
- Lower cost per square foot than mineral limewash
- Higher coverage (~200 sq ft/gal)
- More forgiving technique — easier for beginners
- Fast drying, easy water cleanup
- Water-based — less authentic than mineral limewash
- Less depth and variation than Romabio
- Not ideal for exterior or masonry applications
Best for: Budget-conscious projects, large interior wall areas, first-time limewash DIYers
Check Price on Amazon →Via Amazon.com

For first-time limewashers who want the authentic Romabio result without guessing about quantities, Romabio offers a starter kit that pairs their Classico formula with the correct application brush, tinting guide, and a mixing paddle — everything in one package. This eliminates the most common first-timer mistake: buying the paint but not the right tools, then trying to apply mineral limewash with a standard roller and getting an uneven, blobby result.
The Classico formula in the kit is identical to the full-size product. The included Marmorino brush has the correct long, flexible bristles that allow you to apply pressure and pull at the same time — which is what creates the authentic dragged, layered look rather than just painting the wall a single color. If you’ve never done limewash before and want your first project to look professional, the starter kit removes the guesswork and gives you the right tool-to-product pairing from the start.
Key fact: Meoded Lime Wash is one of the only Amazon-listed limewash products rated for exterior masonry and stucco — most competitors are interior-only or drywall-only formulas.
- True mineral lime wash — not a synthetic faux effect
- Works on exterior masonry, stucco, and concrete
- Natural matte finish that deepens over time
- Interior and exterior rated
- Fewer color options than synthetic alternatives
- Lower coverage than faux limewash (250–300 sq ft/gal)
- Technique-sensitive — less forgiving than water-based options
Best for: Exterior masonry, stucco walls, natural/mineral limewash purists, interior and exterior projects
Check Price on Amazon →Via Amazon.com
⚡ Pro Tips for Limewash Paint
- Always test a sample first. Limewash dries significantly lighter than it looks wet. Apply a 12×12 inch test patch, let it cure 24 hours, and view it under different lighting before committing to a full wall.
- Wet the surface before applying. For mineral limewash on drywall, lightly misting the wall with water before application slows drying and gives you more working time to create texture. On brick or masonry, this is essential for proper carbonation bonding.
- Variation is the point. Don’t try to make limewash look perfectly even — the beauty is in the irregularity. Work in small sections (2×2 ft) and use a crosshatch motion rather than uniform strokes to build natural-looking depth.
- Second coats change everything. A single coat looks sparse. Two coats with the second coat wiped back gives you the layered, aged look. Budget time for both layers plus drying time between them.
Renovation Stage: PAINT
Limewash painting belongs in the PAINT stage — but surface prep is non-negotiable. Clean walls free of grease, dust, and flaking paint are essential. Mineral limewash applied over a dirty or glossy surface will not bond properly. See our guide to the best paint removers if you need to clear old gloss or peeling paint first.
🧮 Limewash Paint Coverage & Cost Estimator
Estimate how much limewash paint you need and what it will cost.

Buying Guide: What Makes a Good Limewash Paint
Not everything labeled “limewash” is the same product. The category spans from authentic Italian mineral paints to water-based decorative finishes that only loosely resemble the original technique. Here’s what actually separates them.
Mineral Limewash vs. Water-Based “Limewash Effect”
True mineral limewash is made from calcium hydroxide (slaked lime) suspended in water. When applied and left to dry, it carbonates — CO₂ from the air converts the calcium hydroxide to calcium carbonate, forming a hard, translucent mineral film bonded to the substrate. This is what gives authentic limewash its depth, translucency, and the slight sheen you see when light hits it at an angle. Water-based “limewash effect” paints skip this chemistry entirely. They use latex or acrylic binders with colorants to simulate the look. The results are decent, but they don’t have the same depth, they can’t carbonation-bond to masonry, and they look more flat over time. According to This Old House’s limewash guide, mineral limewash is the only option for exterior masonry applications where moisture resistance and breathability matter.
Coverage Rate and Cost Per Square Foot
Coverage varies more in limewash than in any other paint category. Smooth drywall might get 180–200 sq ft per gallon from a mineral limewash. The same product on rough brick or concrete block might only cover 80–100 sq ft — the porous surface absorbs much more. Always calculate your coverage based on the actual surface you’re painting, not the label’s maximum coverage claim. On a cost-per-sq-ft basis, mineral limewash typically runs $0.30–0.50 per sq ft for two coats — higher than standard paint but competitive with wallpaper or other decorative finishes of similar visual impact.
Color and Tintability
Raw limewash is naturally white (from the lime). Pigments are added to create colors, and most quality brands offer pre-tinted options in a range of neutrals — whites, warm beiges, soft terracottas, and aged grays. Custom tinting at the store is less reliable with mineral limewash than with latex because the pigment chemistry must be compatible with the alkaline lime base. Stick with manufacturer-specified colors or tints when possible. If you need a custom color, test a sample batch before tinting a full gallon. Color also shifts significantly as the paint dries — limewash always dries lighter than it looks wet, often by 30–40%.
Interior vs. Exterior Formulas
Interior limewash can be a true mineral product or a water-based decorative finish — both have their place. Exterior limewash must be a genuine mineral formula. Water-based latex limewash cannot withstand freeze-thaw cycles, UV exposure, or rain saturation on masonry. For exteriors, only pure mineral limewash should be used — it’s breathable (allows vapor to pass through the wall without blistering) and durable for 5–10 years before reapplication. Family Handyman’s exterior limewash guide recommends applying 2–3 thin coats on brick rather than one heavy coat to allow proper carbonation at each layer.
Related: Want to take the DIY route and make your own? See our guide to making custom colored chalk paint at home — the technique overlaps with DIY limewash recipes that use hydrated lime and water.
Which Surfaces Work Best for Limewash Paint
Limewash behaves differently depending on what it’s applied to. Knowing your surface before buying determines not just the product you choose but how much you’ll need and what technique will work.
Drywall (Smooth Interior Walls)
The most common limewash surface in modern homes. Smooth drywall gives you clean coverage and predictable color, but it lacks the natural variation of brick or plaster. This is where technique becomes critical — the crosshatch brush motion is what creates depth on a flat surface. For the most authentic look, lightly sand the drywall to create a slight tooth before applying, and always use two coats with variation in the second coat to build dimension.
Brick and Stone
Natural surfaces are where mineral limewash truly excels. Brick absorbs the lime deeply into its pores, creating a finish that looks like it has always been part of the wall rather than painted on. The texture variation from the brick itself does much of the artistic work — even a single coat on aged brick looks better than three coats on smooth drywall. Clean the brick thoroughly first and allow it to dry completely before applying.
Plaster and Stucco
Traditional plaster surfaces are historically the most common substrate for limewash. The alkaline chemistry of both plaster and limewash is compatible, and the slightly rough surface creates excellent adhesion and natural texture. Modern gypsum plaster works well too — just ensure the surface is fully cured (at least 30 days old for new plaster) before applying mineral limewash.
Related: Ready to apply? Our full step-by-step tutorial on how to match and work with existing paint on a wall covers prep and transition techniques that are equally relevant when adding limewash to a partially painted room.
Is Limewash Exterior Paint Any Good?
This is the question I get asked most, usually by someone standing in front of a red-brick house they have stopped liking. The short answer is yes — limewash is arguably better outside than inside, and it is the oldest exterior finish there is. But it is good in a specific way that catches people out.
Mineral limewash does not sit on masonry as a film. It carbonates into the top layer of the surface and becomes part of it. That gives you three things ordinary masonry paint cannot:
- It breathes. Moisture moving through a solid wall passes out through limewash instead of collecting behind it. This is why limewash almost never blisters or peels off brick, and why film-forming masonry paint on an old solid wall so often does.
- It is naturally alkaline, which discourages algae and mold on shaded north-facing elevations without any added biocide.
- It ages instead of failing. A film paint fails at an edge and looks damaged. Limewash thins gradually on weather-facing elevations and looks like patina. Whether that reads as charming or shabby is a matter of taste, and you should decide which camp you are in before you buy four gallons.
The catch is the substrate. Limewash needs a mineral surface with some porosity to grip — unpainted brick, stone, lime render, concrete, stucco. On a wall that has already been coated in modern acrylic masonry paint, there is nothing for it to bond into, and it will dust off. That is the single most common exterior limewash failure, and no product on this page fixes it.
Expect to refresh an exterior limewash roughly every five to seven years on weather-facing elevations, and considerably less often on sheltered ones. Recoating is genuinely easy: wash it down, apply, done. There is no scraping and no stripping, which is the part that makes the maintenance cycle bearable compared with repainting rendered walls.
For a whole facade, buy the big container. Limewash goes further than people expect after dilution, but running out halfway up a gable and mixing a fresh batch is how you end up with a visible band. The 15 L / 4-gallon Romabio Classico in Bianco White exists for exactly this — one batch, one consistent tone across the whole elevation.
If brick is what you are actually coating, the step-by-step is in how to limewash brick, and the fireplace version — which has its own heat and soot problems — is in how to limewash a brick fireplace.
How to Choose a Limewash Color
Limewash colour does not behave like paint colour, and choosing it the way you would choose a wall paint is how people end up disappointed.
Three things are different:
It dries dramatically lighter. Wet limewash can look two or three shades darker than the finished result. The lime is white; the pigment is suspended in it, and as the water leaves and carbonation begins, the white asserts itself. Never judge from the wet coat, and never judge from the first hour.
It is never one flat colour. The whole point is mottling — lighter where the brush laid less, darker in the hollows. A sample the size of your hand tells you almost nothing, because the variation needs room to read. Do a test patch at least a metre square, and look at it in morning and evening light before you commit.
The substrate colour comes through. On red brick, a white limewash goes warm and pink-ish. On grey stone it goes cool. The same tin produces two different results on two different walls, which is why brand colour cards are a starting point rather than a promise.
As for which shade: the classic whites and off-whites are classic for a reason — they let the texture do the work. Deeper colours are available and can look extraordinary, but they show application inconsistency far more, so they punish a first attempt. If this is your first limewash wall, start light.
Tinting your own is possible with mineral pigments but not with ordinary colourant, which the lime will bleach out. Buying pre-tinted is the sane route for a first project.
Once you have settled on a colour, the application itself is where the finish is won or lost — the step-by-step walkthrough for limewashing walls covers the crosshatch motion, the working time, and how to open the texture back up before it sets.
What Else You Need Before You Start
Limewash is one of those finishes where the tools are not optional extras — they are part of whether it works.
A crosshatch brush. Not a roller, and not a standard wall brush. The mottled texture comes from a wide, natural-bristle block brush worked in an X pattern. A roller lays limewash flat and dull and removes the only reason you bought it.
Meoded Lime Wash Brush — professional crosshatch brush, natural bristle blend is made for this specific motion and holds enough material that you are not reloading every half metre.
A mineral base coat, if you are going onto drywall. Mineral limewash needs something alkaline and porous to key into. Bare or conventionally primed drywall does not qualify, and this is where most interior limewash failures start.
Meoded Lime Wash Base Coat — mineral-based primer, quart is the matched primer for the Meoded lime wash above, and using a manufacturer’s own base coat removes an entire category of compatibility guesswork.
Beyond that: a bucket for dilution, a spray bottle of clean water for opening up the texture while it is still workable, and old clothes. Lime is caustic while wet. Gloves and eye protection are not a formality here.
When limewash is the wrong choice
- Over existing acrylic or latex paint. Mineral limewash cannot bond to a plastic film. It will powder off. Either strip back to the substrate or choose a limewash-effect paint instead, which is formulated to go over paint.
- In a shower or on a splashback. Limewash is breathable and porous by design. Constant direct water is the one thing it will not take.
- Anywhere you need a wipe-clean surface. Kitchens behind a hob, hallways at hand height, a house with small children and felt-tip pens. Limewash cannot be scrubbed without burnishing.
- When you want a uniform, flat colour. If mottling would read to you as a mistake rather than a texture, this is the wrong finish and no amount of technique will change that.
- On a wall with an unresolved damp problem. Limewash is more forgiving of damp than film paint, but it is not a damp treatment, and it will not hide a leak.
Second thoughts happen. Limewash does come off, and I have written up the process in how to remove limewash paint — it is more work than applying it, so it is worth reading before you commit rather than after.
Final Verdict
Pick by surface, not by ranking. If you are coating unpainted brick, stone or a facade, Romabio Classico is what the job wants — real Italian slaked lime, made for masonry, and the finish that ages rather than fails. Buy it in the 4-gallon container if you are doing a whole elevation, so the tone stays consistent across it.
If you are limewashing interior drywall or plaster and want genuine mineral chemistry, Meoded Lime Wash is the one to buy, paired with its own mineral base coat — on drywall that base coat is the difference between a finish that holds and one that dusts.
And if the wall is already painted, or you simply want the look without the chemistry, ALL-IN-ONE Limewash Paint is the honest answer. It is a limewash effect rather than limewash, and over existing acrylic that is a feature, not a compromise — real limewash would not stick there at all.
Whichever you choose, buy the crosshatch brush. It is the cheapest item here and the one that most changes how the wall looks.
Frequently Asked Questions
What is the best brand of limewash paint?
Romabio is the best brand of limewash paint for authentic mineral results. Their Classico Limewash uses genuine slaked lime and carbonates as it dries, creating the real depth and translucency that distinguishes true limewash from decorative imitations. For a more affordable alternative on interior walls, ALL-IN-ONE Limewash Paint by Heirloom Traditions is the best value option.
Is limewash paint the same as chalk paint?
No — limewash and chalk paint are completely different products. Limewash is made from slaked lime and produces a translucent, mineral finish that carbonates onto the wall. Chalk paint is a water-based acrylic paint with calcium carbonate added for a matte, chalky look. Chalk paint is opaque; limewash is semi-transparent. The application techniques and finishes are also very different.
Can you use limewash paint over existing paint?
Yes, with conditions. Water-based limewash products (like ALL-IN-ONE) can generally be applied over existing latex paint in good condition. True mineral limewash (like Romabio Classico) works best on mineral substrates — drywall, plaster, brick, concrete — but can be applied over existing latex if the surface is clean, dull (not glossy), and well-adhered. Glossy paint should be lightly scuffed first to create adhesion.
How long does limewash paint last?
Interior mineral limewash on properly prepared drywall or plaster can last 10–15 years or more without significant fading or peeling — it bonds chemically to the substrate rather than forming a film on top. Exterior mineral limewash on brick or masonry typically needs reapplication every 5–10 years depending on climate and sun exposure. Water-based limewash products have a shorter lifespan, typically 5–7 years indoors.
Can I make limewash paint at home?
Yes — DIY limewash can be made from hydrated lime (Type S or agricultural lime) mixed with water to a milk-like consistency. Add universal pigments for color. The basic ratio is 1 part lime to 3–4 parts water for the first coat, thicker for subsequent coats. However, working with hydrated lime requires gloves and eye protection as it is highly alkaline. Pre-mixed commercial products are safer and more consistent for most homeowners.
Does limewash paint wash off?
Properly applied and cured mineral limewash does not wash off — the carbonation process bonds it permanently to the substrate. Freshly applied limewash (within the first few hours) can be adjusted with water, which is why the wet-rub technique works to vary texture. Once cured (24–48 hours), it becomes highly durable and water-resistant. Water-based “limewash effect” products are also durable once cured but may not have the same wash-resistance on high-moisture surfaces.
How many coats of limewash do I need?
Two coats is the standard for most interior limewash projects. The first coat provides base coverage; the second builds depth and allows for texture variation — applying the second coat wet and then wiping or stippling it back is what creates the layered, aged look. On brick or stone, three thin coats often look more authentic than two thick ones. Allow each coat to dry fully (at least 4–6 hours) before applying the next.