Can You Paint a Plastic Shed? Here’s What Holds Up Outdoors
Updated: August 2026 | By Sophie Ulman
A resin shed that gets painted wrong doesn’t fade gracefully. It sheds. You come out in April after the first freeze-thaw cycle and there are curls of colour lying in the grass like sunburnt skin, and underneath is the same tired beige you were trying to cover. So: can you paint a plastic shed? Yes. You can absolutely paint a plastic shed and get five or six good years out of it. But only if you handle adhesion before you handle colour, because plastic is a non-porous, low-surface-energy material and ordinary exterior paint has nothing to grip.
I learned that the expensive way. The first time I tried to paint a plastic shed — a ten-year-old Keter unit behind a rental — I hosed it down, let it dry in the sun, and rolled straight on with leftover exterior acrylic. It looked flawless in October. By March I could peel a sheet of it off with my thumbnail in one piece. Here’s what I learned: on polyethylene, the paint doesn’t fail at the wall, it fails at the film-to-plastic boundary. Cleaning is not prep. Bonding is prep.
What’s on this page
The short answer: yes, with one non-negotiable step
Nearly every plastic shed sold in the US is either high-density polyethylene or a polypropylene blend. Both are chemically slippery. They repel water, which is why they make good sheds, and they repel paint for exactly the same reason. That single property is why you cannot paint a plastic shed the way you’d paint a wooden one. A bonding primer — sometimes sold as an adhesion promoter — chemically bites into that surface and gives your topcoat something to hold. Skip it and nothing else you do matters.
Vinyl and PVC behave a little differently from polyethylene, and if you’re working on a fence rather than a shed the rules shift slightly — that’s covered separately in our guide to painting a vinyl fence. For sheds, here’s the shortlist.
| Product | What it’s for | Why it made the list |
|---|---|---|
| INSL-X STIX Bonding Primer | The adhesion layer on a full-size shed | Bonds to glossy polyethylene without sanding through the panel |
| KILZ Siding, Fence & Barn Paint | Topcoat for large flat panels | 100% acrylic, flexible enough to move with the panel in heat |
| Krylon Fusion All-In-One | Small sheds, doors, trim, louvres | Primer and colour in one can — no separate bonding step |
| Rust-Oleum Universal Bonding Primer | Ribs, corners and recesses a roller can’t reach | Spray-can bonding primer that pairs with any acrylic topcoat |
| Krud Kutter Cleaner/Degreaser | Step one, before anything else | Strips the mould-release film that causes most failures |
The 5 products that make it hold
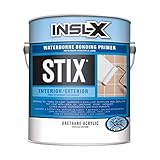
INSL-X STIX Acrylic Waterborne Bonding Primer
STIX is a urethane-modified acrylic, and that modification is the whole point. A standard acrylic primer dries into a film that simply sits on the plastic. The urethane component in STIX cross-links as it cures and forms a mechanical and chemical grip on surfaces that have no tooth at all — glossy polyethylene, PVC, glazed tile, glass. It’s the primer painters reach for when the substrate is technically un-paintable.
On a shed you brush the ribs and roll the flat panels, and one quart covers a mid-size unit with room to spare. The honest limitation: it wants a proper cure window. I put a topcoat over STIX after about four hours on a humid September afternoon and the finish stayed soft for days and marked whenever a rake leaned against it. Give it a full overnight when humidity is above 60%, even though the can allows sooner.
Pros
- Bonds to glossy plastic without aggressive sanding
- Water-based cleanup, low odour
- Takes any acrylic or alkyd topcoat
Cons
- Slow to harden in humid conditions
- Costs roughly twice a general-purpose primer
Via Amazon.com
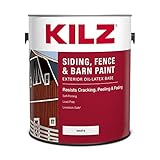
KILZ Siding, Fence & Barn Paint
This is a 100% acrylic exterior paint, and on plastic the “100%” matters more than the price. Cheaper exterior paints cut in vinyl-acrylic copolymers, which cure harder and more brittle. A shed panel sitting in July sun expands measurably across its width, then contracts overnight. A brittle film can’t follow that movement, so it micro-cracks, water gets behind it, and the sheet lifts. A 100% acrylic binder stays flexible enough to move with the panel.
It also flows out well from a roller, which matters because shed panels are usually moulded with a faint woodgrain texture that shows every lap mark. Two thin coats always beat one thick coat here — a heavy coat bridges the texture, dries with a skin over wet paint, and wrinkles. The limitation is coverage over dark plastic: going from charcoal grey to a light stone colour genuinely took me three coats, not two.
Pros
- Flexible 100% acrylic film that survives thermal movement
- Wide tint range, gallon coverage economics
- Self-priming over a bonded primer coat
Cons
- Poor hide over dark plastic — expect a third coat
- Flat finish is harder to wipe clean than satin
Via Amazon.com
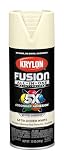
Krylon Fusion All-In-One Spray Paint
Fusion carries its own adhesion chemistry in the can, so it bonds directly to polyethylene, polypropylene, hard vinyl and PVC with no separate primer. That’s not marketing shorthand for “good paint” — the solvent package softens the very top microns of the plastic so the resin keys into it as it flashes off. It’s the reason Fusion survives on garden furniture that ordinary spray paint slides off within a season.
It suits small plastic pieces that live in full afternoon sun, like a vertical tool locker. The real limitation is scale rather than durability: covering a 7×7 shed properly takes six to eight cans, and at that point a quart of primer and a gallon of acrylic costs less and goes on faster. If you want more colour options in this format, the picks in our roundup of the best spray paint for plastic all use the same bonding approach.
Pros
- No separate bonding primer required
- Reaches ribs, louvres and vents easily
- Wide colour and sheen range
Cons
- Expensive per square foot on a large shed
- Needs a still day — overspray travels a long way
Via Amazon.com
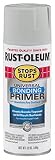
Rust-Oleum Universal Bonding Primer
Same job as STIX, different delivery. This is a bonding primer in an aerosol with a fan-pattern tip, and the reason it earns a place is geometry. Shed panels aren’t flat — they’re moulded with vertical ribs, corner returns and vent slots that a roller skips over and a brush loads too thickly. A fan-tip aerosol gets an even film into all of it in one pass.
Use it as a spot primer on the awkward areas and roll STIX on the flats, then topcoat everything together. My honest note: the aerosol’s coverage claim assumes a smooth surface, and on ribbed plastic you’ll use noticeably more than the can suggests. Buy one more than you think you need. Anyone new to bonding primers generally will find the background in this explainer on using primer on difficult surfaces useful.
Pros
- Reaches moulded detail a roller can’t
- Compatible with acrylic and alkyd topcoats
- Fast recoat window
Cons
- Real-life coverage on ribbed plastic is well below the stated figure
- Not economical as the primary primer on a big shed
Via Amazon.com
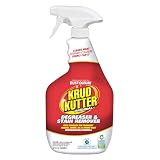
Krud Kutter Original Cleaner/Degreaser
Moulded plastic leaves the factory coated in a mould-release agent — usually a silicone or stearate film applied so the part pops out of the tool. It is invisible, it does not wash off with a hose, and it is the single largest cause of primer failure on plastic. Krud Kutter is an alkaline surfactant cleaner that lifts that film along with years of pollen, algae and hand oil.
Spray it on wet, agitate with a soft brush, rinse hard, and let the shed dry completely before priming. The limitation worth knowing: it is aggressive enough to dull some soft plastics if you leave it sitting in full sun. Work one panel at a time and rinse before it dries on the surface.
Pros
- Removes mould-release film that plain water leaves behind
- No-rinse-residue formula that won’t fight the primer
- Cheap relative to what it prevents
Cons
- Can dull soft plastics if left to dry on the surface
- Needs a genuine rinse, not a wipe
Via Amazon.com
Pro tips from a shed that survived four winters
Scuff, don’t sand. A grey scuff pad or 220-grit gives the primer mechanical tooth. Anything coarser cuts through the UV-stabilised outer layer of the polyethylene and you’ll get chalking from underneath within two summers.
Watch the panel temperature, not the air temperature. A dark shed wall in direct sun runs 30–40 degrees hotter than the shade reading. Paint flashes off before it levels and you get a gritty finish. Follow the shade around the shed and paint whichever face is currently out of the sun.
Two thin coats always beat one thick coat. On plastic this is not a style preference — a thick coat traps solvent underneath, and trapped solvent is what makes a film peel in sheets rather than flake in dots.
Take the doors off. Fifteen minutes with a screwdriver buys you flat, horizontal painting and it stops runs at every hinge and handle. Prime the edges too; that’s where water gets in first.
Prep matters more than the brand. A budget acrylic over a properly degreased and bonded surface will outlast a premium paint rolled onto plastic you merely hosed down. Durability on this job is roughly half product and half surface preparation, and the half you control is the cheaper one.
Renovation Stage: PRIME
This job lives or dies at the priming stage. Colour selection, sheen and brand are all secondary decisions here — the bond between the primer and the polyethylene is the only thing standing between you and a repaint in eighteen months. Budget your time accordingly: expect to spend longer cleaning and priming than painting.
How much primer and paint do you need?
Enter your shed’s footprint and wall height. The calculator adds the two long walls, two end walls and the door face, then works from typical coverage of 300 sq ft per quart of bonding primer and 350 sq ft per gallon of acrylic topcoat, at two coats.

Flat shed panels roll fast. It’s the ribs and vents that decide how long the job takes.
What to look for before you paint a plastic shed
1. Adhesion chemistry, not adhesion claims
Read the label for the substrate list. A primer that specifically names polyethylene, polypropylene or “hard-to-coat plastics” has been formulated for low surface energy. A primer that says “bonds to most surfaces” usually hasn’t. This is the one specification that decides whether the job lasts, so check it before you check the colour.
2. Film flexibility over film hardness
Instinct says a harder film is a tougher film. On plastic it’s the opposite. Look for high elongation — that means the cured film stretches instead of cracking when the panel expands in the heat. A shed wall moves more across a summer day than a stucco wall does across a year, and the topcoat has to move with it.
3. UV resistance and colour choice
Dark colours absorb more heat, and a black shed wall in July can pass 140°F. That accelerates thermal cycling and stresses the paint film. Going lighter than the original colour is easier on the coating and easier on whatever you’re storing inside. If you’re matching the shed to the house, the same logic that governs exterior house paint selection applies here, just at higher surface temperatures.
4. Sheen, and what it reveals
Gloss shows every moulding seam, ripple and dent in a plastic panel. Flat and low-satin hide them. Unless your shed is unusually crisp, go lower in sheen than you think you want.
5. Recoat and cure windows
Two figures, and they are not the same. Recoat time is when you can apply the next coat. Cure time is when the film reaches full hardness and chemical resistance. On plastic, respecting the cure window is what stops a leaning ladder or a stacked bag of compost from printing itself into your new finish.
When you should not paint a plastic shed
If the plastic is already cracking or chalking heavily. Paint doesn’t restore structural integrity. Panels that have gone brittle from a decade of UV will keep cracking under the coating, and every crack becomes a water route. Press a thumb into a suspect panel — if it creaks or crazes, coating it is money spent on a shed that’s failing anyway.
If the shed is under warranty. Several manufacturers void coverage on coated panels. Check before you buy primer, not after.
If you can only work in high humidity or below 50°F. Waterborne bonding primers need evaporation to build their bond. In damp, cool conditions they stay soft, and a soft primer under a hard topcoat is a delamination waiting to happen. Wait for a dry stretch.
If it’s a flexible or thin-wall tarp-style shed. Soft, bendable plastics flex far beyond what any exterior film can follow. Nothing on this page will hold on those.
The prep sequence, in order
This is the whole job. Every time I paint a plastic shed I run these seven steps in this exact order, and I skip nothing.
- Degrease. Krud Kutter, soft brush, panel by panel. Rinse hard with a hose. Water should sheet off, not bead.
- Dry completely. A full day if the shed has vents or seams that hold water. Trapped moisture behind a ribbed panel will find its way out through your primer.
- Scuff. 220-grit or a grey scuff pad, light pressure, uniform coverage. You’re dulling the shine, not removing material.
- Wipe down. Damp cloth to lift the scuff dust, then dry. Dust under primer is a bond failure with a delay built in.
- Prime. Bonding primer everywhere, including door edges and the underside of the roof lip. One even coat is enough if it’s genuinely even.
- Topcoat. Two thin coats, respecting the recoat window between them. Follow the shade around the building.
- Leave it alone. Nothing leans on the shed, nothing gets stacked against it, for a full week.
The US Environmental Protection Agency has straightforward guidance on disposing of leftover paint and solvents once you’re done, and Family Handyman’s exterior painting checklist covers weather-window judgement in more detail than fits here.
The verdict
Yes, you can paint a plastic shed, and the result holds for years — as long as you treat it as a bonding problem rather than a painting problem. For a full-size shed, degrease with Krud Kutter, prime with INSL-X STIX, and topcoat with KILZ Siding, Fence & Barn Paint in two thin coats. For a small locker or deck box, skip all of that and use Krylon Fusion All-In-One straight onto clean, scuffed plastic.
The failure mode I see most often isn’t a bad paint choice. It’s a good paint applied to a surface that still had factory release agent on it. Spend the extra hour on the degreasing step and the rest of the job becomes ordinary painting. If you want to go deeper on the chemistry, our full breakdown of the best paint for plastic covers how these binders behave across different plastic types.
Questions people actually ask
Do I need to sand a plastic shed before painting?
Not sand — scuff. A light pass with 220-grit or a grey scuff pad dulls the gloss and gives the primer tooth. Aggressive sanding cuts through the UV-stabilised outer skin of the polyethylene and causes chalking later.
What kind of paint sticks to a plastic shed?
A 100% acrylic exterior paint over a bonding primer, or an all-in-one plastic-bonding spray paint like Krylon Fusion. Standard exterior latex applied directly to plastic will peel, usually within the first freeze-thaw cycle.
How long does paint last on a plastic shed?
Five to seven years with a bonding primer and two thin acrylic coats, less on a south-facing wall in a hot climate. Without a bonding primer, expect visible lifting inside one year.
Can I use a pressure washer to clean the shed first?
Yes, on a wide fan tip at low pressure and from at least 18 inches away. Close-range pressure washing forces water into panel seams where it sits for days, and it can score soft plastic. A degreaser and a soft brush do a better job on release agent anyway.
Can I spray a plastic shed with an airless sprayer?
You can, and it’s fast on a large unit, but masking becomes the whole job — overspray on plastic carries a long way in even a light breeze. On sheds under about 8×6 feet, rolling the panels is usually quicker end to end.
What happens if I paint a plastic shed without primer?
The film cures with no chemical bond to the substrate, so it holds by surface tension alone. It looks fine until the first real temperature swing, then lifts in sheets — typically starting at panel edges and door frames.
Can I paint the roof panels too?
Yes, and the same rules apply, but roofs take the most direct UV and standing heat of any part of the shed. Use a light colour, expect a shorter service life up there than on the walls, and never walk on the panels to do it.