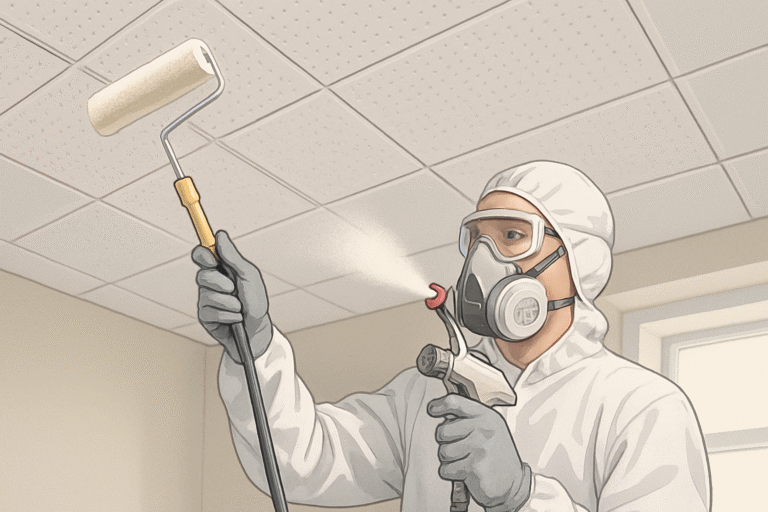
A Floor Buffer Won’t Prep Your Slab for Epoxy. Here’s What It Actually Does.
Updated: October 2026 | By Sophie Ulman
Rent a floor buffer for a weekend, run it over the garage slab until the dust settles and the concrete looks smooth and almost glossy, then roll epoxy on that same afternoon. Six months later the coating is peeling in long strips, right where the tires sit. A floor buffer is built to polish and smooth a surface. It is not built to open that surface up so a coating has something to grip. Mixing those two jobs up is the single most expensive mistake I see in garage floor prep.
I learned this the hard way in my second year taking on floor jobs. A homeowner had already rented and run a floor buffer over his slab before I arrived, certain he had done the hard part. I should have stopped right there and brought in a grinder instead. We laid epoxy that same afternoon, because I did not want to tell a client his weekend of work was wasted. By the following spring, tire tracks had worn clean through to bare concrete in three spots. The buffer had closed the surface instead of opening it, and the epoxy never had anything to hold onto.
Below are the two tools that actually open a slab for epoxy, plus two coatings worth putting down once the prep is right, and the water test that tells you which situation your floor is actually in before you spend a weekend on the wrong tool. If you have not picked a coating yet, my guide to garage floor coatings that actually stick covers more options side by side.
Quick picks: tools and coatings for this job
| What you’re doing | Pick | Best for | Link |
|---|---|---|---|
| Prepping edges and small patches | Stadea 5″ Grinder Dust Shroud with Double-Row Diamond Cup Wheel | Turning an angle grinder you already own into a dust-controlled surface grinder | Amazon → |
| Prepping a full garage floor | Bosch CSG15 5 In. Concrete Surfacing Grinder | A dedicated grinder without a rental trip | Amazon → |
| Coating after prep, heavy use | Rust-Oleum RockSolid Polycuramine | Garage floors that see daily tire traffic | Amazon → |
| Coating after prep, lighter budget | KILZ 1-Part Epoxy Acrylic | Workshops, basements, occasional-use floors | Amazon → |
The four picks, reviewed


Pro tips before you start
- Look for the trowel marks. If you can still see the original trowel pattern from the pour after running a floor buffer over the slab, you have not opened anything. That is a polished surface, not a prepped one.
- Run your hand over it after grinding. It should feel like fine sandpaper, not smooth stone. If it still feels smooth, go over it again.
- Two thin coats, always. Same rule as wall paint. A thick pour skins over on top while the underneath stays soft for days, and that is where peeling starts.
- Vacuum, then damp-mop, then wait. Dust left behind sits between the concrete and the coating like a layer of ball bearings. Let the floor dry completely before coating.
- Wear a real respirator for any grinding. Dry-cutting concrete produces respirable crystalline silica, which OSHA’s construction silica standard treats as a serious exposure risk, not a nuisance dust. A paper dust mask does not count.
Where this sits in the job: Prep, before anything goes down
Cleaning and degreasing come first, then the surface test below, then grinding or etching, then a moisture check, then the coating. A floor buffer has no place in that sequence when epoxy is the end goal. For the complete five-step checklist, including the moisture test in full, see my guide on what to do before using epoxy floor paint in your garage. If you are still deciding between a rental and buying your own equipment, my full breakdown of grinder options and rental costs covers that decision in detail. This Old House’s walkthrough on applying an epoxy coating is a useful second opinion on the sequence.
The water-drop test for your slab
Pour a tablespoon of water onto a clean, dry patch of bare concrete and watch what happens. This tells you whether a floor buffer could ever be the right call here, or whether you need a grinder or an acid etch before anything else.
What a floor buffer actually does to concrete
Most of the confusion here comes from one honest mix-up: a floor buffer and a floor grinder look similar, sound similar when they run, and both leave a garage floor looking cleaner than before. What they do to the surface is close to opposite.
Buffing closes the surface, grinding opens it
A floor buffer spins a pad, usually diamond-impregnated or resin-backed, that works through friction and heat to flatten high points and bring up a shine. It removes almost no material. A diamond cup wheel on a grinder does the opposite: the segments actually cut into the top layer of cured concrete, called the laitance, and remove it. That exposes the aggregate underneath and opens the capillary pores a coating needs to mechanically key into. One tool polishes what is there. The other removes a measurable layer to expose something new.
How to tell if your slab needs more than a floor buffer
Three checks, in order of how fast they are: the water-drop test above, a visual check for trowel marks (if you can still see the original finishing pattern from the pour, nothing has been removed), and a hand check for texture (a properly ground slab feels like fine sandpaper, not smooth stone). If a slab fails any of these, a floor buffer will not fix it, no matter how long you run it. The same logic applies to any concrete floor, not just a garage — see my broader guide on painting a concrete floor that will not peel in year one for the full picture beyond epoxy specifically.
When buffing alone is the right call
A floor buffer is not a useless tool. It is the right one for maintaining an already-coated or already-polished floor that is not getting a new coating — a decorative polished-concrete finish meant to stay exposed, or scuffing up shine on a floor you are not recoating this year. The mistake is reaching for it as a substitute for grinding when the plan is to put epoxy or polyaspartic down afterward.
When not to grind your slab
- Active moisture coming up from below. Dark damp patches or white efflorescence mean grinding alone will not fix the problem. Run the overnight moisture test from my epoxy prep checklist before you do anything else — a vapor barrier or moisture-blocking primer may be the real fix.
- A decorative polished-concrete finish meant to stay exposed. If the floor is not getting coated at all, grinding it down would ruin the finish you are trying to keep. That is exactly when a floor buffer is the correct tool, not the wrong one.
- An existing coating that is still well adhered. If you are recoating a floor that is not peeling, a light scuff-sand may be enough. Grinding all the way to bare concrete is not always necessary — see the recoating section in the same prep guide.
Prep and coat, in order
- Clear the floor completely and degrease any oil or grease stains.
- Run the water-drop test above to see where your slab actually stands.
- Grind or acid-etch, never just buff, based on what the test showed.
- Tape down plastic overnight for a moisture check before you commit to a coating.
- Coat within the manufacturer’s recoat window once the surface passes both tests.
The verdict
A floor buffer has a real job on a concrete floor. It is just not this one. Save it for maintaining a polished floor that is already finished, and reach for a diamond cup wheel like the Stadea shroud and wheel or a dedicated grinder like the Bosch CSG15 when the job is prepping bare concrete for epoxy or polyaspartic. Skip that distinction and you are not saving a step. You are guaranteeing a recoat in a year, this time over tire tracks that already peeled once.
Questions people actually ask
What is the difference between a floor buffer and a floor grinder?
A floor buffer polishes a surface using friction and heat, removing almost no material. A floor grinder uses a diamond cup wheel to cut into and remove the top layer of cured concrete, opening pores a coating can grip. One smooths what is there; the other exposes something new underneath.
Can I use a floor buffer to prep concrete for epoxy?
No. A floor buffer closes the surface further instead of opening it, which is the opposite of what epoxy needs to bond. Use a diamond cup wheel grinder or an acid etch instead, then confirm with the water-drop test before you coat.
Will acid etching work instead of grinding?
On bare, never-painted concrete, yes — acid etching opens the surface chemically rather than mechanically. It will not remove an existing coating or heavy contamination the way grinding does, so a painted or sealed floor still needs grinding first.
How do I know if my garage floor is too smooth for epoxy?
Run the water-drop test: pour a tablespoon of water on bare concrete. If it beads up and sits on top instead of soaking in within a minute or two, the surface is too closed for a coating to key into without grinding or etching first.
Can I rent a floor buffer and still get epoxy to stick?
Only if you also grind or etch the surface afterward. Renting a floor buffer does not substitute for that step — it was never designed to remove material, only to polish whatever surface is already there.
How long does grinding a two-car garage floor take compared to buffing it?
A dedicated grinder like the Bosch CSG15 can cover a one or two-car floor in a day with proper dust extraction. A hand-held attachment like the Stadea shroud takes considerably longer across a full floor, which is why it is better suited to edges and small patches than a whole garage.
Does buffing hurt an epoxy coating that is already down?
Buffing an already-cured, well-adhered epoxy coating for routine shine is generally fine. The problem is specifically using a floor buffer as the prep step before the first coat ever goes down — that is when it works against adhesion instead of for it.