Mastering the Mist: The Ultimate 2026 Beginner’s Guide to Paint Spray Guns
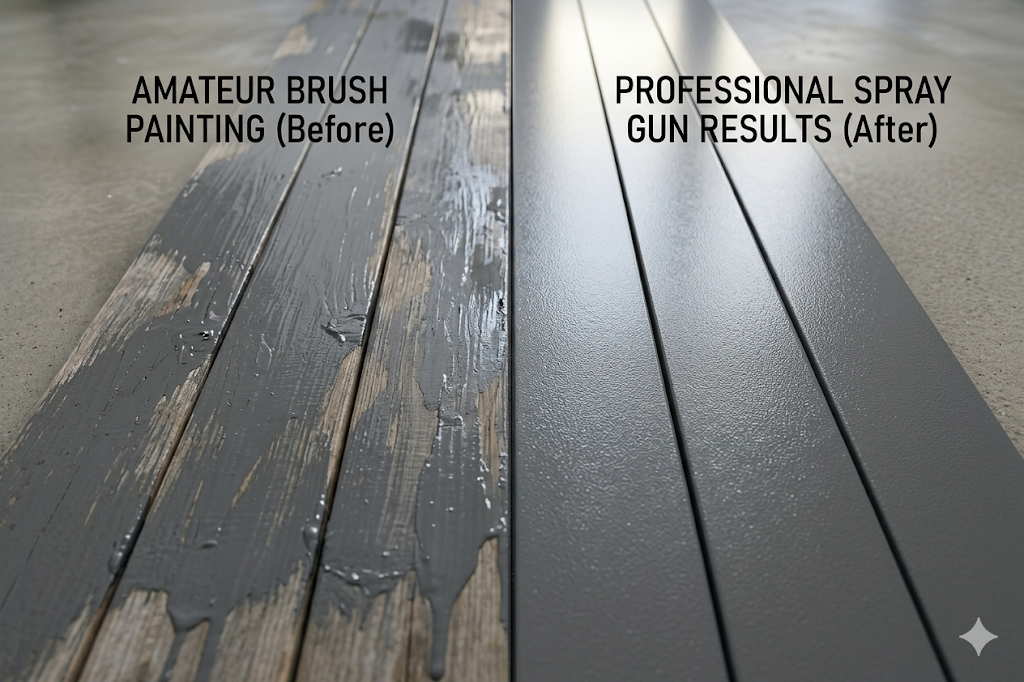
Gone are the days when achieving professional-quality paint finishes required hiring expensive contractors or spending decades mastering brush techniques. In 2026, paint spray gun technology has reached a tipping point where DIY enthusiasts can achieve results that rival professional painters at a fraction of the cost.
The eternal triangle of speed, quality, and cost no longer forces you to choose just two. Modern spray guns deliver lightning-fast coverage, flawless finishes, and budget-friendly pricing that makes them accessible to weekend warriors and serious DIYers alike.
Why 2026 is the Golden Year for DIY Paint Spraying
This year’s technological advances have eliminated the traditional barriers that kept spray guns in professional hands. Smart pressure controls prevent overspray disasters, while improved nozzle designs work with unthinned paint straight from the can. Turbine efficiency has doubled, and cleanup systems have been simplified to the point where post-project maintenance takes minutes, not hours.
The result? You can now tackle exterior siding, interior walls, furniture refinishing, and cabinet projects with confidence, speed, and professional-grade results.
The Top 3 Paint Sprayers for 2026: Deep Dive Analysis
1. Graco Magnum X5 Electric TrueAirless – The Powerhouse Choice
The Graco Magnum X5 Electric represents the gold standard for serious DIYers who demand professional results. This airless system generates up to 3000 PSI of pressure, allowing you to spray unthinned latex paint directly from the gallon bucket.
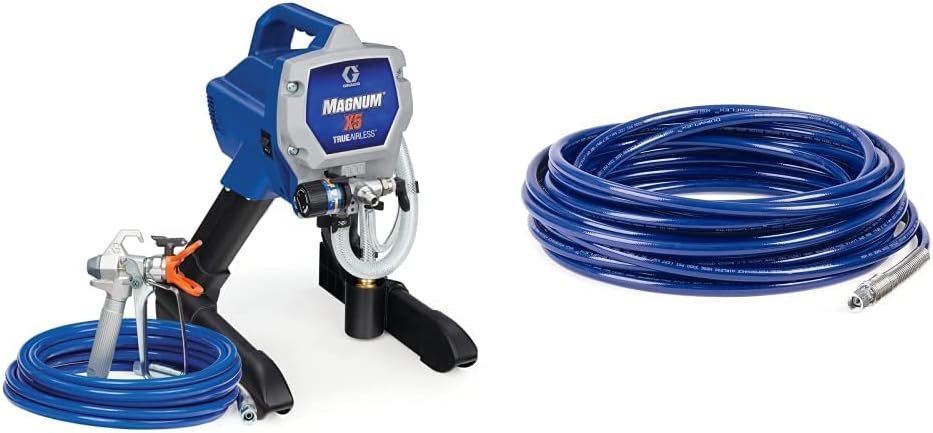
Key Features That Matter:
- TrueAirless Technology: No air compressor needed, pure hydraulic pressure
- SmartControl Pressure: Automatically adjusts for consistent spray patterns
- Flexible Suction Tube: Spray directly from 1 or 5-gallon containers
- Annual Use Rating: Built for 125 gallons per year
Best Use Cases:
The X5 excels at large exterior projects like siding, fences, and decks. Its ability to handle thick, unthinned paint makes it perfect for textured surfaces where brush marks would be visible. Professional contractors trust this model for residential repaints, and DIYers love its set-and-forget simplicity.
Investment Perspective:
At approximately $400-500, the X5 pays for itself after just two medium-sized projects when compared to hiring contractors. The 2-year warranty and readily available replacement parts ensure long-term value.
2. Wagner FLEXiO 590 – The Versatile All-Rounder
The Wagner FLEXiO 590 bridges the gap between portability and power with its innovative X-Boost turbine technology. This HVLP system delivers the control needed for detailed work while maintaining enough power for larger projects.
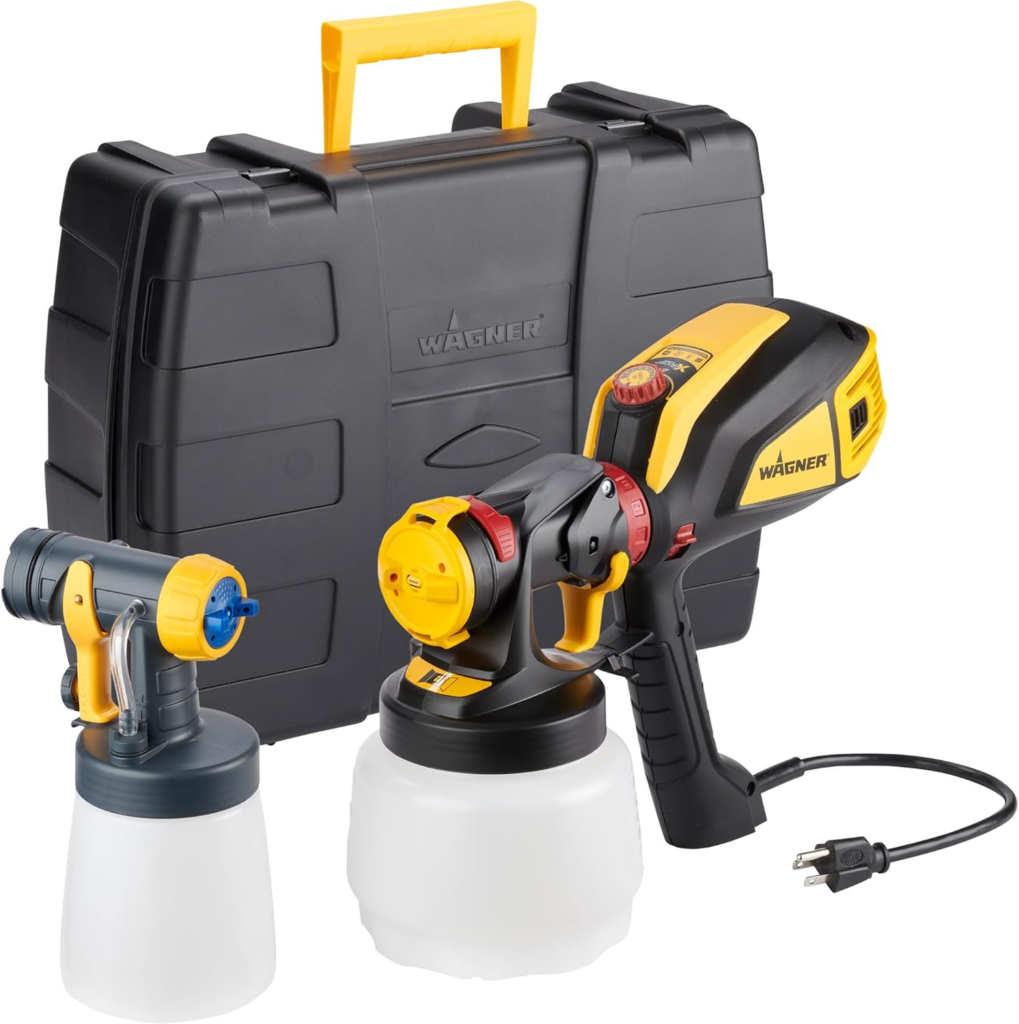
Revolutionary X-Boost Turbine:
Wagner’s 2026 X-Boost technology provides 50% more power than previous generations while reducing noise levels by 30%. The two-stage turbine design creates consistent atomization across different paint viscosities.
Flexibility Features:
- Dual Nozzle System: iSpray detail nozzle for fine work, iSpray wide nozzle for broad coverage
- Indoor/Outdoor Versatility: Excellent for both interior trim and exterior surfaces
- Weight Distribution: Turbine stays on the ground, reducing operator fatigue
- Material Compatibility: Handles stains, sealers, and latex paints with minimal thinning
Why DIYers Choose the FLEXiO:
This model shines for homeowners who tackle diverse projects throughout the year. Paint interior walls in the morning, then switch nozzles to stain the deck in the afternoon. The learning curve is gentler than airless systems, making it ideal for first-time spray gun users.
3. HomeRight Super Finish Max – The Budget Champion
Don’t let the sub-$150 price fool you – the HomeRight Super Finish Max delivers remarkable results for furniture refinishing, cabinet projects, and smaller paint jobs.
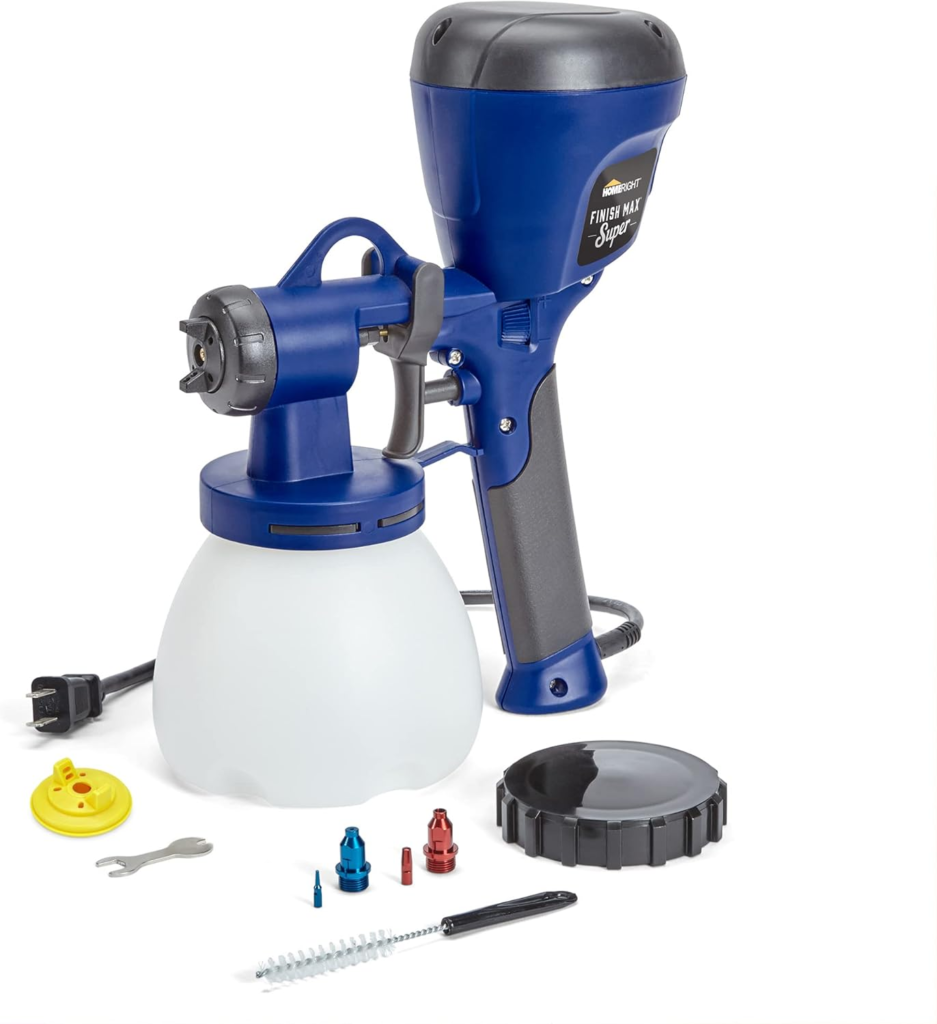
Budget-Friendly Features:
- Three Spray Patterns: Horizontal, vertical, and round for maximum versatility
- Brass Nozzle: Superior durability compared to plastic alternatives
- Easy Cleanup: Tool-free disassembly for quick maintenance
- Lightweight Design: Perfect for extended use without fatigue
Sweet Spot Applications:
The Super Finish Max excels at projects where precision matters more than speed. Furniture refinishing, craft projects, and detail work benefit from its excellent control and smooth finish quality. Many users report professional-grade results on kitchen cabinets and bathroom vanities.
ROI Reality:
This sprayer pays for itself with a single cabinet refinishing project. Professional cabinet painting services charge $3,000-6,000 for an average kitchen, while the Super Finish Max enables DIY results for under $200 in materials and equipment.
Comparison Table: Specs at a Glance
| Feature | Graco Magnum X5 | Wagner FLEXiO 590 | HomeRight Super Finish Max |
|---|---|---|---|
| Type | Airless | HVLP Turbine | HVLP Electric |
| Max Pressure | 3000 PSI | 9.5 PSI | 27 PSI |
| Coverage Rate | 125 gal/year | 50 gal/year | 25 gal/year |
| Paint Capacity | 1-5 gallon | 1.5 quart | 27 fl oz |
| Thinning Required | Minimal | Some paints | Most paints |
| Weight | 19 lbs | 11.5 lbs | 3.9 lbs |
| Warranty | 2 years | 2 years | 1 year |
| Price Range | $400-500 | $200-300 | $100-150 |
| Best For | Large exteriors | Versatile projects | Detail/furniture work |
The Physics of Spraying: HVLP vs. Airless Explained Simply
Understanding spray gun technology helps you choose the right tool and achieve better results. Think of it as the difference between a garden hose and a pressure washer – both move water, but the method and results differ dramatically.
Airless Systems (Like the Graco X5)
Airless sprayers use hydraulic pressure to force paint through a tiny orifice at incredibly high pressure (up to 3000 PSI). The paint breaks into fine droplets through sheer force, creating a fan pattern that covers surfaces quickly.
Advantages:
- No paint thinning required
- Fastest coverage rates
- Deep penetration into textured surfaces
- Works with thick materials like primers and elastomeric coatings
Trade-offs:
- Higher overspray
- Requires more masking
- Can be intimidating for beginners
HVLP (High Volume, Low Pressure) Systems
HVLP systems like the Wagner FLEXiO 590 use high air volume at low pressure (typically under 10 PSI) to atomize paint. Think of it as a sophisticated hair dryer that gently breaks paint into fine particles.
Advantages:
- Superior transfer efficiency (more paint on surface, less waste)
- Excellent control for detail work
- Reduced overspray
- Gentler learning curve
Trade-offs:
- Slower coverage than airless
- May require paint thinning
- Less effective on heavily textured surfaces
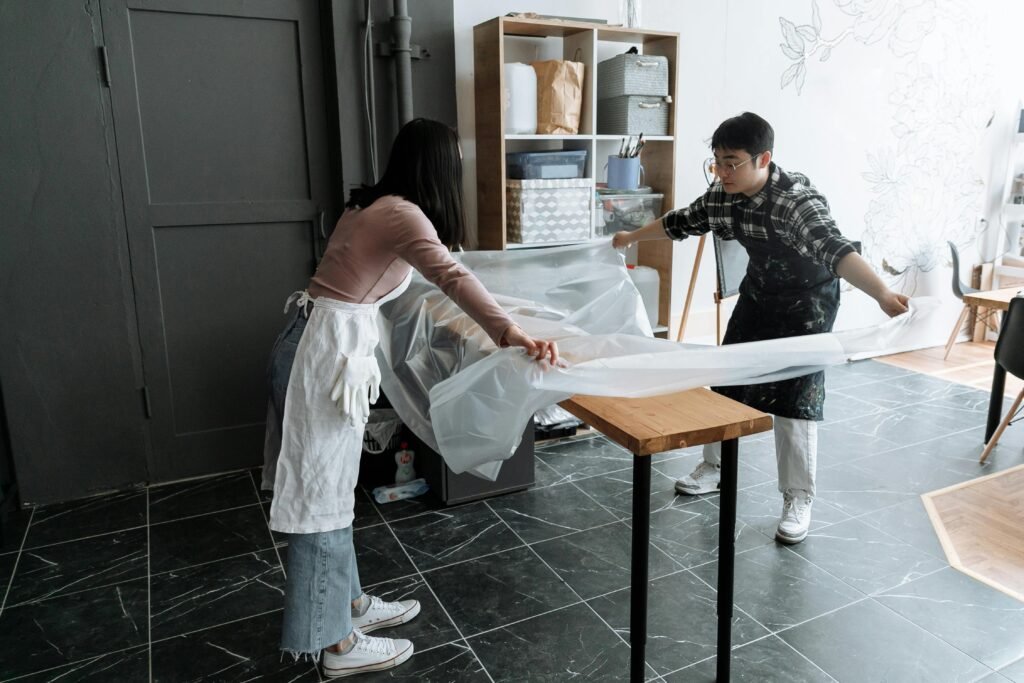
Setting Up Your DIY Spray Booth: Professional Environment at Home
Creating the right environment is crucial for professional results. Poor setup leads to contamination, uneven coverage, and frustrated DIYers who abandon spray guns forever.
Location Selection Criteria
Indoor Considerations:
- Minimum 10×12 feet of clear space
- Cross-ventilation or exhaust fan capability
- Concrete floors (easier cleanup)
- Access to electrical power
Outdoor Setup:
- Wind speed under 5 mph
- Shaded area (direct sun affects paint flow)
- Level surface for consistent spray patterns
- Protection from debris and insects
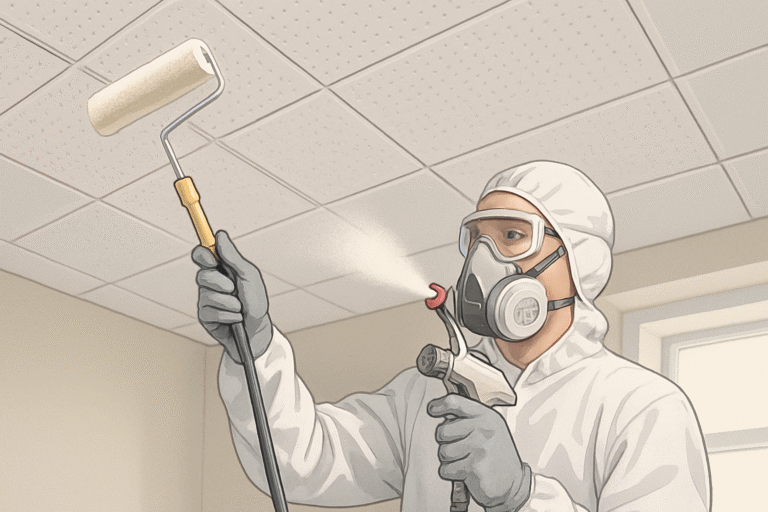
Essential Safety Equipment
Personal Protection:
- N95 respirator minimum (P100 for solvent-based paints)
- Safety glasses with side shields
- Disposable coveralls or old clothes
- Nitrile gloves for cleanup
Environmental Controls:
- Drop cloths extending 6 feet beyond spray area
- Plastic sheeting for masking walls/furniture
- Explosion-proof lighting for enclosed spaces
- Fire extinguisher rated for paint fires
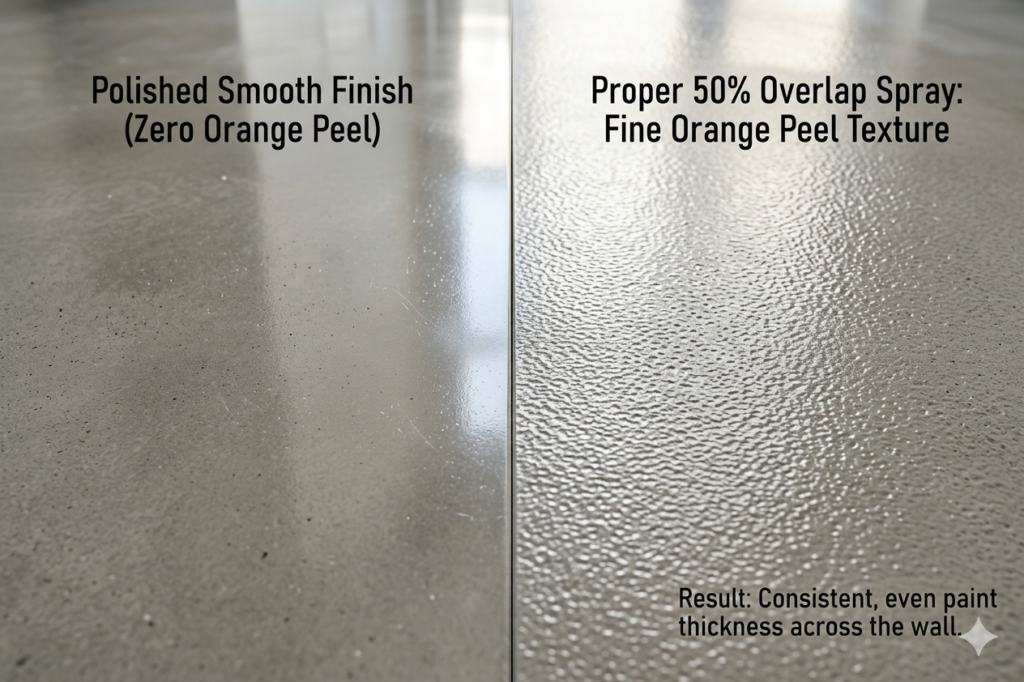
Ventilation: The Make-or-Break Factor
Proper airflow prevents paint buildup that causes orange peel texture and ensures your safety. Create cross-ventilation by opening doors/windows on opposite sides of your workspace. Position an exhaust fan to pull contaminated air away from your breathing zone.
Pro Tip: Hang a tissue paper strip to visualize air movement. It should flow steadily away from your spraying position toward the exhaust point.
Comprehensive How-To: From Prep to Professional Finish
Surface Preparation: The Foundation of Great Results
Cleaning Protocol:
- Remove all loose paint, dirt, and debris
- Wash surfaces with TSP solution
- Allow complete drying (24 hours minimum)
- Sand glossy surfaces lightly (220-grit)
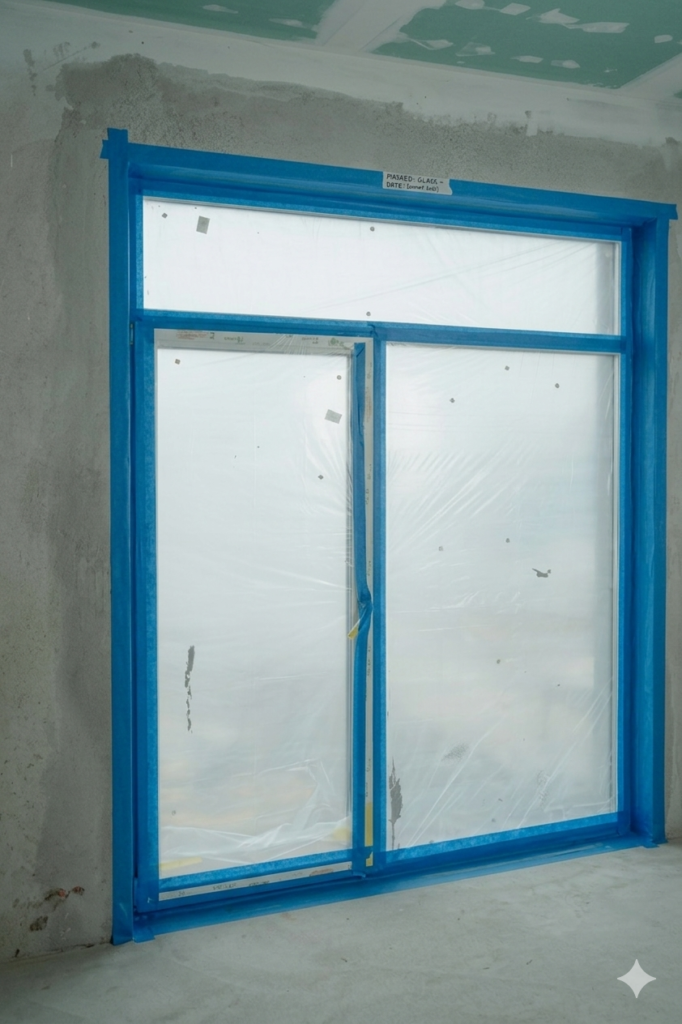
Masking Strategy:
Use high-quality painter’s tape designed for your surface type. Apply tape when temperature is above 50°F but before the hottest part of the day. Remove tape while paint is still slightly tacky for clean lines.
The Viscosity Test: Getting Paint Consistency Right
Most HVLP systems require some paint thinning for optimal atomization. The “funnel test” determines proper consistency quickly and accurately.
Equipment Needed:
- Ford cup #4 or similar viscosity cup
- Stopwatch or smartphone timer
- Paint thinner or water (match paint type)
- Measuring cups
Testing Procedure:
- Fill viscosity cup completely with unthinned paint
- Time how long it takes to empty completely
- Compare to manufacturer’s recommendations (typically 20-25 seconds for latex paint)
- Add thinner in 10% increments if needed
- Retest until proper flow time is achieved
Critical Rule: Never thin paint more than 20% without consulting manufacturer specifications. Over-thinning reduces coverage and durability.
The 50% Overlap Technique: Ensuring Even Coverage
Professional painters achieve uniform color through consistent overlap patterns. The 50% overlap technique ensures each square inch receives the same amount of paint.
Setup Steps:
- Start spraying 6 inches before your target surface
- Maintain consistent distance (6-8 inches for HVLP, 10-12 inches for airless)
- Keep spray gun perpendicular to surface
- Move at steady 2-3 feet per second
Overlap Pattern:
- Each pass should cover 50% of the previous stroke
- Use horizontal passes for vertical surfaces
- Maintain wet edge to prevent lap marks
- Work systematically from top to bottom
Advanced Technique: The Cross-Hatch Method
For premium finishes on furniture and cabinets, the cross-hatch method eliminates any possibility of streaking or uneven color.
Application Steps:
- Apply first coat using vertical passes with 50% overlap
- Allow flash time (surface becomes tacky but not dry)
- Apply second coat using horizontal passes
- Maintain same overlap percentage and spray distance
This technique uses more material but delivers showroom-quality results that justify the extra effort and cost.
Troubleshooting Guide: Solving Common Spray Gun Problems
Problem: Clogged Spray Tip
Symptoms:
- Irregular spray pattern
- Paint spitting or dripping
- Reduced coverage rate
Solutions:
- Immediate Fix: Reverse spray tip (most modern tips are reversible)
- Deep Clean: Remove tip and soak in appropriate thinner for 30 minutes
- Prevention: Strain paint before use, clean equipment immediately after use
Pro Tool: Keep a soft-bristled toothbrush dedicated to spray gun maintenance for gentle cleaning of delicate parts.
Problem: Orange Peel Texture
Symptoms:
- Bumpy, textured finish resembling orange skin
- Loss of smoothness despite proper surface prep
Root Causes & Fixes:
- Too much air pressure: Reduce PSI in 5-unit increments
- Wrong spray distance: Move closer to surface (typically 6-8 inches)
- Fast gun movement: Slow down to 2-3 feet per second
- Wrong nozzle size: Switch to smaller tip for thinner materials
Problem: Paint Runs and Sags
Symptoms:
- Dripping or flowing paint creating uneven thickness
- Glossy streaks in otherwise uniform finish
Immediate Response:
- Stop spraying immediately
- Brush out runs while paint is wet
- Allow complete drying before recoating
- Sand smooth if runs have dried
Prevention Strategies:
- Reduce fluid flow rate
- Increase gun movement speed
- Maintain proper spray distance
- Work in smaller sections to maintain wet edge
Problem: Poor Atomization
Symptoms:
- Large paint droplets instead of fine mist
- Speckled or spotted appearance
- Uneven color distribution
Diagnostic Steps:
- Check paint viscosity (repeat funnel test)
- Verify proper thinning ratios
- Inspect air compressor (for HVLP systems)
- Clean or replace spray tip/nozzle
Advanced Fix: For persistent atomization problems, the issue may be worn internal components. Most spray guns have rebuild kits available that restore like-new performance.
Maintenance: Protecting Your Investment
Proper maintenance extends spray gun life from months to decades. Professional painters often use the same equipment for 10+ years through consistent care and preventive maintenance.
Immediate Post-Use Cleaning (Every Session)
Time Required: 10-15 minutes
Critical Window: Clean within 30 minutes of finishing to prevent paint curing in internal passages
Step-by-Step Process:
- Flush System: Run appropriate thinner through entire paint path
- Disassemble: Remove all user-serviceable parts per manual
- Hand Wash: Use soft brush with mild detergent for external surfaces
- Detail Clean: Use pipe cleaners for internal passages
- Dry Completely: Air dry all components before reassembly
Weekly Deep Cleaning (Heavy Use)
Focus Areas:
- Internal paint passages
- Trigger mechanism lubrication
- Air filter replacement/cleaning
- Pressure relief valve testing
Lubrication Points:
Apply light machine oil to trigger pivots and adjustment screws monthly. Avoid over-lubrication which attracts debris and affects paint flow.
Seasonal Storage Protocol
Preparation Steps:
- Complete thorough cleaning cycle
- Run preservative oil through system (for airless units)
- Store in temperature-controlled environment
- Protect from freezing (can crack internal components)
- Document usage hours for service scheduling
Pro Tip: Keep a maintenance log noting hours of use, types of paint sprayed, and any performance issues. This information helps predict when components need replacement and aids troubleshooting.
Replacement Parts Strategy
Stock These Items:
- Spray tips/nozzles (most commonly replaced)
- Seals and gaskets for your specific model
- Filters (both inlet and gun filters)
- Trigger components for high-use guns
When to Replace:
- Spray tips: Every 40-50 gallons for quality results
- Seals: At first sign of pressure loss or leaking
- Filters: Monthly during heavy use, seasonally for occasional users
Conclusion: Your Path to Professional DIY Results
Paint spray guns have evolved from professional-only tools to accessible equipment that democratizes high-quality finishes. The: Graco Magnum X5 delivers contractor-grade results for large projects, while the: Wagner FLEXiO 590 provides versatility for diverse DIY needs. Budget-conscious crafters find exceptional value in the: HomeRight Super Finish Max.
Success depends on matching the right tool to your specific projects, creating proper working conditions, and maintaining equipment for long-term performance. The techniques and troubleshooting guidance in this guide eliminate the trial-and-error phase that frustrates many first-time spray gun users.
Your Next Steps:
- Evaluate your primary project types (large exteriors vs. detailed furniture work)
- Set up a proper workspace with adequate ventilation and lighting
- Practice the 50% overlap technique on test surfaces before tackling final projects
- Establish a maintenance routine from day one
The investment in quality spray equipment pays dividends in time saved, superior results, and the satisfaction of achieving professional-grade finishes with your own hands. Welcome to the ranks of DIY painters who refuse to compromise on quality while saving thousands on contractor costs.
Most importantly: Start with smaller projects to build confidence and technique before tackling major renovations. Every professional painter started as a beginner, and the tools available in 2026 make the learning curve gentler than ever before.