Best Ceiling Paint After Popcorn Removal: Seal First
A stripped popcorn ceiling is not a blank ceiling. It is torn drywall paper, patched gouges, and bare joint compound sitting next to fifty-year-old sealed board — four surfaces with four different porosities. Roll ordinary paint straight onto that and you get flashing: a ceiling that looks patchy and blotchy under the light, at every hour of the day, forever. The best ceiling paint after popcorn removal is only half the answer. What you seal it with first is the other half.
I learned that on a 1970s bungalow. The scraping went well, the sanding went well, I rolled two coats of a good flat ceiling paint straight over it, and every single patch showed through as a dull grey ghost the moment the afternoon sun came across the room. Sealing and recoating cost me an extra day I would not have spent if I had primed properly the first time.
This guide covers the sequence that avoids that: test, seal, prime, paint. If your ceiling still has its texture and you would rather paint over it than scrape it, that is a different job entirely — see the best way to paint a popcorn ceiling instead.
Before Anything Else: Test for Asbestos
Spray-applied asbestos surfacing was banned in 1973, but existing stock was legally used for years afterwards, which is why ceilings installed into the early 1980s can still contain it. If your popcorn texture went up before roughly 1980 and you have not tested it, do not scrape, sand, or even wet it.
Testing is cheap and unambiguous. A mail-in lab sample runs about $30 to $50 and takes a few days. Collect it wet — mist the spot with water first so nothing goes airborne — take a piece around an inch across from an inconspicuous corner, and seal it in a zip bag. If it comes back positive, that is a licensed abatement job, not a weekend project, and the encapsulate-and-cover route is usually far cheaper than removal. The EPA’s asbestos guidance is the reference to work from.
While you are at it: if the house predates 1978, the paint over the texture can contain lead as well. The two tests are separate and both are worth doing — how to identify lead paint covers that side.
Why Proper Prep Matters Before Painting
Before you can tackle painting ceiling after popcorn removal, you must focus on prep, your success depends on it.
Scraping & Sanding: The Foundation
Scraping leaves three problems behind, and only one of them is obvious. The gouges you can see. The torn face paper you can mostly see. The change in porosity across the ceiling you cannot see at all until the paint dries.
Torn face paper is the one that ruins ceilings. Drywall is gypsum sandwiched between paper, and a wet scrape lifts the top paper layer in fuzzy patches. Sand those and the fuzz just gets worse — you are sanding paper fibres, which fray rather than cut. Prime over them and they swell and stand up like stubble. The fix is a clear penetrating sealer (Gardz is the one most drywall finishers reach for), which soaks into the torn fibres and hardens them into a sandable film. Seal, let it dry, then sand lightly with 150 grit. It goes glass-smooth.
On sanding generally: a vacuum-attached pole sander is genuinely worth renting for a day. Dry sanding a whole ceiling by hand puts gypsum dust into every room in the house regardless of how much plastic you hang, and you will still be finding it in March. Work in overlapping passes with light pressure — pressing harder digs new gouges into softened board rather than levelling the old ones.
Then check your work the way the ceiling will actually be judged. Turn the room lights off, hold a work light flat against the ceiling, and sweep it across the surface. Raking light throws a shadow off every ridge and hollow that overhead light hides completely. Mark what you find with a pencil and skim it before you prime, because you will not get another honest look once there is paint on it.
Choosing the Best Ceiling Paint after Popcorn Removal
After sanding, it’s time to prime and paint. Flat, stain-blocking paints are your best friend when you’re finishing a ceiling once textured.
Primers That Work Wonders
PVA primer is designed for one job: sealing brand-new, unpainted drywall. A ceiling that has just had popcorn scraped off it is not new drywall — it is old board, torn paper, fresh compound, and possibly decades of water staining, all at once. PVA is too thin to even that out. Pick by what you are actually facing:
- Torn paper anywhere: clear penetrating sealer first (Gardz or equivalent), then your primer. Skipping this is the single most common reason these ceilings come out fuzzy.
- Patches and skim coats: a high-build drywall primer-surfacer. It fills fine sanding scratches and equalises porosity so the topcoat dries at one sheen across the whole ceiling.
- Water stains, nicotine, or smoke: shellac-based stain blocker, spot or full-coat. Water-based primers will not hold these back — the stain migrates through and reappears weeks later. More on that in covering water stains on a ceiling.
- Adhesive or glue residue: oil-based or shellac. Latex over old adhesive re-wets it and lifts.
Prep matters more than the brand here. A mid-priced flat over a properly sealed, properly primed ceiling beats an expensive flat over bare patched board every time. If you want the full breakdown of primer types, the best drywall primer guide goes deeper.
Paint Choices That Hide Imperfections
Flat, and specifically ceiling flat, not wall flat. Sheen is the whole argument. Any gloss reflects light directionally, and a ceiling is the one surface in the house that light travels along rather than striking head-on, so every ridge you left behind casts a highlight. A true ultra-flat scatters light in all directions and hides a genuinely surprising amount of imperfection.
Dedicated ceiling paint also carries two properties wall paint does not. It is formulated thick and slow-levelling, so it holds on the roller instead of raining down on you, and most of it dries down from pink or blue to white so you can see your coverage as you go — which on a white-on-white ceiling is worth more than it sounds. The sheen options are compared in the best sheen for ceiling paint.
Two thin coats always beat one thick coat, and on a ceiling there is a specific reason: one heavy coat sags into fine drips that dry as ridges you then have to sand off a surface you just finished sanding. Use a 3/8-inch nap on a smooth ceiling — longer nap deposits a stipple texture that will not match your walls. Roll the whole ceiling in one session, keeping a wet edge, working in four-foot sections and rolling in the direction of the main window. Stopping halfway for lunch leaves a lap mark that no second coat covers. A Bates 3/8-inch roller kit covers it for one room; the wider comparison is in the best ceiling paint roller.
Product Recommendations & Honest Reviews
Here are some Amazon picks to consider, complete with pros and caveats:
Dustless Drywall Sander with Shop‑Vac Attachment
Why it’s great: Preps the ceiling with minimal dust—“completely unnecessary to cover floors.”
What to watch for: Requires compatible HEPA bags or your vacuum may clog quickly.

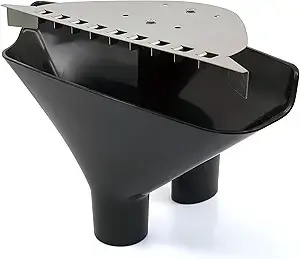
Popcorn Ceiling Scraper Tool ( POPeeze PRO)
Why it’s helpful: Attaches to a shop vacuum to collect debris and minimize mess.
Drawbacks: Not recommended for ceilings that have been painted over—might clog or damage.
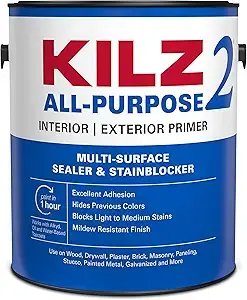
Kilz 2 Primer & Sherwin‑Williams Master Hide Flat Paint
Kilz 2 Primer: Reliable and cost-effective—great for sealing softened drywall.
Master Hide Flat Paint: Ultra-flat finish ideal for hiding imperfections. Requires two coats after primer.
Step‑by‑Step: From Removal to Finish
- Scrape popcorn using a scraper attachment or paint remover gel.
- Sand thoroughly, start coarse, finish with fine grit; clean up dust with vacuum.
- Patch and skim-coat any gouges for a uniform surface.
- Prime, use oil/shellac base if needed, otherwise a high-quality PVA primer.
- Paint with two coats of ultra-flat ceiling paint (e.g., Master Hide).
- Final touches, remove tape, reinstall fixtures, enjoy your smooth ceiling.
Expert Tips & Insights
- Test for asbestos before you scrape on anything installed before about 1980. Non-negotiable, and it is a $30 test.
- Be honest about whether you want a flat ceiling or a smooth one. A dead-flat ceiling is unforgiving: it shows every wave in the framing and every imperfect joint. If your board is old and the joists have moved, a light knockdown or orange-peel texture hides that and looks intentional. Going smooth on a ceiling that cannot support it is how people end up disappointed after all the work.
- Skim-coat rather than sand your way out of a bad patch. Past a certain point sanding removes board instead of levelling it, and you end up chasing a low spot across the ceiling.
- Prime the day you finish sanding. Bare gypsum and torn paper pull moisture out of the air, and a ceiling left open for a week in a humid house can raise the fibres all over again.
When This Job Is Not Worth Doing Yourself
I would rather say this plainly than have you find out on day three:
- The asbestos test came back positive. Stop. Licensed abatement, or cover the ceiling rather than remove it.
- The ceiling was painted over before you got there. Painted popcorn does not release with water — the paint film waterproofs it. You are looking at dry scraping, which is slow, brutal, and gouges everything. Many finishers will skim the whole ceiling flat instead, and that is often the cheaper path.
- The board is water-damaged or spongy. Soft drywall does not come back. Replace those sheets before you think about paint.
- You are doing more than one room. This is overhead work with your arms up and your neck back, and it punishes you physically in a way that walls do not. One room is a weekend. Three rooms is not three weekends.
Whatever you decide, wear a proper particulate respirator rather than a dust mask — gypsum dust, old paint, and torn paper are all going directly over your face. Organic vapour cartridges on a half-mask are what I wear for this, and respirators for painting covers why a dust mask is not enough.
Frequently Asked Questions
Do you have to prime a ceiling after popcorn removal?
Yes, always. You are left with old board, torn face paper, and fresh joint compound side by side, and those absorb paint at completely different rates. Without a primer that evens the porosity out, the topcoat dries at different sheens across the ceiling and every patch shows as a dull ghost under raking light.
What kind of paint do you use after removing a popcorn ceiling?
A dedicated ultra-flat ceiling paint, two thin coats, over an appropriate primer. Flat is not a style preference here — any sheen at all catches the light along the ceiling and highlights every ridge you left behind.
Why does my ceiling look blotchy after painting?
Flashing, caused by uneven porosity. The patched and sanded areas drank more paint than the surrounding sealed board, so they dried flatter and darker. A third topcoat rarely fixes it. Prime the whole ceiling with a high-build drywall primer and recoat.
How do you fix fuzzy drywall paper after scraping?
Do not sand it — paper fibres fray rather than cut, and sanding makes it worse. Apply a clear penetrating sealer such as Gardz, which soaks in and hardens the fibres into a film, let it dry, then sand lightly with 150 grit.
How long after popcorn removal can you paint?
Once every patch is fully dry, which means 24 hours for thin compound and longer for anything thick or in a humid room. Compound looks dry on the surface well before it is dry through, and priming over damp compound traps moisture that later shows as a shadow.
Can you paint over a popcorn ceiling instead of removing it?
Yes, and if yours tests positive for asbestos it is the safer option, since painting encapsulates rather than disturbs. It needs a thick-nap roller and a light touch so you do not dislodge the texture. That method is covered separately in the best way to paint a popcorn ceiling.
How many coats of paint after popcorn removal?
One primer coat, sometimes two if the surface is very patchy, then two thin topcoats. Skipping the second topcoat is a false economy — single-coat ceilings look fine on the day and go patchy as they cure.
The Bottom Line
Test, seal, prime, then two thin coats of ultra-flat. The order matters more than the products, and the sealing step is the one people skip. A ceiling that flashes cannot be fixed by adding another coat of paint — you have to go back and seal it properly, which is the same work twice.
About the author: Sophie Ulman has renovated and painted more rooms than she can count — and made every mistake in the book so you don’t have to. She focuses on real-world durability: not how products perform on day one, but whether the repair holds through a full seasonal cycle.
ThePaintly is reader-supported. We only recommend products we’ve personally evaluated. When you buy through links on this site, we may earn an affiliate commission at no extra cost to you.