How to Limewash Brick: Complete Step-by-Step DIY Guide
Updated April 2026 • By The Paintly Editorial Team
If you’ve been eyeing that dated orange or red brick exterior and wondering whether limewashing it is worth the effort — it absolutely is. Learning how to limewash brick gives your home a soft, European-farmhouse look without the permanence of paint. The process is forgiving, reversible, and genuinely satisfying to do yourself. This guide walks you through every step, from prepping your surface to choosing the right product for brick specifically.
Unlike regular paint, limewash penetrates the porous surface of brick rather than sitting on top of it. That means no peeling, no flaking, and a finish that actually improves with age. Whether you’re tackling an interior fireplace or a full exterior, the technique is the same — and with the right limewash paint for brick, even beginners can nail it on the first try.
Quick Picks: Best Limewash Paint for Brick
| Pick | Product | Best For | Size | Link |
|---|---|---|---|---|
| Best Overall | Romabio Classico Limewash | Interior & exterior brick | 2.5L (0.67 gal) | See Price |
| Fireplaces | Romabio Fireplace Kit | Small brick projects & fireplaces | 1L + brush kit | See Price |
| Best Beginner | ALL-IN-ONE Limewash Paint | Easy faux-limewash effect on brick | Gallon | See Price |
Product Reviews
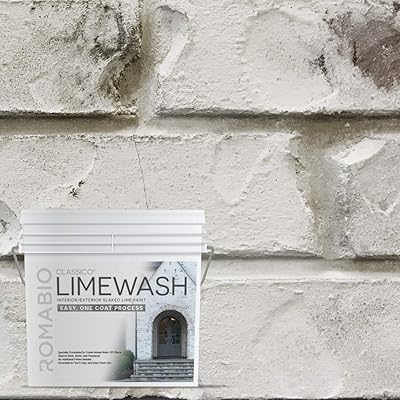
Romabio Classico Limewash — Interior/Exterior Paint
Romabio Classico is the benchmark limewash paint for brick, and for good reason. It’s hand-crafted in Italy using slaked-lime and 2,000-year-old mineral techniques, reformulated for modern one-coat application. On raw brick, a single coat at a 1:1 dilution gives you an authentic chalky, matte finish — the kind that looks like it’s always been there. Coverage lands at roughly 75–107 sq ft per liter per coat, so one 2.5L can handles most accent walls or fireplace surrounds without a second trip to Amazon.
The real magic is in how it distresses. While the coat is still soft (within an hour of application), you can work a damp brush over sections to pull back color and reveal the underlying brick. This gives you full control over opacity. The downside: it only comes in neutral whites and off-whites, so color options are limited. For those who want the authentic mineral look on exterior brick, though, this is the one to buy.
✅ Key fact: Penetrates brick pores rather than sitting on top — no peeling, ever.
- Authentic slaked-lime formula
- One-coat coverage on raw brick
- Easy distressing while wet
- Interior & exterior rated
- Limited color range (whites/off-whites)
- Requires dilution before use
- Not for previously painted brick
Best for: Exterior brick facades, interior feature walls, unpainted raw brick

Romabio Fireplace Kit — Classico Limewash + Brush
The Romabio Fireplace Kit bundles their Classico Limewash (1L) with a small masonry brush, stir stick, and bucket opener — everything you need for a brick fireplace makeover in one box. The 1L size is precisely sized for the average fireplace surround (roughly 25–30 sq ft at a 1:1 dilution with two light coats). Having the dedicated masonry brush included is a genuine convenience; the stiff, natural bristles work the limewash into mortar lines and brick texture far better than a standard paint brush.
One thing to note: this kit is designed for indoor use. The 1L volume makes it impractical for large exterior projects — for those, step up to the standard 2.5L Classico. But for a living room fireplace or a compact interior brick accent, the kit eliminates guesswork and delivers a consistent result. The included instructional sheet is also more useful than you’d expect, with dilution ratios and drying times clearly laid out.
✅ Key fact: Includes masonry brush sized perfectly for fireplace brick mortar lines.
- Complete kit — no extra purchases
- Right-sized for fireplaces
- Masonry brush included
- Clear instructions in box
- 1L only — not for large areas
- Interior use focused
- Costs more per liter than standard size
Best for: Brick fireplaces, accent walls, small indoor brick projects
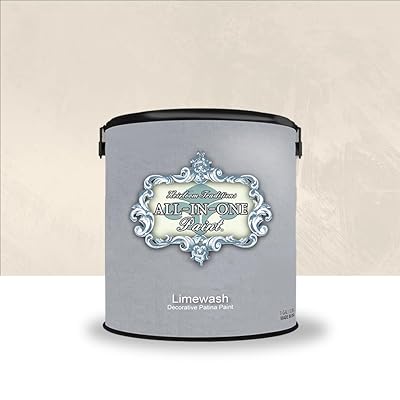
ALL-IN-ONE Limewash Paint — Manor House by Heirloom Traditions
If you want the limewash look without dealing with lime dilution ratios, the ALL-IN-ONE Limewash Paint by Heirloom Traditions is your shortcut. It’s not a true mineral limewash — it’s a water-based paint engineered to replicate the chalky, variegated texture of limewash without requiring the mixing expertise. For DIYers intimidated by “1:3 dilution ratios” and “working wet into wet,” this is a major advantage. The Manor House shade (creamy off-white) is the most popular color and works beautifully on both brick and drywall.
Application is straightforward: brush it on in irregular strokes, then immediately use a damp cloth or second brush to soften and blend. The gallon covers 450–500 sq ft, making it cost-effective for large brick projects. The trade-off is longevity — without the mineral chemistry of true lime, it won’t penetrate pores the same way, and exterior use in wet climates may require a sealer. For interior brick or exterior in dry climates, though, this product delivers gorgeous results with a much shorter learning curve.
✅ Key fact: No dilution needed — apply straight from the can, ideal for first-timers.
- Ready-to-use, no dilution
- Wide color range
- Covers 450–500 sq ft per gallon
- Works on brick and drywall
- Not a true mineral limewash
- May need sealer outdoors
- Less authentic texture vs Romabio
Best for: Interior brick walls, beginners, large-area projects needing multiple colors
⚡ Pro Tips for Limewashing Brick
- Always wet the brick first. A quick rinse with a garden hose gives you more working time and prevents the porous brick from instantly absorbing your limewash unevenly.
- Work in sections of 3–4 sq ft. Limewash dries fast. Smaller sections let you blend properly before it locks in.
- Never apply in direct sunlight. Heat accelerates drying and kills your blending window entirely.
- Dilution determines opacity. Start with a 1:1 ratio (limewash:water) for medium coverage. Go 1:2 for a more washed, translucent look.
- Distress while wet. Use a damp stiff brush to scrub back sections right after application — this exposes underlying brick for a beautifully aged effect.
🧱 Stage: PREP — Before Limewash Goes On
Limewashing brick is a PREP-stage project. The surface must be clean, structurally sound, and free of any previous paint or sealers. Limewash relies on the porosity of raw brick to bond. Any barrier between the lime and the masonry will cause adhesion failure. If your brick has been previously painted, you’ll need to strip it first — check our guide on removing paint with steam before you start.
🧮 Brick Coverage Calculator
Enter your wall dimensions to estimate how much limewash you need.

Step-by-Step: How to Limewash Brick
Follow these six steps for a clean, professional-looking result the first time.
Power wash at 1,500–2,000 PSI to remove dirt, mold, and efflorescence. Let dry for 24–48 hours. Any organic material left behind will prevent the lime from bonding correctly.
Check for cracked or missing mortar joints. Re-point any gaps with mortar and allow it to cure fully (minimum 7 days for new mortar) before applying limewash.
Tape off windows, trim, concrete, and landscaping. Limewash drips and is difficult to remove from non-masonry surfaces once it begins to cure. Drop cloths on the ground are essential.
Start with a 1:1 ratio (one part limewash, one part water). Use a drill mixer attachment for 60 seconds to ensure a fully uniform consistency. Adjust after your first test patch.
Dampen the surface with a garden hose — wet but not dripping. Load a wide masonry brush or 1¼” nap roller and apply in X-pattern strokes, working limewash into the mortar lines. Work in 3–4 sq ft sections.
Immediately use a damp stiff-bristle brush to scrub back sections you want less covered. Allow the first coat to dry fully (2–4 hours) before deciding if a second coat is needed. Never apply a second coat over a wet first coat.
⭐ Our Verdict
For most homeowners, Romabio Classico Limewash is the clear choice for brick. It’s the only product here made from actual slaked lime, and that matters for both durability and the authentic mineral finish. If you’re doing a fireplace, grab the kit — everything you need is in the box. Beginners who want zero mixing hassle should look at the ALL-IN-ONE Limewash, which delivers excellent results with a much friendlier learning curve.
Frequently Asked Questions
Most brick projects require two coats of limewash for solid, even coverage. The first coat is absorbed unevenly into the porous brick; the second coat builds opacity and evens out the tone. If you want a very light, translucent wash, a single diluted coat (1:2 ratio) may be enough. Always evaluate the first coat fully dry before adding a second.
True mineral limewash bonds chemically with masonry and can last 15–25 years on protected exterior surfaces. It won’t peel or flake the way paint does — it gradually weathers and can develop an even more attractive aged patina over time. Faux limewash paints may need refreshing every 5–10 years, depending on climate and sun exposure.
Yes, but it requires effort. Fresh limewash (within the first few days of application) can be removed with water and vigorous scrubbing. Cured limewash requires a mild acid wash (diluted muriatic acid) or pressure washing at high PSI. Because limewash penetrates the brick rather than coating it, some residue may remain even after aggressive removal. This is one reason many homeowners consider it more permanent than it initially sounds.
No — limewash is one of the safest finishes you can apply to brick. Because it’s breathable, moisture can still escape through the masonry. This prevents the spalling and moisture damage associated with film-forming paints that trap water inside the brick. Limewash is actually the historically correct finish for masonry — it’s been used on brick buildings for centuries without damaging them.
Yes, always. Wetting the brick before applying limewash slows absorption and gives you more time to work the product into the mortar lines and blend edges. This is especially important in warm weather, where dry brick will suck the moisture out of your limewash in seconds, creating a patchy, uneven finish. The brick should be damp but not dripping — any standing water will dilute your mixture unpredictably.
Generally yes — especially for homes with dated orange or brown brick exteriors that feel heavy and dated. The European-farmhouse aesthetic is highly sought after in 2025 and 2026, and limewashing can significantly improve curb appeal without the cost of re-siding. That said, it’s worth noting that it’s not easily reversible, so potential buyers who prefer exposed brick might see it as a negative. In most markets, updated curb appeal still outweighs this concern.
DIY limewash costs roughly $80–$250 in materials for a typical 1,500 sq ft exterior, depending on the number of coats and product chosen. Professional limewashing typically runs $1.50–$4.00 per sq ft installed, or $2,250–$6,000 for the same surface area. The DIY savings are substantial, and the technique is genuinely achievable for most homeowners willing to take their time with prep.