Can You Paint Laminate Countertops? Here’s What Actually Holds Up
Updated: August 2026 | By Sophie Ulman
Roll ordinary wall paint straight onto a kitchen counter and you will be scraping it off with a fingernail inside a month. Laminate is a non-porous melamine sheet. Nothing bites into it on its own. So can you paint laminate countertops? Yes — but only with a coating system built to bond to a slick surface, and only if you degloss the top first. Get either half wrong and you get peeling at the sink edge within one season.
I have refinished four laminate counters now — two kitchens, two bathroom vanities. The first one failed. The three after it are still intact, and the oldest is coming up on three years of daily coffee mugs, cutting boards and hot pans set down where they should not have been.
What This Covers
Quick Picks at a Glance
| Kit | Finish | Full cure | Best for |
|---|---|---|---|
| Giani Granite 2.0 Epoxy Topcoat | Speckled granite, high gloss | ~7 days | Kitchen counters that take real abuse |
| Rust-Oleum Countertop Transformations | Stone chip, low sheen | ~3 days | Long runs and L-shaped kitchens |
| Beyond Paint Countertop Makeover | Solid color, satin | ~3 days | Modern flat color, minimum steps |
| Giani Granite 2.0 Acrylic | Speckled granite, gloss | ~2 days | Bathroom vanities and rentals |
| INSL-X Stix (primer only) | N/A – bonding layer | Recoat in 4 hrs | Rolling your own custom color |
The 4 Kits Worth Your Money
When people ask can you paint laminate countertops, what they usually want to know is which product survives the first year. These are countertop systems, not wall paint. Each one ships with its own bonding base and its own topcoat, and each one behaves differently once a hot pan lands on it.
 Best for heavy-use kitchensStage: Paint
Giani Granite 2.0 Countertop Paint Kit – Epoxy Topcoat
The base coat in this kit is a bonding primer with a high-solids acrylic binder, so it grips melamine without you sanding through the laminate face. What separates the epoxy version from Giani’s cheaper acrylic version is the topcoat: a two-part resin you pour and spread, which cross-links as it cures instead of just drying. That chemical cure is why it shrugs off water rings and mug bottoms that would dull an acrylic film.
The trade-off is patience. It is self-leveling, which means it looks glass-smooth, but it also means it stays soft far longer than the label suggests. I put a dish rack on one at day four because it felt hard. It left four permanent dents. Give it the full seven days before anything touches it – and I mean nothing, not even a paper towel.
Pros
- Hardest finish of any kit here
- Genuinely convincing granite depth
- Everything included, no separate primer
Cons
- Seven-day cure before real use
- Epoxy pour is unforgiving on inside corners
- Strongest odor of the four
Via Amazon.com
 Best for long counter runsStage: Paint
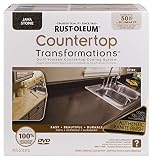
Rust-Oleum Countertop Transformations Kit
This one works differently from every other kit here. You roll a tinted base coat, then broadcast decorative chips into it while it is still wet, scrape the surface flat once dry, and seal it with a diamond-embedded topcoat. The chips are what give it dimension, and the scraping step is what turns a gritty surface into something that feels like stone rather than sandpaper.
The scraping is also the part people underestimate. You need a steady hand and about 40 minutes of forearm work per counter section. On my sister’s L-shaped kitchen it took the whole afternoon. But the payoff is that this system handles big continuous surfaces better than anything else – the chips hide the roller laps that plague solid-color kits over eight feet of counter.
Pros
- Hides roller marks on wide surfaces
- Textured finish disguises minor dings
- Usable in about three days
Cons
- The scrape step is real physical work
- Loose chips get everywhere
- Color range is limited to stone tones
Via Amazon.com
 Best for flat modern colorStage: Paint
Beyond Paint Countertop Makeover Kit
Beyond Paint is an all-in-one acrylic that carries its own adhesion promoter, so the primer step is folded into the paint itself. Two coats of color, optional flecks for texture, then a water-based sealer over the top. Fewer steps than anything else here, and the only kit that gives you a genuinely flat modern color rather than a faux-stone pattern.
Where it gives ground is hardness. The sealer is a waterborne film, not a resin, so it dents more easily than the Giani epoxy. On a bathroom vanity that is irrelevant. Next to a stovetop it is not – I would not put a hot pan down on this one even after full cure, and neither would I cut on it. Treat it as a surface that needs a trivet and it will hold for years.
Pros
- Fewest steps of any system here
- Solid contemporary colors, not faux granite
- Low odor, easy water cleanup
Cons
- Softer film – dents under point loads
- Flat color shows lap marks on long runs
- Pint size means tight coverage on big kitchens
Via Amazon.com
 Best for rentals and vanitiesStage: Paint
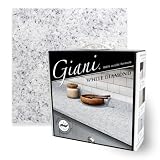
Giani Granite 2.0 Countertop Paint Kit – 100% Acrylic
Same base coats and same mineral speckle as the epoxy kit, but the topcoat is a water-based acrylic instead of a two-part resin. It air-dries rather than cross-links, which drops your wait from seven days to about two and cuts the fumes to almost nothing. If you are working in a bathroom with one small window, that difference matters more than the spec sheet suggests. It is the same logic behind painting kitchen cabinets without sanding – bonding chemistry buys you the shortcut, not wishful thinking.
Understand what you are giving up: an acrylic film scratches. On a vanity that sees a toothbrush and a soap dish, you will never notice. On a kitchen counter where someone slides a ceramic bowl across it twice a day, you will see hairlines inside a year. That trade-off is why it suits a rental bathroom you want back in service fast.
Pros
- Back in service in about two days
- Low odor – workable in small bathrooms
- Same granite look as the epoxy kit
Cons
- Scratches under sliding dishware
- Less heat tolerance than epoxy
- Gloss dulls faster around a sink
Via Amazon.com
If You Want to Roll Your Own Color
Some people do not want speckle or a fixed palette. If you already have a color you love, you can build the system yourself – but the bonding primer is not optional, and standard drywall primer will not do it. A bonding primer is chemically different: it uses an acrylic-urethane resin that grips slick, non-porous faces instead of soaking into a porous one the way a standard primer does. That distinction is the whole ballgame on laminate.
 Best bonding layer for DIY colorStage: Prime
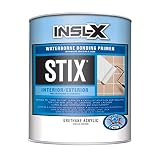
INSL-X Stix Acrylic Waterborne Bonding Primer, 1 Quart
Stix is a waterborne acrylic-urethane primer-sealer formulated for surfaces that reject paint: PVC, vinyl, glazed tile, glossy enamel and yes, melamine laminate. It sticks by wetting out the slick surface and forming a mechanical key as the urethane component cures, which is why it holds where a latex primer slides off. It also recoats in about four hours, so you can prime and lay your first color coat the same day.
Its limit is that it is only the adhesion layer. Stix will not survive as a wearing surface, and neither will most cabinet enamels rolled over it – you still need a hard clear topcoat rated for horizontal use. The first time I used Stix on a laminate cabinet door I skipped the topcoat because the enamel felt hard. Two months later the paint was lifting at every edge. Here is what I learned: on laminate, the bonding primer buys you adhesion, never abrasion resistance.
Pros
- Bonds to glossy melamine reliably
- Four-hour recoat keeps the project moving
- Any color topcoat you want
Cons
- Primer only – you still buy paint and topcoat
- More steps and more room for error
- Costs more than a kit once fully assembled
Via Amazon.com
Pro Tips From the Fourth Counter
Two thin coats always beat one thick coat. Always. On a horizontal surface a thick coat skins over and traps solvent underneath, and that soft layer is what dents three days later.
Pull the sink and the faucet if you can. Cutting in around a drop-in sink leaves a ragged edge exactly where water pools, and that edge is where every failed counter I have seen started to lift.
Sand with 220-grit, not 80. You are dulling the sheen so the primer can grab, not removing material. Cut through the melamine layer into the particleboard core and you have created a swelling problem that no coating fixes.
Wipe with denatured alcohol after sanding, not a damp rag. Water leaves the dust as a paste in the scratch pattern. Alcohol lifts it and flashes off clean.
Do the underside of the front edge. Nobody looks there until a guest runs a hand along it and finds bare laminate.
How Much Kit Do You Need?
Measure your counter run in feet and pick your depth. One standard kit covers about 35 square feet.

Can You Paint Laminate Countertops in Every Kitchen? Choosing the System
The honest answer is that the surface matters less than how the counter gets used. Every kit here bonds to laminate. What separates them is what happens on day 400.
Match the topcoat to the abuse
Epoxy resin cures by chemical cross-linking, which produces a harder, denser film than any air-drying acrylic can. If your counter is next to a stove and sees knives, mugs and grocery bags, take the epoxy and take the seven-day wait. If it is a vanity, the acrylic is the smarter call because you get the room back in two days and the abuse never arrives.
Match the pattern to the length
Speckled and chip finishes hide lap marks. Solid colors show them. On a run longer than eight feet you cannot keep a wet edge across the whole surface with a roller, and a flat charcoal will telegraph exactly where you stopped. That is not a product defect – it is physics, and it is why Rust-Oleum’s chip system exists.
Match the cure time to your life
A seven-day cure means seven days of no kitchen counter. Plan it around a trip if you can. People fail this project by getting impatient at day four, not by choosing the wrong kit. This Old House makes the same point about laminate refinishing: the coating is only as good as the wait.
Think about ventilation before you open the can
Two-part epoxy off-gasses considerably more than waterborne acrylic. Open windows, run a fan pointed out, and keep pets out of the room until it stops smelling. The EPA’s guidance on volatile organic compounds is worth two minutes before you start a kitchen-sized project indoors.
When NOT to Paint Your Laminate Countertops
Can you paint laminate countertops in every situation? No. Four cases where I would tell you to stop and spend the money elsewhere.
If the laminate is delaminating or bubbled. Coating over a lifted edge glues nothing down. The bubble stays, and now it is a bubble under a hard shell that cracks. Re-glue the sheet first or replace the top.
If the particleboard core is swollen around the sink. Swollen core means water got in and the substrate has expanded permanently. Paint does not compress it back. That counter needs replacing, full stop.
If you cook on it constantly with hot pans. No refinishing coating here is rated for direct hot cookware. If your habit is pan-to-counter, you will scar it regardless of which kit you buy.
If you are selling the house in under six months. Painted counters read as a DIY fix to buyers and inspectors. Money spent here rarely comes back on a fast sale.
The Prep Sequence That Decides Everything
Durability on laminate is 50% product and 50% surface preparation – and on a slick melamine face it leans even further toward prep. Prep matters more than the brand you choose. Every counter that fails, fails at the prep stage, not in the can. Ask can you paint laminate countertops and get a yes, and you have only answered half the question. The other half happens in the two hours before the lid comes off.
- Degrease twice. Kitchen counters carry a cooking-oil film you cannot see. Wash with a strong degreaser, rinse, then repeat. Skip this and the primer beads.
- Caulk out. Cut and pull the old silicone bead at the backsplash and around the sink. You will re-caulk at the end over the finished surface.
- Scuff with 220-grit. Uniform dulling across the whole face and the front edge. No shiny spots left anywhere.
- Vacuum, then wipe with denatured alcohol. Dust in the scratch pattern is the second most common failure I see.
- Tape the perimeter and mask the cabinet fronts. If your cabinets are already painted, this is where you protect that work.
- Prime or lay the kit’s base coat in two thin passes. Let the first flash off completely. Thick single coats stay soft underneath for days.
- Topcoat, then wait longer than you think. Whatever the label says, add two days before you set anything heavy on it.
If you are doing the cabinets in the same project, the same bonding rule applies to those doors – our breakdown of paint for laminate cabinets covers which enamels survive on melamine doors, and the primer guide for kitchen cabinets explains why a bonding primer beats an all-purpose one on any slick surface. For a full-color scheme, start with the kitchen cabinet paint roundup.
The Verdict
So, can you paint laminate countertops and have it last? Yes – and here is the short version of how to choose. For a working kitchen, buy the Giani Granite 2.0 Epoxy kit and give it the full week. For a long or L-shaped run, the Rust-Oleum chip system hides lap marks nothing else can. For a vanity or a rental you need back fast, take the Giani acrylic version. And if you want your own color, start with INSL-X Stix and add a hard clear topcoat rated for horizontal wear.
Whichever you pick: 220-grit, alcohol wipe, two thin coats, and wait longer than the label tells you.
Questions People Actually Ask
How long do painted laminate countertops last?
Three to five years with an epoxy topcoat and normal kitchen use. Closer to two with a waterborne acrylic in a busy kitchen, and considerably longer on a bathroom vanity. The sink edge always goes first.
Do you have to sand laminate countertops before painting?
Yes – scuff-sand with 220-grit to kill the gloss. You are not removing the laminate, only dulling it so the primer can bond. Some kits claim no sanding is needed, and they will still last longer if you scuff anyway.
Can you paint laminate countertops without a kit?
You can, but only with a bonding primer such as Stix plus a hard clear topcoat rated for horizontal surfaces. Wall paint and standard primer will peel off melamine within weeks.
Is painted countertop food safe?
Once fully cured, these coatings are safe to have food near – but do not treat them as a cutting surface. Use a board. Cutting into the film opens a path for water to reach the particleboard core.
Can you put hot pans on painted countertops?
No. None of these coatings is rated for direct heat from cookware. A hot pan will blister or discolor even a cured epoxy. Keep a trivet within reach.
What is the most durable paint for laminate countertops?
A two-part epoxy resin topcoat. It cures by cross-linking rather than air-drying, which produces a denser film that resists water rings, scratches and abrasion far better than any acrylic.
Can you paint laminate countertops in a bathroom?
Yes, and bathrooms are the easiest place to succeed. The abuse level is low, so a waterborne acrylic kit holds up fine and you get the room back in two days instead of seven.
Can you paint laminate countertops that are already chipped at the edge?
Small chips, yes – fill them with a two-part epoxy wood filler, sand flush at 220-grit, then coat as normal. Lifted or bubbled laminate is a different problem, and coating over it will not hold.
How do you fix a chip in a painted countertop?
Scuff the chip and about an inch around it with 320-grit, feather the edge, dab in base coat, then re-topcoat the whole section rather than the chip alone. Spot-topcoating leaves a visible sheen ring.