Do Car Touch-Up Paint Pens Actually Hide a Chip, or Just Make It Shiny?
Updated: August 2026 | By Sophie Ulman
A chip on your hood is not a cosmetic problem for long. Bare steel under a stone chip starts rusting within weeks in a wet climate, and once rust creeps sideways under the surrounding clear coat, no pen is going to save it — that’s a body shop and a four-figure invoice. So the question isn’t whether to fix it. The question is whether a car touch up paint pen genuinely hides the chip, or just replaces a small dark dot with a small shiny bump that catches the light every time you walk past.
Here’s the honest answer, and it took me two ruined repairs to learn it. A car touch up paint pen hides a chip perfectly well. It just doesn’t do it on the day you apply it. The people who say pens don’t work are almost always the people who stopped at the blob.
What’s in this guide
Why your repair looks shiny instead of invisible
Automotive touch-up paint is mostly solvent. As it cures, that solvent evaporates and the film shrinks — significantly. This is the single fact that decides whether your repair disappears or announces itself.
Follow the logic. If you fill the chip so the paint sits perfectly flush today, it shrinks overnight and you’re left with a sunken pit that collects shadow. So you deliberately overfill, leaving a small proud dome. That dome is correct. It’s supposed to be there. Then you wait for it to shrink and harden, and you level it flush. Skip that last step and the dome stays — and a dome reflects light at a different angle than the flat panel around it. That’s your shine.
Most people apply the paint, stand back, decide it looks worse than the chip did, and never come back. The repair was never finished. Family Handyman’s chip repair walkthrough makes the same point about building the fill above the surrounding surface before any leveling happens.
Scratch pens and touch-up pens are not the same product
This trips up a lot of buyers. Consumer Reports tested clear scratch repair pens and found them limited to surface marks in the clear coat — if the damage reaches the color below, those pens have nothing to offer. A car touch up paint pen is a different animal: it carries pigment matched to your factory paint code, so it fills the void with actual color. If you bought a clear pen expecting it to fix a stone chip down to primer, that’s the mismatch, not a failure of touch-up paint.
Quick picks at a glance
| Product | What it does | Best for |
|---|---|---|
| Dupli-Color Scratch Fix All-in-1 | Prep tip, color, and clear coat in one pen | One or two chips on a common factory color |
| Quixx 00070-US Scratch Remover Kit | Abrasive paste plus 3000-grit to level a proud repair | Rescuing a repair that already dried proud |
| Griot’s Garage 6" Random Orbital Polisher | Machine-blends the halo around each repair | A hood or bumper peppered with road rash |
| Dupli-Color Scratch Seal Clear Pen | Clear top coat only | Sealing a dealer color vial that has no clear |
| Meguiar’s Ultimate Compound | Final polish that blends the halo | The last 10% that makes it vanish |
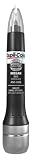
Dupli-Color Scratch Fix All-in-1 Touch-Up Paint Pen
This is three tools in one barrel, and the order they’re arranged in tells you how the job is supposed to go. One end is an abrasive fiberglass tip that scrubs loose paint flakes and surface rust out of the chip — that mechanical bite matters, because touch-up paint bonds to clean substrate and slides off oxidized metal. The middle is the color, with a fine pen tip for hairline scratches and a chisel brush for a chip the size of a grain of rice. The far end is a foam applicator carrying clear coat.
Colors are keyed to the paint code on your door jamb sticker, and Dupli-Color’s factory-match program is the reason this is the pen most people should start with. The honest limitation: on a metallic or pearl finish, the metallic flake in a hand-applied pen never orients the way sprayed paint does. On my sister’s silver sedan the repaired chip reads slightly flatter than the panel from three feet away in direct sun. On solid colors I’ve never had that problem.
Pros
- Prep, color, and clear in one purchase
- Two applicator shapes for two damage sizes
- Factory paint code matching
Cons
- Metallics read flatter than the surrounding panel
- The fiberglass tip sheds if you scrub too hard
Via Amazon.com

Quixx 00070-US Paint Scratch Remover Kit
Ignore the name on the box for a second and look at what’s inside: an abrasive repair paste, a finishing polish, a piece of 3000-grit paper, and polishing cloths. That is precisely the kit you need to take a cured touch-up dome down flush. The paste works by plastic deformation rather than pure cutting — it moves and levels the softer top film instead of grinding a crater around it, which is exactly the failure mode you get from reaching for a coarse compound first.
The first time I used a car touch up paint pen, I filled a chip on a black fender, admired it wet, and came back the next morning to a glossy lump you could feel with a fingernail. I went straight at it with polish and burned a dull halo into the clear coat around it — a repair now twice the size of the original chip. Here’s what I learned: you have to remove the excess material first, then restore gloss. Never the other way round. Worth naming the limitation honestly: Consumer Reports rated this kit as one of the few that performs, and also noted it takes real elbow grease by hand. It does nothing for damage that goes below the color.
Pros
- Levels a proud repair without a coarse compound
- Includes the 3000-grit step most people are missing
Cons
- Hand application takes patience and pressure
- Useless on damage that reaches primer or metal
Via Amazon.com
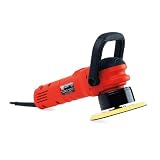
Griot’s Garage 10813LNGCRD 6" Dual Action Random Orbital Polisher
A dual action polisher rotates and oscillates at the same time, so the pad never traces the same path twice. That is what makes it forgiving: a rotary buffer parked over one spot burns through clear coat in seconds, while a random orbital spreads the heat and the cut across a wandering pattern. If you have twenty chips across a hood and each one needs its halo blended, hand polishing is an afternoon of shoulder work. This does it in twenty minutes.
Be clear-eyed about whether you need it. For three chips on a door, buy the compound and use your hand — this tool costs many times what the rest of the article costs combined, and it will sit in a cupboard. It earns its keep the moment you are correcting whole panels rather than dots, which is also when it starts paying for itself against detailer rates. The 25-foot cord version exists because the shorter one runs out halfway down a full-size truck.
Pros
- Blends repair halos far faster than by hand
- Random orbit resists burn-through on clear coat
- Long cord reaches a full-size vehicle
Cons
- Heavy overkill for two or three chips
- Costs more than every other item here combined
Via Amazon.com
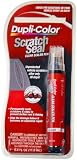
Dupli-Color Scratch Seal Clear Pen
Colored touch-up paint on a modern car is base coat — it has almost no gloss and almost no UV or chemical resistance on its own. The gloss you see on your panel comes from the clear layer above it. If your dealer sold you a half-ounce vial of color with no clear, the repair will look matte, chalk out within a season, and stay soft enough to mark. This pen is only that missing top layer, in a foam applicator that lays it down without dragging the color underneath.
Use it in two thin coats with fifteen to twenty minutes between them, which is the same discipline that governs any clear coat over spray paint. Two thin coats always beat one thick coat. Always. The limitation worth naming: clear shrinks as it cures too, so a repair that looks perfectly domed on Sunday will read slightly lower by Wednesday. Plan the final leveling around that, not around how it looks an hour after application.
Pros
- Rescues dealer color vials that ship without clear
- Foam tip doesn’t drag the base coat
- Works over any brand of touch-up color
Cons
- Clear only — no color, no prep tip
- Foam tip dries out if the cap isn’t seated firmly
Via Amazon.com
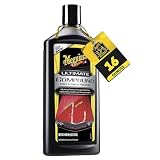
Meguiar’s Ultimate Compound
After the fill is level, there is still a faint ring where the new clear meets the old — a slight difference in gloss that your eye reads as a halo. This compound uses fine abrasives that break down as you work them, cutting hard at first and finishing fine, so a single product both removes the leveling marks and restores gloss without a second polishing step.
Work it by hand on a foam applicator in a small area, four or five passes, then wipe with a clean microfiber and look at it from an angle. The limitation is real: this is a finishing product, not a leveling product. It will not remove a blob and it will not fix a sunken pit — try to use it that way and you’ll thin the clear coat around the repair before you touch the repair itself. It is also useful well beyond chip work; the same bottle sorts out haze on a repainted plastic bumper.
Pros
- Removes leveling marks and restores gloss in one step
- Clear-coat safe by hand or machine
- Useful on every painted panel, not just repairs
Cons
- Cannot level a proud repair — finishing only
- Aggressive if used on thin or already-polished clear
Via Amazon.com
Pro tips I learned the expensive way
Never apply paint straight from the pen tip to the panel. Squeeze a drop onto a piece of card and pick it up with a toothpick or a micro brush. The pen tip carries far more paint than a chip needs, and the whole blob problem starts with that first overloaded touch.
Work in the shade on a cool panel. Hot sheet metal flashes the solvent off before the paint can settle into the bottom of the chip, and you get a bubbled surface with a void underneath. If you can’t hold your palm flat on the panel, it’s too hot to paint.
Wipe the chip with isopropyl alcohol, not wax remover you found in the garage. Wax and silicone are the reason touch-up paint beads instead of wetting out. Alcohol on a lint-free cloth, let it flash, then paint.
Build in two or three thin coats, not one. Fifteen to twenty minutes between coats. Each thin coat shrinks less and traps less solvent than a single heavy one, which is the same reason a thick coat of any paint stays soft underneath for days.
Be patient about leveling. Touch-up paint typically wants at least 24 to 48 hours before wet-sanding, and cool or humid weather stretches that considerably. Give it a week if you can. Levelling a repair that is still soft in the middle just drags it out of the chip.
Renovation Stage: PAINT
Chip repair sits squarely in the paint stage, but it borrows from both sides. The fiberglass prep tip is prep work and the clear pen is sealing work — and the outcome depends on all three being done in order. Rushing straight to color is the mistake that produces every “touch-up paint made it look worse” complaint on the internet.
Chip repair cure schedule calculator
Tell it how many chips you’re fixing and how warm it is, and it will tell you how many coats you need, how long to wait between them, and the day you can safely level and polish.

How to choose a car touch up paint pen
Start with the paint code, not the color name
“Silver” is not a color. Your manufacturer built four of them that year. The code on the door jamb sticker — three or four characters, sometimes preceded by C/TR — is the only thing that matters, and every reputable car touch up paint pen is sold against that code rather than a description. If you order by eye, the repair will read as a patch even when the geometry is perfect.
Decide whether you need clear coat in the pen
Almost every car built in the last thirty years uses a base coat plus clear system. If the product you’re buying is color only, you need a separate clear pen. A car touch up paint pen sold as an all-in-one already includes it. Getting this wrong is the most common reason a repair looks dull next to a glossy panel six months later.
Match the applicator to the damage
A fine pen tip is for a scratch you can trace with a fingernail. A chisel brush is for a chip with area. A syringe or micro brush is for anything deep and narrow, because it delivers paint to the bottom of the void instead of bridging over the top and leaving an air pocket that collapses later. Buying the right car touch up paint pen matters less than delivering the paint with something small enough for the damage. The same logic applies to wheels, where a brush reaches into curb rash that no aerosol will fill — our guide to paint for car rims goes into that separately.
Count the chips before you buy
Under about six chips, a pen and a hand-applied leveling kit are the right call. Above twenty, budget for machine polishing as well, because blending twenty separate halos by hand is an afternoon of shoulder work and the results drift as you get tired. That crossover is the single most useful thing to know before you add anything to a cart.
Prep matters more than the brand
I’ll say this the way I say it about every surface: the difference between a repair that lasts eight years and one that lifts next spring is almost never the brand of paint. It is whether the chip was clean, dry, free of wax, and free of loose edges before the first drop went in. Durability is roughly half product and half surface preparation, and the half you control completely is the second one.
When a car touch up paint pen is the wrong tool
Rust that has spread under the surrounding paint. If you press the edge of the chip and the paint around it flexes or flakes, corrosion is already travelling sideways underneath. Painting over that seals moisture in and buys you a year at most. That panel needs to be cut back to sound metal.
Damage longer than a couple of inches. A pen fills volume. It does not resurface area. A long key scratch touched up by pen reads as a visible line no matter how carefully you level it, because your eye follows continuous edges far more easily than isolated dots.
Anything on a lease return. A visible amateur repair is often assessed harder than the original chip. Get the inspection criteria before you touch it.
Deep metallic and pearl finishes. Hand-applied metallic flake lies flat instead of orienting through the film the way sprayed paint does. The repair will be structurally fine and slightly off in sheen. If that will bother you every time you park, spraying is the honest answer — which is a different project entirely, and one our guide to car paint sprayers covers.
The seven-step repair, in the order that works
1. Wash and degrease. Soap and water first, then isopropyl alcohol on a lint-free cloth. Let it flash off completely.
2. Clear the chip. Fiberglass prep tip or the corner of a toothpick — remove loose flakes and any surface rust. If a flake lifts, keep going until only sound paint remains.
3. Prime if you can see metal. Bare steel needs primer. Bare plastic needs an adhesion promoter, which is the same principle behind painting a plastic surface anywhere else — nothing sticks to raw plastic without it.
4. Build color in thin coats. Two or three, fifteen to twenty minutes apart, delivered by toothpick or micro brush. Leave the final coat slightly proud.
5. Clear coat. Two thin coats, same interval. Slightly proud again.
6. Wait. Two days minimum in warm dry weather, a week or more if it’s cool or humid. This is the step everyone skips and the reason most repairs look wrong.
7. Level, then polish. Wet-sand the high point only with 3000 grit and almost no pressure — you are sanding the new paint, not the panel. Then compound the area to bring the gloss back. Level first, gloss second. Reverse that order and you thin the factory clear before you’ve touched the lump.
The verdict
A car touch up paint pen absolutely hides a chip — the shine people complain about is an unfinished repair, not a bad product. For a handful of chips on a solid color, the Dupli-Color Scratch Fix All-in-1 covers prep, color, and clear in one purchase and gets you most of the way there. Buy the Quixx kit alongside it, because your first repair will almost certainly dry proud and that kit is how you take it flush without wrecking the panel around it. The polisher only makes sense once you’re correcting whole panels rather than dots — and if you’re not sure which camp you’re in, count your chips before you spend anything.
Questions people actually ask
Do car touch-up paint pens really work?
Yes, on chips and short scratches, provided you finish the job. The paint fills the void and seals the substrate against rust. What decides the appearance is the leveling step after the fill has cured — stop before that and you get a shiny dome instead of a flat repair.
How long should touch-up paint dry before I sand or polish it?
At least 24 to 48 hours in warm, dry conditions before any wet-sanding, and considerably longer in cool or humid weather. Many detailers wait a week, and two weeks is not excessive. The clear coat continues to shrink and harden across that whole window.
Why does my touch-up paint look sunken the day after I applied it?
Because the solvent evaporated. Touch-up paint shrinks as it cures, so a fill that sits flush when wet ends up below the surface once dry. The fix is to deliberately overfill — leave the last coat proud, let it shrink, then level it flush.
Can I use a car touch up paint pen on a plastic bumper?
You can, but only after an adhesion promoter if the chip goes down to bare plastic. Paint has nothing to grip on unprimed polypropylene and will lift at the edges within months.
Do I need clear coat over touch-up paint?
On any car with a base-coat-plus-clear factory finish, which is nearly all of them, yes. Colored touch-up paint on its own has little gloss and little UV resistance. Without clear, the repair goes dull and chalky well before the panel around it does.
What’s the difference between a touch-up pen and a scratch repair pen?
A touch-up pen contains pigment matched to your paint code and fills damage that has removed color. A scratch repair pen is clear and only fills or masks marks confined to the clear coat. If you can see a different color at the bottom of the damage, the clear pen won’t help.
How do I fix a touch-up repair that dried as a shiny lump?
Don’t reach for compound first — you’ll thin the clear coat around the repair before you touch the lump. Wet-sand the high point only with 3000 grit and almost no pressure, using a kit made for the job, then compound the area to restore gloss.
Will touch-up paint stop a chip from rusting?
It will, as long as you sealed clean metal. Paint applied over existing surface rust traps moisture and the corrosion continues underneath. Clean down to sound material, prime, then paint.